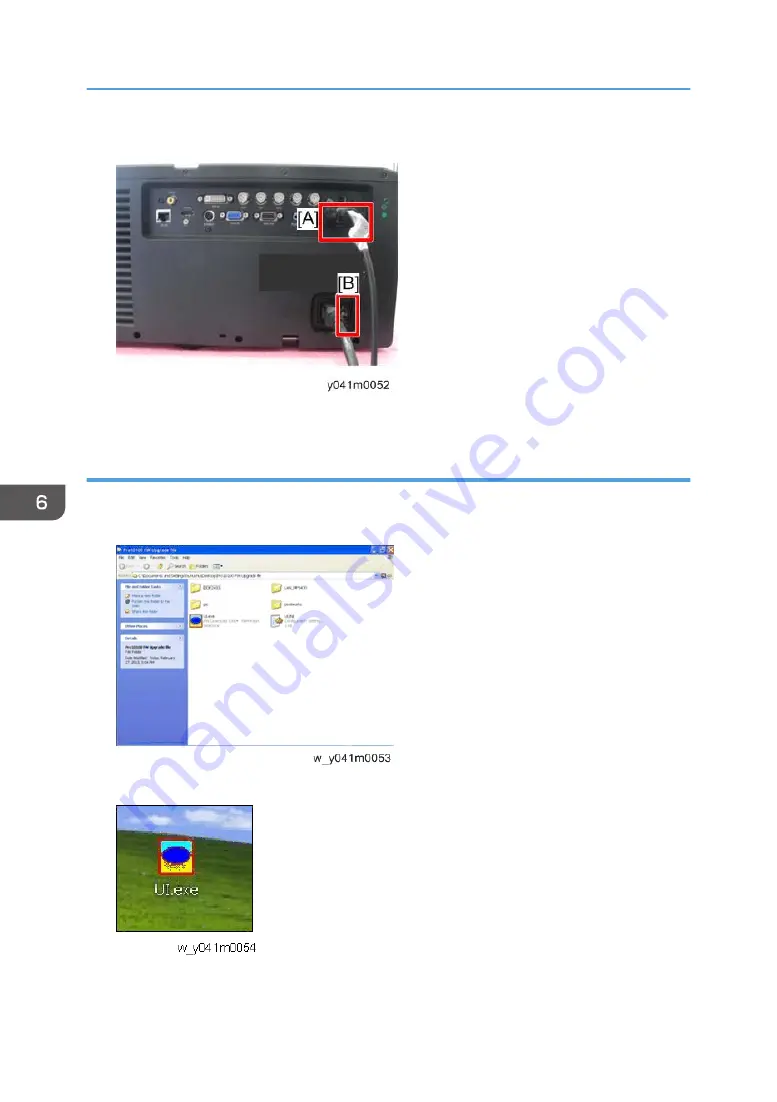
2.
Connect the projector and PC with the RS232 cable [A].
3.
Turn on the "Power Switch" [B], and let the projector get into standby mode.
Download software and update
1.
Download the latest FW program file from the website, unzip the file and save it on your
desktop, then double click the folder.
2.
Execute the UI.exe file.
6. Firmware Update
100
Содержание PJK7000
Страница 1: ...Deneb PJ1 Machine Codes Y041 Field Service Manual 26 December 2013...
Страница 7: ...6...
Страница 21: ...1 Product Information 20...
Страница 27: ...7 Remove the 3 screws and the dummy board A 8 Install the GEO board 2 Installation 26...
Страница 37: ...Be sure to attach the shorter screw A under the HDMI port 3 Replacement and Adjustment 36...
Страница 40: ...5 Remove the 1 screw to remove the LAN board A 6 Remove the 3 hex screws Part Replacement 39...
Страница 47: ...2 Remove the 3 screws to remove the system fan module A 3 Replacement and Adjustment 46...
Страница 49: ...2 Remove the 2 screws to remove the front shielding A 3 Replacement and Adjustment 48...
Страница 51: ...Right Cover Lamp Cover 1 Remove the 6 screws to remove the right cover A 3 Replacement and Adjustment 50...
Страница 56: ...2 Unplug the 1 connector and then remove the optical engine A Part Replacement 55...
Страница 65: ...3 Replacement and Adjustment 64...
Страница 68: ...Main Procedures Main Procedures 67...
Страница 70: ...Error LED flashing red temp LED steady lights red Main Procedures 69...
Страница 71: ...Error LED flashing red temp LED flashing red 4 Troubleshooting 70...
Страница 72: ...Error LED flashing red lamp LED steady lights red Main Procedures 71...
Страница 73: ...Error LED flashing red filter LED flashing red 4 Troubleshooting 72...
Страница 74: ...C Image Performance Troubleshooting 1 1 Is the RICOH logo displayed on the screen Main Procedures 73...
Страница 75: ...1 2 Is the PC image displayed on the screen 4 Troubleshooting 74...
Страница 76: ...1 3 Is video image displayed on the screen Main Procedures 75...
Страница 77: ...1 4 Is focus ok 4 Troubleshooting 76...
Страница 78: ...1 5 Is color ok Main Procedures 77...
Страница 79: ...1 6 Have line bar 4 Troubleshooting 78...
Страница 80: ...1 7 Is there noise on the image Main Procedures 79...
Страница 81: ...1 8 Is uniformity ok 4 Troubleshooting 80...
Страница 82: ...D Remote Control Troubleshooting Main Procedures 81...
Страница 83: ...4 Troubleshooting 82...
Страница 84: ...E Network Troubleshooting 1 1 Is the LAN connector LED in normal status Main Procedures 83...
Страница 85: ...1 2 Are the network settings of the unit right 4 Troubleshooting 84...
Страница 87: ...4 Troubleshooting 86...
Страница 118: ...2 Press the Power Left Left Menu keys to get into service mode to check the S N Re write Serial Number S N 117...
Страница 119: ...MEMO 118...
Страница 120: ...MEMO 119...
Страница 121: ...MEMO 120 EN...


