background image

7

125

Appendix

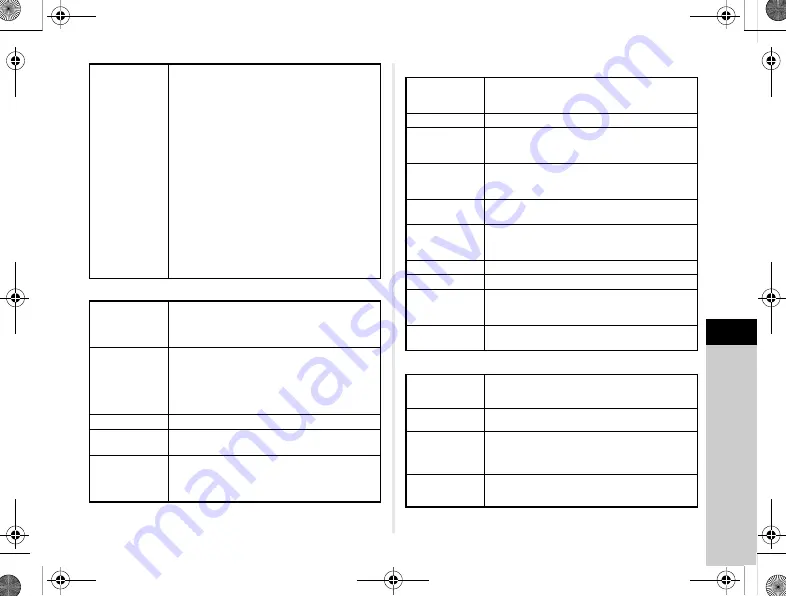
Flash

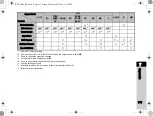
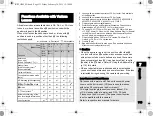
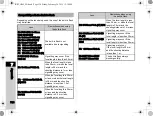
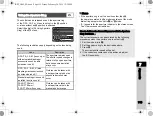
Capture Functions

Movie

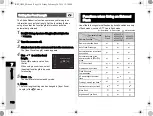
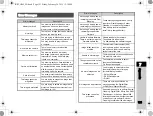
Interval Shooting

[Interval Shooting]

Interval: 2 sec. to 24 hr., Standby Interval: 

minimum time or 1 sec. to 24 hr., Number of Shots: 

2 to 2000 times, Start Interval: Now, Set Time 

[Interval Composite]

Interval: 2 sec. to 24hr., Standby Interval: 

minimum time or 1 sec. to 24 hr., Number of Shots: 

2 to 2000 times, Start Interval: Now, Set Time, 

Composite Mode: Additive, Average, Bright, 

Save Process: On, Off

[Interval Movie]

Recorded Pixels: 

z

u

t

, Interval: 2 sec. 

to 24 hr., Standby Interval: minimum time or 1 sec. 

to 24 hr., Number of Shots: 8 to 2000 times (

z

8 to 500 times), Start Interval: Now, Set Time

[Star Stream]

Recorded Pixels: 

z

u

t

, Standby Interval: 

minimum time or 1 sec. to 24 hr., Number of Shots: 

8 to 2000 times (

z

: 8 to 500 times), Start Interval: 

Now, Set Time, Fade-out: Off, Low, Medium, High

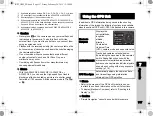
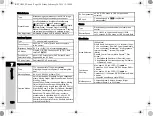
Built-in Flash

Built-in retractable P-TTL pop-up flash

Guide number: approx. 12 (ISO100/m)

Angle of view coverage: equivalent to 28mm lens 

in 35 mm format

Flash Modes

Auto Flash Discharge (Auto Picture, Scene Mode), 

Auto Flash + Red-eye Reduction (Auto Picture, 

Scene Mode), Flash On, Flash On + Red-eye 

Reduction, Slow-speed Sync, Slow-speed Sync + 

Red-eye, Trailing Curtain Sync, Manual Flash 

Discharge (FULL to 1/128 power)

Sync Speed

1/180 sec.

Flash Exposure 

Compensation

-2.0 to +1.0 EV

External Flash

P-TTL, Leading Curtain Sync, Trailing Curtain Sync, 

Contrast-control-sync, High-speed Sync, Wireless 

Sync

• Available with 2 dedicated external flashes

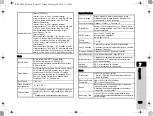
Custom Image

Bright, Natural, Portrait, Landscape, Vibrant, 

Radiant, Muted, Bleach Bypass, Reversal Film, 

Monochrome, Cross Processing

Cross Processing Random, Preset 1-3, Favorite 1-3

Digital Filter

Extract Color, Replace Color, Toy Camera, Retro, 

High Contrast, Shading, Invert Color, Unicolor Bold, 

Bold Monochrome

HDR Capture

Auto, Type1, Type2, Type3

Bracket Value adjustable

Auto Align: On, Off

Clarity 

Enhancement

On, Off

Lens Correction

Distortion Correction, Peripheral Illumination 

Correction, Lateral Chromatic Aberration Correction, 

Diffraction Correction

D-Range Settings Highlight Correction, Shadow Correction
Noise Reduction

Slow Shutter Speed NR, High-ISO NR

Electronic Level

Displayed in viewfinder (horizontal direction only); 

displayed on LCD monitor (horizontal direction 

and vertical direction)

Horizon 

Correction

SR On: corrects up to 1 degree, 

SR Off: corrects up to 1.5 degrees

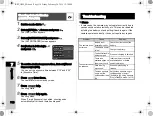
File Format

MPEG-4 AVC/H.264 (MOV)

• Motion JPEG (AVI) for Interval Movie Record 

and Star Stream

Recorded Pixels

Framerate

u

 (1920×1080, 30p/25p/24p)

t

 (1280×720, 60p/50p)

Sound

Built-in stereo microphone, external microphone 

(stereo recording compatible) 

Recording Sound Level adjustable (sound level 

is displayed on the monitor)

Recording Time

Up to 4 GB or 25 minutes; automatically stops 

recording if the internal temperature of the camera 

becomes high.

KS2_OPM_EN.book  Page 125  Friday, February 20, 2015  12:10 PM

Содержание Pentax K-S2

Страница 1: ...ORXJK HUNV 6 31 8 KWWS ZZZ ULFRK LPDJLQJ FR XN 5 2 0 1 0 5 6 25325 7 21 WK 6WUHHW 6XLWH HQYHU RORUDGR 8 6 KWWS ZZZ XV ULFRK LPDJLQJ FRP 5 2 0 1 1 1 SORUHU ULYH 6XLWH 0LVVLVVDXJD 2QWDULR 1 KWWS ZZZ ULFRK LPDJLQJ FD 5 2 0 1 1 2 7 XQ DR QWHUQDWLRQDO 3OD D KDRMLDEDQJ 5RDG X XL LVWULFW 6KDQJKDL 1 KWWS ZZZ ULFRK LPDJLQJ FRP FQ 2SHUDWLQJ 0DQXDO 7R HQVXUH WKH EHVW SHUIRUPDQFH IURP RXU FDPHUD SOHDVH UHDG W...

Страница 2: ...m ion Battery D LI109 Battery charger D BC109 AC plug cord Strap O ST132 Software CD ROM S SW156 Start Guide Lenses you can use Lenses that can be used with this camera are DA DA L D FA and FA J lenses and lenses that have an 9 Auto position on the aperture ring To use any other lens or accessory see p 113 KS2_OPM_EN book Page 0 Friday February 20 2015 12 10 PM ...

Страница 3: ...1 1 2 3 4 5 6 7 Introducing the K S2 Getting Started Taking Pictures Playback Functions Sharing Images Changing the Settings Appendix KS2_OPM_EN book Page 1 Friday February 20 2015 12 10 PM ...

Страница 4: ...ies p 49 Setting the Exposure p 51 Using the Built in Flash p 53 Setting the Focus Method p 54 Setting the Drive Mode p 59 Setting the White Balance p 68 Controlling the Image Finishing Tone p 71 Correcting Images p 74 How to Use This Manual 1 Introducing the K S2 p 7 Gives you an overview of the K S2 Read this and get to know your K S2 2 Getting Started p 30 Explains how to get your K S2 ready fo...

Страница 5: ...shooting p 118 Main Specifications p 123 Index p 130 For Using Your Camera Safely p 135 Care to be Taken During Handling p 137 WARRANTY POLICY p 141 There is a possibility that the illustrations and the display screen of the monitor in this manual are different from the actual ones 4 Playback Functions p 77 Explains various operations for playing back and editing images 5 Sharing Images p 89 Expla...

Страница 6: ...Using the AC Adapter 33 Inserting a Memory Card 34 How to Open the Monitor 35 Initial Settings 36 Turning the Camera On 36 Setting the Display Language 37 Setting the Date and Time 37 Setting the LCD Display 38 Formatting a Memory Card 38 Basic Shooting Operation 39 Shooting with the Viewfinder 39 Shooting While Viewing the Live View Image 41 Reviewing Images 42 Taking Pictures 44 Configuring the ...

Страница 7: ...ions 77 Playback Mode Palette Items 77 Changing the Playback Method 78 Displaying Multiple Images 78 Displaying Images by Folder 79 Displaying Images by Shooting Date 79 Playing Back Images Continuously Slideshow 80 Displaying Rotated Images 80 Connecting the Camera to an AV Device 81 Connecting the Camera to a Computer 82 Editing and Processing Images 83 Changing the Image Size 83 Correcting Colo...

Страница 8: ... enjoyment during demonstrations performances or of items on display Images taken with the purpose of obtaining copyrights also cannot be used outside the scope of use of the copyright as laid out in the Copyright Act and care should be taken here also To users of this camera Do not use or store this camera in the vicinity of equipment that generates strong electromagnetic radiation or magnetic fi...

Страница 9: ...ror Strap lug Hot shoe Microphone Image plane indicator Microphone terminal Strap lug Card access lamp USB terminal micro B Terminal cover HDMI terminal type D Microphone NFC mark Card slot for SD Memory Cards Diopter adjustment lever Viewfinder Vari angle monitor Connection cable cover Battery cover unlock lever Battery cover Tripod socket KS2_OPM_EN book Page 7 Friday February 20 2015 12 10 PM ...

Страница 10: ...amp lights green When the switch is turned to C the camera enters C mode and the lamp lights red 5 Front e dial Q Changes the values for camera settings such as exposure p 47 You can change the menu category when a menu screen is displayed p 19 In playback mode use this to select a different image 6 Flash pop up button 1 Press to pop up the built in flash p 53 7 RAW Fx button P You can assign a fu...

Страница 11: ...as a shutter release button and facilitates taking self portraits by holding the camera with the lens facing you The indicator lamp lights green or red when the button can be used as a shutter release button p 41 At all other times this button is used to switch the Wi Fi function on or off p 90 e AF AE Lock button f Available for adjusting focus instead of pressing 0 halfway and for locking the ex...

Страница 12: ...ed p 13 About the indicator lamps The main switch lamp self portrait shutter button lamp and E lamp turn off in the following situations From the time when 0 is pressed halfway until the end of shooting While f is pressed During playback mode While a menu is displayed During Auto Power Off You can set the lamp lighting settings in Indicator Lamps of the D3 menu p 27 About the four way controller I...

Страница 13: ... 14 17 19 20 27 26 17 19 18 16 20 21 22 25 2324 4 5 6 7 8 9 10 1 1 250 250 1600 1600 F F 5 6 5 6 12345 12345 5 00 5 00 1 0 1 0 G1A1 G1A1 Live View 1 Capture mode p 45 15 Electronic Level vertical tilt p 17 2 Flash Mode p 53 3 Drive Mode p 59 16 EV Compensation p 48 4 White Balance p 68 17 EV bar scale 5 Custom Image p 71 18 Operation guide and number of shots during Multi exposure Interval Shootin...

Страница 14: ...Bright Bright 02 02 2015 02 02 2015 10 23 10 23 12345 12345 1 2 3 4 9 8 11 16 21 10 15 20 12 6 5 7 17 22 13 18 23 14 19 26 27 02 02 2015 02 02 2015 Custom Image Custom Image Custom Image Bright Bright Bright When shooting with Live View 1 2 3 4 12 8 16 24 15 21 17 6 5 7 13 25 23 14 26 27 10 23 10 23 1 23 45 1 23 45 02 02 2015 02 02 2015 Custom Image Custom Image Custom Image Bright Bright Bright C...

Страница 15: ...le appears on the right or left side When the angle exceeds the range that can be displayed in the scale the indicators on the scale are displayed in red Display Off Nothing is displayed on the monitor Electronic Compass The current latitude longitude altitude direction Coordinated Universal Time UTC capture mode and exposure value are displayed Turn the camera off and on again to return to the st...

Страница 16: ... 200 0 3 0 3 100 0001 100 0001 G Standard Information Display Standard Information Display Single image display Standard Information Display Playback Info Display selection screen Detailed Information Display 1 Captured image 6 Drive Mode p 59 2 Rotation information p 80 7 Flash Mode p 53 8 Flash Exposure Compensation p 53 3 Capture mode p 45 4 Protect setting p 106 9 Focus Method p 54 5 Folder nu...

Страница 17: ... Level 42 Framerate p 44 24 Diffraction Correction p 75 43 Photographer p 109 44 Copyright Holder p 109 25 Color Fringe Correction p 87 45 Information tampering warning 26 Highlight Correction p 74 46 Altitude p 117 47 Lens direction p 117 27 Shadow Correction p 74 48 Latitude p 117 49 Longitude p 117 28 AA Filter Simulator p 76 50 Universal Coordinated Time p 117 29 Shake Reduction Horizon Correc...

Страница 18: ...diopter adjustment lever lift up and remove the eyecup Adjust the diopter setting until the AF frame in the viewfinder looks sharp and clear Viewfinder 1 AF frame p 40 11 Sensitivity p 51 Exposure compensation value 2 Spot metering frame p 52 3 AF point p 56 12 AE Lock p 49 4 Flash indicator p 53 13 Change AF Point p 56 5 Focus Method p 54 14 Multi exposure p 63 6 Shutter speed 15 AE Metering p 52...

Страница 19: ... in the viewfinder and the electronic levels for the vertical and horizontal camera angles can be displayed on the Live View screen p 11 Select whether to display the electronic level in Electronic Level of the A3 menu p 22 Electronic Level When level at 0 When tilted 5 to the left When held vertically and tilted 3 to the right KS2_OPM_EN book Page 17 Friday February 20 2015 12 10 PM ...

Страница 20: ...nual Menus Press F Using the Direct Keys A Sensitivity p 51 B White Balance p 68 C Flash Mode p 53 D Drive Mode p 59 Using the Control Panel G 99999 99999 10 23 10 23 99999 99999 File Format File Format Cancel Cancel OK OK File Format File Format File Format 02 02 2015 02 02 2015 Use ABCD to select an item Use R to change settings Press F to cancel the setting operation Press E to confirm the sele...

Страница 21: ...ngs High ISO NR High ISO NR Slow Shutter Speed NR Slow Shutter Speed NR Exit Exit Cancel Cancel OK OK Custom Image Custom Image Image Capture Settings Image Capture Settings AF Settings AF Settings AE Metering AE Metering Exit Exit Digital Filter Digital Filter HDR Capture HDR Capture File Format File Format JPEG Recorded Pixels JPEG Recorded Pixels Image Capture Settings Image Capture Settings JP...

Страница 22: ...isplay the first tab of the proper menus for the camera settings at that time To display the menu tab last selected first set in 25 Save Menu Location of the E4 menu Settings are returned to their default values with Reset of the D3 menu To reset all the settings in the Custom Setting menus to the defaults use Reset Custom Functions of the E5 menu Some settings do not apply KS2_OPM_EN book Page 20...

Страница 23: ... Sets the RAW file format PEF AF Settings AF Mode 4 Selects the autofocus method when shooting with the viewfinder z p 55 AF Active Area 4 Selects the area to adjust the focus when shooting with the viewfinder Auto 11 AF Points p 56 AF Assist Light 4 Discharges the assist light when autofocusing in dark locations On p 55 AE Metering 4 Selects the part of the sensor to use for measuring brightness ...

Страница 24: ...p 48 GPS Sets the camera action when the optional GPS unit is used p 117 A3 Live View Contrast AF 4 Sets the autofocus mode for shooting with Live View Face Detection p 57 Focus Peaking 4 Emphasizes the outline of the subject in focus and makes it easier to check the focus Off p 57 Grid Display Displays the grid during Live View Off p 11 Histogram Display Displays the histogram during Live View Of...

Страница 25: ...stogram Display Displays the histogram during Instant Review Off Highlight Alert Sets overexposed areas to blink red during Instant Review Off E Dial Program ming G Sets the Q R M operation for each exposure mode I J XG p 100 H ISO I I J J K I J GLINE L I J GLINE M J m n J GLINE p I J GLINE o I J GLINE Rotation Direction Reverses the effect obtained when Q or R is turned Rotate Right Menu Item Fun...

Страница 26: ... AF AE L Button Movie Sets the function for when f is pressed in C mode Enable AF1 Self portrait Shutter Button Sets whether to use the self portrait shutter button as the shutter release button when taking self portraits On Memory Determines which settings to save when the power is turned off On for settings other than Digital Filter HDR Capture Clarity Enhancement and Shooting Info Display p 105...

Страница 27: ...Default Setting Page B1 Slideshow Display Duration Sets an image display interval 3sec p 80 Screen Effect Sets a transition effect when the next image is displayed Off Repeat Playback Starts the slideshow again from the beginning after the last image is displayed Off Auto Movie Playback Plays back movies during the slideshow On Quick Zoom Sets the initial magnification when magnifying images Off H...

Страница 28: ...lay color of the status screen control panel and menu cursor 1 p 38 LCD Display Settings Adjusts the brightness saturation and the color of the monitor 0 D2 USB Connection Sets the USB connection mode when connecting to a computer MSC p 82 HDMI Out Sets the output format when connecting to an AV device with an HDMI input terminal Auto p 81 Folder Name Sets the folder name in which images are store...

Страница 29: ...after Remote Control shooting On Wi Fi Activates the built in Wi Fi function Off p 89 Reset Resets the settings of the direct keys and for the items of the A menu C menu B menu D menu control panel and playback mode palette D4 Pixel Mapping Maps out and corrects any defective pixels on the sensor p 119 Dust Removal Cleans the sensor by shaking it Off p 119 Sensor Cleaning Locks the mirror in the u...

Страница 30: ...2 9 One Push Bracketing Shoots all frames with one release when using Bracketing Off p 62 10 Interval Shooting Options Sets whether to start counting the time of interval from when exposure starts or when exposure ends for Interval Shooting Interval Composite and Interval Movie Record Interval p 65 11 AF in Interval Shooting Sets whether to lock the focus position used when the first picture is ta...

Страница 31: ... use autofocus when shooting with a remote control unit Off p 61 E4 22 Release While Charging Sets whether to release the shutter while the built in flash is being charged Off p 53 23 Color Space Sets the color space to use sRGB 24 Save Rotation Info Saves rotation information when shooting On p 80 25 Save Menu Location Saves the last menu tab displayed on the monitor and displays it again the nex...

Страница 32: ...s turned off 2 Remove the body mount cover 1 and lens mount cover 2 After removing the cover be sure to put the lens down with the lens mount side facing upward 3 Align the lens mount indexes red dots 3 on the camera and the lens and secure by turning the lens clockwise until it clicks Attaching the Strap Attaching a Lens 3 3 KS2_OPM_EN book Page 30 Friday February 20 2015 12 10 PM ...

Страница 33: ...rest service center for professional cleaning When a retractable lens is attached and is not extended you cannot take pictures and use some functions If the lens is retracted during shooting the camera stops working Refer to How to Use a Retractable Lens p 40 for details We assume no responsibility nor liability for accidents damages and malfunctions resulting from the use of lenses made by other ...

Страница 34: ...e battery is inserted incorrectly it may not be removed Wipe the electrodes of the battery with a soft dry cloth before inserting Do not open the battery cover or remove the battery while the power is on Be careful as the camera or battery may become hot after the camera has been used continuously for a long period of time Remove the battery when you will not use the camera for a long time The bat...

Страница 35: ...m in your pocket Battery performance will return to normal at room temperature Have extra batteries ready when traveling overseas or taking a lot of pictures We recommend the use of the optional AC adapter kit K AC128 when using the monitor for a long time or when connecting the camera to a computer or AV device 1 Make sure that the camera is turned off 2 Open the battery cover Remove the battery ...

Страница 36: ...ction cable cover to its original position Be sure to read the manual of the AC adapter kit before using the AC adapter The following memory cards can be used with this camera SD Memory Card SDHC Memory Card SDXC Memory Card In this manual these cards are referred to as memory cards 1 Make sure that the camera is turned off 2 Slide the memory card cover in the direction of 1 and then rotate it to ...

Страница 37: ...previously used on other devices p 38 Use a high speed memory card when recording movies If the write speed cannot keep up with the recording speed the writing may stop during recording The following procedure explains how to open the monitor with the LCD screen facing inward 1 Open the monitor 180 horizontally while holding the top and bottom of it 2 Rotate the monitor 180 forward The monitor can...

Страница 38: ...ate according to the direction and angle of the monitor You can take low angle and high angle pictures by adjusting the angle of the monitor while it is open horizontally Also you can take self portraits by pointing the lens toward yourself while checking the Live View image on the LCD screen of the monitor facing you p 41 Turn the camera on and make the initial settings 1 Turn the main switch to ...

Страница 39: ...o select the date format 2 Press D and use AB to select 24h or 12h 3 Press E The frame returns to Date Format 4 Press B and then press D The frame moves to the month if the date format is set to mm dd yy Setting the Display Language Text Size Text Size Std Std New York New York English English Initial Setting Initial Setting Settings complete Settings complete Cancel Cancel Hometown Hometown New Y...

Страница 40: ... formatting or the card may be damaged Formatting deletes all data both protected and unprotected t Memo When a memory card is formatted the volume label K S2 is assigned to the card When the camera is connected to a computer the memory card is recognized as a removable disk with the name K S2 Setting the LCD Display Time Time Date Date Date Format Date Format 00 00 00 00 mm dd yy mm dd yy 01 01 2...

Страница 41: ...ens p 40 2 Turn the camera on 3 Set the focus mode switch to v 4 Turn the mode dial and align the dial indicator to R The selected capture mode is displayed on the monitor Guide Display y Guide Display settings p 26 5 Look through the viewfinder to view the subject When using a zoom lens turn the zoom ring to the right or left to change the angle of view Basic Shooting Operation Shooting with the ...

Страница 42: ...nu p 23 When Display Time is set to y Instant Review is displayed until the next operation L Deletes the image R Magnifies the image J Saves the RAW data only when a JPEG image was taken and the data remains in the buffer Focus indicator How to Use a Retractable Lens If the camera is turned on when a retractable lens such as smc PENTAX DA L 18 50mm F4 5 6 DC WR RE is attached and is not extended a...

Страница 43: ...or 180 horizontally The self portrait shutter button lamp lights green 2 Face both the lens and the LCD screen of the monitor toward yourself 3 Check the Live View image and press the self portrait shutter button After the picture is taken Instant Review is displayed until the next operation The camera returns to standby mode when the self portrait shutter button is pressed again Shooting While Vi...

Страница 44: ...reviewed The image cannot be deleted or magnified during Instant Review Do not force the monitor over the maximum viewing angle Keep the monitor closed when not using the camera t Memo Shooting with the self portrait shutter button is available only when Self portrait Shutter Button of Button Customization in the A4 menu is set to On default setting and the monitor is positioned at the correct ang...

Страница 45: ...eletes the image R to the right Magnifies the image up to 16 Use ABCD to change the area to display Press M to return the display area to the center Press E to return to the entire image display R to the left Switches to the thumbnail display p 78 J Saves the RAW data only when a JPEG image was taken and the data remains in the buffer G Changes the type of information displayed p 14 B Displays the...

Страница 46: ...ed pixels and the framerate Shooting conditions for Interval Movie Record and Star Stream can be changed from Parameter Adj on the Drive Mode screen Configuring the Capture Settings Image Capture Settings v A1 File Format JPEG RAW RAW JPEG Recorded Pixels q p o r JPEG Quality m l k RAW File Format PEF DNG 99999 99999 File Format File Format Cancel Cancel OK OK 99999 99999 5472x3648 5472x3648 JPEG ...

Страница 47: ...larity Enhancement feature to create a single composite image with them p 46 G H I J K L M Exposure modes Allows you to change the shutter speed aperture value and sensitivity p 47 Scene Modes b Portrait For capturing portraits Reproduces a healthy and bright skin tone c Landscape For capturing landscape views Reproduces the vivid green of trees d Macro For capturing tiny objects at close focus ra...

Страница 48: ...Night Snap For taking snapshots in poorly lit places m Food For capturing images of food Saturation will be rather high to make food look appetizing o Pet For capturing moving pets p Kids For capturing moving kids Reproduces healthy and bright skin tone q Surf Snow For capturing images of dazzling backgrounds such as snowy mountains s Backlight Silhouette Produces a silhouette image of the subject...

Страница 49: ...value is changed in J K L or M mode The sensitivity is changed in H mode 3 Turn Q The shutter speed is changed in I K or L mode Exposure Modes Mode Change Shutter Speed Change Aperture Value Change Sensitivity EV Compen sation G Program Automatic Exposure 1 1 x x H Sensitivity Priority Automatic Exposure x 2 x I Shutter Priority Automatic Exposure x x x J Aperture Priority Automatic Exposure x x x...

Страница 50: ...e set between 5 and 5 EV 2 and 2 EV in C mode 1 Press J and then turn R e and the compensation value are displayed on the status screen Live View screen and in the viewfinder during adjustment Available operations t Memo Bracketing shooting enables you to take pictures while automatically changing exposure p 62 Auto Applies Noise Reduction according to the shutter speed sensitivity and internal te...

Страница 51: ...k the exposure before shooting use the AE Lock function This function can be used by assigning AE Lock to the f button p 100 Recording Movies J K L The camera operates in the selected exposure mode The aperture value can be changed only before shooting When set to L mode the sensitivity can also be changed O P The camera operates according to the saved exposure mode Other modes The camera operates...

Страница 52: ...C mode the Wi Fi function is disabled t Memo You can change the settings for recording a movie from the control panel or the C1 menu p 25 The sound level for recording a movie can be set from the control panel or Recording Sound Level of the C1 menu When Manual is selected Volume can be set from 0 to 20 You can record a movie continuously up to 4 GB or 25 minutes When the memory card is full recor...

Страница 53: ...V step setting for exposure set from 2 Sensitivity Steps of the E1 menu Playing Back Movies A Plays back pauses a movie D Forwards a frame when paused Press and hold D Fast forwards playback C Reverses a frame when paused Press and hold C Fast reverses playback B Stops playback R Adjusts the volume 21 levels J Saves the displayed frame as a JPEG file when paused G Switches between Standard Informa...

Страница 54: ...ge Custom Applies Noise Reduction at user defined levels for each ISO setting Off Does not apply Noise Reduction at any shutter speed High ISO NR High ISO NR Auto Auto Cancel Cancel OK OK 1 100 100 200 200 400 400 800 800 1600 1600 3200 3200 6400 6400 ISO ISO ISO ISO ISO ISO ISO ISO ISO ISO ISO ISO ISO ISO High ISO NR High ISO NR Reset Reset AE Metering v A1 A Multi segment Meters the brightness i...

Страница 55: ...eduction Discharges a pre flash for red eye reduction before the main flash and discharges a flash for each picture E Slow speed Sync Sets to a slow shutter speed and discharges a flash for each picture Use this for example when shooting a portrait with the sunset in the background F Slow speed Sync Red eye Discharges a pre flash for red eye reduction before the main flash is discharged with Slow ...

Страница 56: ...t the focus mode switch to v or w The autofocus method for shooting with the viewfinder differs from that for shooting with Live View t Memo You can use the f button to focus on the subject The f button operation can be set in Button Customization of the A4 menu p 100 Sensitivity Guide Number Sensitivity Guide Number ISO 100 Approx 12 ISO 3200 Approx 68 ISO 200 Approx 17 ISO 6400 Approx 96 ISO 400...

Страница 57: ...elected scene mode p 110 In R mode AF Mode is fixed to z Setting the AF Mode when Shooting with the Viewfinder v A1 z Auto select mode Switches automatically between x and y modes according to the subject x Single mode When 0 is pressed halfway and the subject comes into focus the focus is locked at that position The AF assist light turns on as necessary y Continuous mode The subject is kept in fo...

Страница 58: ...camera automatically selects the optimum focusing area 7 Auto 5 AF Points Out of the 5 AF points the camera automatically selects the optimum focusing area E Select Sets the focusing area to the user selected point from 11 points 8 Expanded Area AF Sets the focusing area to the user selected point from 11 points When the subject happens to move out of the selected focusing area after being focused...

Страница 59: ...iew of the A3 menu the outline of the subject in focus is emphasized and makes it easier to check the focus This function works in both v and w modes Setting the AF Mode during Live View v A3 e Face Detection Detects and tracks faces of people The main face detection frame for AF and AE is displayed in yellow f Tracking Tracks the subject in focus The shutter can be released even if the subject is...

Страница 60: ... to standby mode AF Fine Adjustment E4 Apply All Applies the same adjustment value to all lenses Apply One Saves an adjustment value for the lens being used Up to 20 values D R to the right Adjusts the focus to a closer position C R to the left Adjusts the focus to a farther position M Resets the adjustment value to the default setting 0 0 0 0 3 3 27 27 AF Fine Adjustment AF Fine Adjustment Apply ...

Страница 61: ...l capture mode Continuous Shooting Z b Continuously takes pictures while 0 is kept pressed p 60 Self timer O P Y Releases the shutter about 12 seconds or 2 seconds after 0 is pressed p 60 Remote Control Q R S Enables shooting with remote control p 61 Bracketing T 1 U Takes three consecutive pictures at different exposure levels p 62 Multi exposure V z W X Creates a composite image by taking multip...

Страница 62: ...eturns to standby mode 8 Press 0 halfway and then fully The shutter is released after about 12 seconds or 2 seconds Continuous Shooting Z Continuously takes pictures at high speed b Continuously takes pictures at low speed Self timer Continuous Shooting H Continuous Shooting H Cancel Cancel OK OK Self timer 12 sec Self timer 12 sec Cancel Cancel OK OK O Releases the shutter after about 12 seconds ...

Страница 63: ...trol unit t Memo The maximum operating distance of the remote control unit is approx 4 m from the front of the camera To adjust focus with remote control set in 21 AF with Remote Control of the E3 menu When using the Remote Control Waterproof O RC1 the autofocus system can be operated with the q button on the remote control unit The r button cannot be used Remote Control R Releases the shutter aft...

Страница 64: ...he 1 EV Steps setting of the E1 menu The following settings for the Bracketing can be set in the E2 menu Bracketing 1 Takes pictures with the self timer U Takes pictures with remote control 0 3EV 0 3EV 0 3EV 0 3EV Bracketing Bracketing Cancel Cancel OK OK Bracketing Bracketing Self timer Self timer Cancel Cancel OK OK Bracketing Bracketing Remote Control Remote Control Cancel Cancel OK OK R Change...

Страница 65: ...Cancel Parameter Adj Parameter Adj Composite Mode Composite Mode Number of Shots Number of Shots Average Average OK OK times times 0002 0002 Multi exposure Multi exposure Composite Mode Composite Mode Average Average Shooting Speed Shooting Speed Number of Shots Number of Shots times times Cancel Cancel OK OK Composite Mode Select from Average Additive or Bright Number of Shots Select from 2 to 20...

Страница 66: ...with remote control 0002 0002 00 00 02 00 00 02 Interval Shooting Interval Shooting Cancel Cancel Parameter Adj Parameter Adj Interval Interval Number of Shots Number of Shots OK OK times times 00 00 02 00 00 02 0002 0002 10 00 10 00 PM PM Interval Shooting Interval Shooting Interval Interval Set Time Set Time Start Interval Start Interval Start Time Start Time Number of Shots Number of Shots time...

Страница 67: ...o that pictures are taken at the set interval after each exposure ends The screen displayed in Step 5 varies depending on the 10 Interval Shooting Options setting For Interval Shooting and Interval Composite the focus position used when the first picture is taken is locked When performing autofocus for each exposure set 11 AF in Interval Shooting to Adjusts focus for each shot in the E2 menu Star ...

Страница 68: ...hange the shooting conditions 4 Press G 5 Set the shooting conditions Interval Select from 2 seconds to 24 hours Standby Interval Select from the minimum time or 1 second to 24 hours Number of Shots Select from 2 to 2000 times Start Interval Select whether to take the first picture now or at a set time Start Time Set the shooting start time when Start Interval is set to Set Time Composite Mode Sel...

Страница 69: ... x or y Proceed to Step 7 if you do not need to change the shooting conditions 4 Press G 5 Set the shooting conditions Recorded Pixels Select from z u or t Interval Select from 2 seconds to 24 hours Standby Interval Select from the minimum time or 1 second to 24 hours Number of Shots Select from 8 to 2000 times When Recorded Pixels is set to z select from 8 to 500 times Start Interval Select wheth...

Страница 70: ...dby Interval Select from the minimum time or 1 second to 24 hours Number of Shots Select from 8 to 2000 times When Recorded Pixels is set to z select from 8 to 500 times Start Interval Select whether to take the first picture now or at a set time Start Time Set the shooting start time when Start Interval is set to Set Time Fade out Select the fade out effect level of light trails from Off Low Medi...

Страница 71: ...ding to the light source of each area u is not available in C mode The following settings for the white balance can be set in the E2 3 menus R Selects the type of Fluorescent P Uses Digital Preview to preview the background image with the white balance setting applied J Saves the preview image only when the image can be saved AB Adjust Green Magenta CD Adjust Blue Amber M Resets the adjustment val...

Страница 72: ...e 1 Select p in Step 2 of Setting the White Balance p 68 2 Press G 3 Adjust the color temperature Set the color temperature value within the range from 2500K to 10000K Available operations 4 Press E The White Balance setting screen reappears t Memo Select Mired in 15 Color Temperature Steps of the E3 menu to set the color temperature in mired units The color temperature can be changed in 20 mired ...

Страница 73: ...perations 5 Press E The screen of Step 2 reappears Controlling the Image Finishing Tone Custom Image v A1 Bright Natural Portrait Landscape Vibrant Radiant Muted Bleach Bypass Reversal Film Monochrome Cross Processing Bright Bright Cancel Cancel Parameter Adj Parameter Adj Check Check OK OK P Uses Digital Preview to preview the background image with the selected setting applied J Saves the preview...

Страница 74: ... cross processed images starting from the most recent image taken No cross processed image appears if there are no cross processed images 3 Use Q to select a cross processed image 4 Select the Favorite number 1 2 or 3 to save the settings and press E The settings of the selected image are saved as your Favorite settings t Memo The saved Cross Processing settings can be loaded by selecting Cross Pr...

Страница 75: ... The Digital Preview operation in Step 2 cannot be performed when the drive mode is set to Multi exposure Interval Shooting or Interval Composite Depending on the filter used it may take longer to save images t Memo Images can also be processed with digital filters in playback mode p 84 Digital Filter v A1 C1 Extract Color Replace Color Toy Camera Retro High Contrast Shading Invert Color Unicolor ...

Страница 76: ...nge the exposure 4 Press E The control panel reappears 5 Press F The camera returns to standby mode u Caution This function cannot be used in some capture modes or in combination with some other functions p 110 File Format is fixed to JPEG When File Format is set to RAW or RAW the setting is changed to JPEG For HDR Capture multiple images are combined together to create a single image so it may ta...

Страница 77: ...AW or RAW correction information is saved as a RAW file parameter and you can select whether to apply the correction to the images when developing them For the RAW Development function Color Fringe Correction can also be set p 87 Lens Correction v A2 Distortion Correction Reduces distortions occurring due to lens properties Peripheral Illumin Corr Reduces peripheral light fall off occurring due to...

Страница 78: ...or less Images with the texture and surface details enhanced can be captured Set in the control panel or Clarity Enhancement of the A2 C1 menu u Caution This function cannot be used in combination with some other functions p 112 In C mode this function is available only when the drive mode is set to Interval Movie Record Anti Aliasing Filter Simulator v A3 Type1 Takes pictures balancing the resolu...

Страница 79: ... p 83 e Cropping 1 Crops out only the desired area of an image p 84 f Protect Protects images from being accidentally erased p 106 h Slideshow Plays back images one after another p 80 i Save as Manual WB 1 Saves the white balance settings of the captured image as Manual White Balance p 70 Image Rotation Image Rotation Exit Exit Rotates captured images Rotates captured images Useful for image playb...

Страница 80: ...ime Protected images cannot be selected You can delete the images selected individually along with the images selected by specifying the range to delete Changing the Playback Method Displaying Multiple Images ABCD Moves the selection frame Q Shows the next previous page G Shows the display style selection screen L Deletes the selected images 100 0505 100 0505 100 0505 100 0505 12 Thumbnail Display...

Страница 81: ...s G in Step 1 of Displaying Multiple Images p 78 The display style selection screen appears 2 Select Calendar Filmstrip Display Available operations 3 Press E The selected image appears in single image display Displaying Images by Folder ABCD Moves the selection frame L Deletes the selected folder Deleting a Folder 100_0707 100_0707 100 100 101 101 102 102 103 103 104 104 105 105 106 106 107 107 1...

Страница 82: ...ged by following the procedure below 1 Display the image to edit in single image display 2 Select a in the playback mode palette The selected image is rotated in 90 increments and the four thumbnail images are displayed 3 Use ABCD to select the desired rotation direction and press E The image rotation information is saved u Caution When 24 Save Rotation Info is set to Off in the E4 menu image rota...

Страница 83: ...creen of the connected AV device u Caution While the camera is connected to an AV device nothing is displayed on the camera monitor regardless of the LCD screen direction Also you cannot adjust the volume on the camera Adjust the volume on the AV device t Memo Check the operating manual of the AV device and select a suitable input terminal for connecting the camera By default the maximum resolutio...

Страница 84: ...o a computer To operate the camera terminate the USB connection on the computer then turn off the camera and remove the USB cable If the K S2 dialog appears on the computer screen in Step 5 select Open folder to view files and click the OK button t Memo Refer to Operating Environment for USB Connection and Provided Software p 129 for system requirements to connect the camera to a computer and to u...

Страница 85: ...ly the desired area of the selected image and saves it as a new file 1 Display the image to edit in single image display 2 Select e in the playback mode palette The cropping frame to specify the size and position of the area to crop appears on the screen 3 Specify the size and position of the area to crop by using the cropping frame Available operations 4 Press E The save confirmation screen appea...

Страница 86: ...playback mode palette The screen to select a digital filter appears 3 Select a filter Use Q to select a different image Proceed to Step 7 if you do not need to change the parameters 4 Press G The parameter setting screen appears Correcting Color Moiré Cancel Cancel OK OK Processing Images with Digital Filters Base Parameter Adj Extract Color Replace Color Toy Camera Retro High Contrast Shading Inv...

Страница 87: ... check the parameter details press G Press G again to return to the previous screen 5 Press E The image selection screen appears 6 Use Q to select an image for applying the same filter effects and press E You can only select an image that has not been processed with a filter The save confirmation screen appears AB Selects a parameter CD Adjusts the value Brightness Brightness Cancel Cancel OK OK R...

Страница 88: ...iple segments can be deleted at once Press E again to cancel the selection 6 Press F The screen of Step 3 reappears 7 Press E The save confirmation screen appears 8 Select Save and press E u Caution Select dividing points in chronological order from the beginning of the movie When canceling the selected dividing points cancel each of them in reverse order from the end of the movie to the beginning...

Страница 89: ...images with the same settings Select a folder Develops up to 500 images in the selected folder with the same settings Develop images as shot Allows you to change Image Capture Settings JPEG Recorded Pixels and JPEG Quality Develop images with modified settings Allows you to change Image Capture Settings Aspect Ratio JPEG Recorded Pixels JPEG Quality Color Space Lens Correction Distortion Correctio...

Страница 90: ...u Caution Only RAW images captured with this camera can be developed The parameters Digital Filter and Clarity Enhancement cannot be set at the same time t Memo When Select multiple images or Select a folder is selected in Step 2 a folder with a new number is created and the JPEG images are stored in it With the provided software Digital Camera Utility 5 you can develop RAW files on a computer AB ...

Страница 91: ...ated while a connection is not established or during standby the Wi Fi function is disabled The function is enabled when the camera recovers from Auto Power Off The Wi Fi function is disabled during the USB connection u Caution Do not attempt to use the Wi Fi function in a location where the use of wireless LAN devices is restricted or prohibited such as on airplanes When using the Wi Fi function ...

Страница 92: ...ication device to the NFC mark of the camera A beep sounds and Wi Fi enabled appears on the screen u Caution To establish a Wi Fi connection by touching a communication device the Wi Fi function and the NFC reader writer function of the device must be enabled in advance For details on how to operate the communication device refer to the operating manual of the device t Memo When the dedicated appl...

Страница 93: ...via Wi Fi and start Image Sync installed on the communication device 1 Set the wireless LAN Wi Fi function and the NFC reader writer function to ON on the communication device 2 Lightly touch the communication device to the NFC mark of the camera A Wi Fi connection is established between the camera and communication device Image Sync is started and the list of images appears Operating the Camera w...

Страница 94: ...xxxx in the Network List The Enter Password screen appears 4 Enter the password and tap Connect A Wi Fi connection is established between the camera and communication device The list of images appears on the Image Sync screen t Memo Refer to Communication Info in Wi Fi of the D3 menu for the default password p 89 When a Non NFC compatible Device is Used KS2_OPM_EN book Page 92 Friday February 20 2...

Страница 95: ...a and communication device 3 Start Image Sync on the communication device Image Sync is started and the list of images appears Flick left or right on the screen to change screens t Memo You can also change screens by tapping the buttons displayed at the bottom of each screen When an iOS Device is Used Screens of Image Sync Application image list Camera image list A mode KS2_OPM_EN book Page 93 Fri...

Страница 96: ...Communication Device 1 Settings p 98 2 Capture mode 3 Live View 4 AF frame 5 White Balance Shutter Speed Aperture value EV Compensation Sensitivity 6 Live View on off 7 Operation modes 8 NFC connection screen 9 Battery level 10 Thumbnail of the last captured image When tapped the camera image list is displayed 11 File Format Image storage capacity 12 Drive Mode 13 Green button 14 Shutter button 1 ...

Страница 97: ...MI terminal When using the ASTROTRACER function The captured images are saved to the memory card inserted in the camera and to the communication device with Image Sync Shooting cannot be performed if there is not enough available space on the memory card t Memo Shooting can also be performed by tapping the Live View image Set in Touch AF on the Settings screen p 98 You can view the images saved ei...

Страница 98: ...splay you can select the image storage location album from Application or Gallery or Camera Roll 1 Tap 4 2 Select the album The images in the selected album are displayed Flick left right Shows the previous next image Pinch out in Magnifies Reduces the image Selecting the Image Storage Location KS2_OPM_EN book Page 96 Friday February 20 2015 12 10 PM ...

Страница 99: ...selected images 4 Select the desired action t Memo When you touch and hold the desired image shown in list display or shooting information display the same screen as Step 4 appears and you can select the action to apply Selecting Multiple Images KS2_OPM_EN book Page 97 Friday February 20 2015 12 10 PM ...

Страница 100: ... the setting item to be changed Changing the Settings Touch AF Sets whether to perform only autofocus or perform shooting after autofocus when touching the Live View image Recorded Pixels Changes the number of recorded pixels and the quality level General Settings Changes the communication settings and the display language KS2_OPM_EN book Page 98 Friday February 20 2015 12 10 PM ...

Страница 101: ...5 99 Sharing Communication Settings The password and wireless channel can be changed Device Information Language 4 Change the settings and tap 1 KS2_OPM_EN book Page 99 Friday February 20 2015 12 10 PM ...

Страница 102: ...and the self portrait shutter button 1 Select Button Customization in A4 menu and press D The Button Customization screen appears 2 Select the desired item and press D The screen to set the function for the selected item is displayed Camera Settings Customizing the Button E dial Functions A4 Setting the E dial Operation I Change Shutter Speed J Change Aperture Value ISO Change Sensitivity e EV Com...

Страница 103: ...mum display time 60 seconds You can magnify or save the preview image Shake Reduction Turns the Shake Reduction and Movie SR functions on off AF Active Area Enables changing the AF point p 56 AF AE L Button AF AE L Button Movie Enable AF1 Autofocus is performed when f is pressed p 54 Enable AF2 Autofocus is performed when f is pressed and not when 0 is pressed halfway Cancel AF While f is pressed ...

Страница 104: ...ration p 100 2 Press B and select Y or Z for each display item Setting the One Push File Format Z The recording format returns to the original file format after a picture is taken Y The setting is retained until any of the following operations is performed When P is pressed again When 3 or F is pressed or when the mode dial or main switch is turned RAW Fx Button RAW Fx Button Cancel after 1 shot C...

Страница 105: ...de in Step 3 of Saving the Settings p 103 and press D The Rename USER Mode screen appears 2 Select USER1 or USER2 and press D The text entry screen appears 3 Change the text Up to 18 single byte alphanumeric characters and symbols can be entered Saving Frequently Used Settings A4 Exposure Mode G H I J K L M Sensitivity EV Compensation AF point Flash Mode Drive Mode White Balance A1 4 menu settings...

Страница 106: ...ngs To change the original settings save the USER mode settings again ABCD Moves the text selection cursor R Moves the text input cursor J Switches between upper and lower case letters E Enters a character selected with the text selection cursor at the position of the text input cursor L Deletes a character at the position of the text input cursor Using the Saved USER Mode 1 1 250 250 1600 1600 F ...

Страница 107: ...nation Select F Hometown in Step 3 to change the city and DST settings for the hometown G appears in the control panel when Time Setting is set to G Most of the functions set on this camera are saved even if the camera is turned off For the following function settings you can select whether to save the settings Z or to return the settings to their default values Y when the camera is turned off Set...

Страница 108: ...l number from 100 to 999 and a string of 5 characters The folder name can be changed 1 Select Folder Name in D2 menu and press D The Folder Name screen appears 2 Select a folder name and press E Proceed to Step 6 if you selected Date or do not need to change the character string from PENTX File Management Settings Protecting Images from Deletion Protect Select image s Select image s Select a folde...

Страница 109: ...a new folder or when the file name number reaches 9999 When Create New Folder is selected in the D2 menu a folder is created with a new number when the next image is saved u Caution You cannot successively create multiple folders t Memo A new folder is automatically created in the following cases When the drive mode is set to Interval Shooting p 64 When the drive mode is set to Interval Composite ...

Страница 110: ...ers and a sequential number from 0001 to 9999 You can set whether to continue the sequential numbering for the file name even if a new folder is created in Sequential Numbering of File No in the D2 menu Select Reset File Number to reset the file number to its default value t Memo When the file number reaches 9999 a new folder is created and the file number is reset File Name Color Space File Name ...

Страница 111: ...Y Does not embed copyright information in the Exif data Z Embeds copyright information in the Exif data Copyright Information Copyright Information Embed Copyright Data Embed Copyright Data Photographer Photographer Copyright Holder Copyright Holder A AB BC C A AB BC C D DE E F FG GH H I I J J K KL LM MN NO OP PQ QR R S S T TU UV VW WX X Y Y Z Z 0 0 1 1 2 2 3 3 4 4 5 5 6 6 7 7 8 8 9 9 _ _ Photogra...

Страница 112: ... l p u Sensitivity 1 2 Flash Drive Mode Continuous Shooting Z 3 Z 3 Self timer Remote Control Q 4 Bracketing Multi exposure Interval Shooting Interval Composite Interval Movie Record Star Stream Focus Method z e 3 x e 3 x 3 y 3 x e 3 x 3 x 3 y 3 y e 3 y 3 File Format RAW RAW KS2_OPM_EN book Page 110 Friday February 20 2015 12 10 PM ...

Страница 113: ...cannot be changed 6 Specific settings are used 7 Available only when the drive mode is set to Interval Movie Record 8 Bracketing is not available Shake Reduction On 3 White Balance g 3 g 3 g 3 g 3 g 3 g 3 g 3 g 3 g 3 g 3 Custom Image 5 5 5 5 5 5 5 5 5 5 Digital Filter HDR Capture 6 6 7 AA Filter Simulator 8 8 8 Save RAW Data Capture Mode Function R S Y M C b cd im q eo f gh js tv k l p u KS2_OPM_E...

Страница 114: ...of Special Functions Digital Filter HDR Capture Clarity Enhancement Lens Correction AA Filter Simulator Flash Drive Mode Continuous Shooting 2 Bracketing 2 Multi exposure 2 Interval Shooting 1 1 1 2 Interval Composite 2 Interval Movie Record 1 1 1 Star Stream File Format RAW RAW Digital Filter HDR Capture KS2_OPM_EN book Page 112 Friday February 20 2015 12 10 PM ...

Страница 115: ...ring is set to a position other than 9 or a lens without an 9 position or accessories such as an auto extension tube or auto bellows are used the camera does not operate unless 28 Using Aperture Ring is set to Enable in the E4 menu Refer to Using the Aperture Ring p 115 for details When a retractable lens is attached and is not extended you cannot take pictures and use some functions If the lens i...

Страница 116: ...cal length is 20 mm or less or when the focal length is 35 mm and the shooting distance is less than 1 5 m vignetting may occur DA 16 85mm F3 5 5 6 ED DC WR When the focal length is 24 mm or less and the shooting distance is 0 8 m or less vignetting may occur DA 17 70mm F4 AL IF SDM When the focal length is less than 24 mm or when the focal length is 35 mm and the shooting distance is 1 m or less ...

Страница 117: ... FA F A M S with diaphragm accessories such as extension tube K Pictures can be taken with a set aperture value but an exposure deviation may occur Manual diaphragm lens such as reflex lens lens only FA SOFT 28mm FA SOFT 85mm F SOFT 85mm lens only Pictures can be taken with a set aperture value in the manual aperture range 28 28 27 27 1 1 1 1 2 2 Using Aperture Ring Using Aperture Ring Disable Dis...

Страница 118: ... the A3 menu Use of the following external flashes optional enables a variety of flash modes such as P TTL auto flash mode x Available Restricted Not available Setting the Focal Length A3 35 35 mm mm OK OK Input Focal Length Input Focal Length Functions when Using an External Flash Compatible Flash Camera Function Built in Flash AF540FGZ AF540FGZ II AF360FGZ AF360FGZ II AF200FG AF160FC Red eye red...

Страница 119: ... flash to discharge a flash when taking a picture at a shutter speed faster than 1 180 seconds Set the capture mode to I K or L In addition to GPS information being saved in the shooting information of the image the following functions are available when the optional GPS unit O GPS1 is attached to this camera t Memo Refer to the manual of the GPS unit for details on how to attach the unit and info...

Страница 120: ...es correctly it does not require any repairs Shooting Celestial Bodies ASTROTRACER A2 ASTROTRACER ASTROTRACER Action in B Mode Action in B Mode Precise Calibration Precise Calibration Timed Exposure Timed Exposure Exposure Time Exposure Time GPS LED Indicators GPS LED Indicators Troubleshooting Problem Cause Remedy The camera does not turn on Battery is not installed properly Check the orientation...

Страница 121: ... does not discharge if the subject is bright Change the flash mode p 53 The camera is not recognized when it is connected to a computer The USB connection mode is set to PTP Set USB Connection to MSC in the D2 menu Dust or dirt particles appear in images The CMOS sensor is dirty or dusty Activate Dust Removal from the D4 menu The Dust Removal function can be activated every time the camera is turn...

Страница 122: ...nside the lens mount area If the power is turned off during cleaning this may cause damage to the shutter CMOS sensor and the mirror Hold the camera with the lens mount down while cleaning the sensor so dust will fall away from the sensor when the blower is used When the battery level is low the message Not enough battery power remaining to clean sensor is displayed on the monitor Install a fully ...

Страница 123: ...en you try to perform Pixel Mapping or Sensor Cleaning or to update the firmware if the battery level is insufficient Install a fully charged battery Not enough battery power remaining to clean sensor Not enough battery power remaining to update the firmware Unable to update firmware There is a problem with the firmware update file Unable to update the firmware The update file is damaged Try downl...

Страница 124: ...turn off because its internal temperature is too high Leave the camera turned off until it has had time to cool down before turning on the camera again Shutter release is disabled Ensure the zooming index on the lens is set to a position that permits shutter release Pictures cannot be taken when a retractable lens is attached and is not extended Error messages Description KS2_OPM_EN book Page 122 ...

Страница 125: ...EG m Best l Better k Good RAW JPEG simultaneously recordable Color Space sRGB AdobeRGB Storage Media SD SDHC SDXC memory card UHS I compatible Storage Folder Folder Name Date 100_1018 101_1019 or a user assigned name default PENTX Storage File File Name user assigned name default IMGP File No Sequential Numbering Reset Type Pentaprism Finder Coverage FOV Approx 100 Magnification Approx 0 95 50mm F...

Страница 126: ...ene Portrait Sunset Blue Sky Forest Night Scene Night Scene HDR JPEG only Night Snap Food Pet Kids Surf Snow Backlight Silhouette Candlelight Stage Lighting Museum Advanced HDR mode JPEG only exposure bracket value is selectable from 1 2 or 3 EV Exposure modes Program Sensitivity Priority Shutter Priority Aperture Priority Shutter Aperture Priority Manual Bulb EV Compensation 5 EV 1 3 EV steps or ...

Страница 127: ...Curtain Sync Trailing Curtain Sync Contrast control sync High speed Sync Wireless Sync Available with 2 dedicated external flashes Custom Image Bright Natural Portrait Landscape Vibrant Radiant Muted Bleach Bypass Reversal Film Monochrome Cross Processing Cross Processing Random Preset 1 3 Favorite 1 3 Digital Filter Extract Color Replace Color Toy Camera Retro High Contrast Shading Invert Color U...

Страница 128: ... parameters File Format JPEG Aspect Ratio JPEG Recorded Pixels JPEG Quality Color Space Distortion Correction Peripheral Illumin Corr Lat Chromatic Ab Adj Diffraction Correction Color Fringe Correction White Balance Custom Image Digital Filter Clarity Enhancement Sensitivity High ISO NR Shadow Correction Editing Features Image Rotation Color Moiré Correction Resize Cropping aspect ratio can be cha...

Страница 129: ...t terminal Type D stereo microphone input terminal USB Connection MSC PTP Standards IEEE 802 11b g n standard wireless LAN protocol Frequency Center Frequency 2412 to 2462 MHz channels Ch 1 to Ch 11 Security Authentication WPA2 Encryption AES Standards ISO IEC14443 TypeA ISO IEC14443 TypeB JIS X 6319 4 automatically selected Operating Frequency 13 56 MHz Dimensions Approx 122 5 mm W 91 mm H 72 5 m...

Страница 130: ...e Image Storage Capacity by Size Recorded Pixels JPEG Quality PEF DNG m l k q 20M 134 304 596 59 59 p 12M 224 503 975 o 6M 418 917 1707 r 2M 1024 2119 3615 List of World Time Cities Region City North America Honolulu Anchorage Vancouver San Francisco Los Angeles Calgary Denver Chicago Miami Toronto New York Halifax Central and South America Mexico City Lima Santiago Caracas Buenos Aires Sao Paulo ...

Страница 131: ...le com quicktime download Operating Environment for USB Connection and Provided Software Windows OS Windows 8 1 32 bit 64 bit Windows 8 32 bit 64 bit Windows 7 32 bit 64 bit or Windows Vista 32 bit 64 bit CPU Intel Core 2 Duo or higher RAM 2 GB or more HDD For installing and starting up the program 100 MB or more of available space For saving image files Approx 10 MB file JPEG Approx 20 MB file RA...

Страница 132: ...Button 101 Y mode 46 Anti aliasing filter 76 Aperture Priority Automatic Exposure 47 Aperture value 47 Aspect Ratio 83 87 ASTROTRACER 118 Auto AF Active Area 56 Auto EV Compensation 28 Auto Flash Discharge 53 Auto Image Rotation 80 R mode 39 Auto Picture mode 39 Auto Power Off 36 Autofocus 54 AV device 81 J mode 47 g 68 AWB in Tungsten Light 69 B M mode 47 Backlight Silhouette S 46 Base Parameter ...

Страница 133: ...lay Color 26 38 Distortion Correction 75 DNG 44 D Range Settings 74 Drive Mode 59 DST daylight saving time 37 105 Dust Removal 119 Dynamic range 74 E E dial 100 Editing images 83 Electronic Compass 13 117 Electronic Level 13 17 Error messages 121 EV Compensation 48 EV Steps 48 Expanded Area AF AF Active Area 56 Exposure Bracketing 62 Exposure modes 47 104 External flash 116 Extract Color Digital F...

Страница 134: ...Macintosh 129 Macro S 45 Magnifying images 43 Manual Exposure 47 Manual Flash Discharge 53 Manual focus 54 Manual White Balance 70 Memory 105 Memory card 34 Menu 19 Meter Operating Time 28 w 54 Microphone 7 50 Microphone terminal 50 Miniature Digital Filter 84 Mired 70 Mirror 7 Mirror Up 120 Mode dial 39 Moiré reduction 76 Monitor 10 35 Monochrome Custom Image 71 Monochrome Digital Filter 84 Motio...

Страница 135: ... AF Active Area 56 Select Contrast AF 57 Select Delete 78 Selecting the range of images 78 Self portrait Shutter Button 41 90 101 Self timer shooting 60 Sensitivity 51 Sensitivity Priority Automatic Exposure 47 Sensitivity Steps 51 Sensor Cleaning 120 Sequential Numbering 108 Set up menus 26 Shade White Balance 68 Shading Digital Filter 73 84 Shadow Correction 74 Shake Reduction 22 Sharpness Custo...

Страница 136: ...gsten White Balance 68 TV 81 I mode 47 U Unicolor Bold Digital Filter 73 84 Updating firmware 27 USB Connection 82 119 129 USB terminal 82 USER mode 103 User registration 6 Using aperture ring 115 V Version update 27 Vibrant Custom Image 71 Viewfinder 16 Volume label 38 W WARRANTY POLICY 141 Water Color Digital Filter 84 WB Adjustable Range 69 WB When Using Flash 69 White Balance 68 Wi Fi 89 Windo...

Страница 137: ...apter exclusively developed for this camera with the specified power and voltage Using a battery charger or AC adapter not exclusive to this camera or using the exclusive battery charger or AC adapter with an unspecified power or voltage can cause a fire electric shock or camera breakdown The specified voltage is 100 240V AC Do not disassemble or modify the product This can cause a fire or electri...

Страница 138: ...l not to burn yourself during removal Keep wires hairpins and other metal objects away from the and contacts of the battery Do not short the battery or dispose of the battery in fire This can cause an explosion or fire If any leakage from the battery should come in contact with skin or clothing it may cause irritation to the skin Wash the affected areas thoroughly with water Precautions for D LI10...

Страница 139: ...ature changes will cause condensation on the inside and outside of the camera Place the camera in your bag or a plastic bag and remove it after temperatures of the camera and surroundings are equalized Avoid contact with garbage mud sand dust water toxic gases or salt These could cause the camera to breakdown Wipe the camera to dry off any rain or water drops Do not press on the monitor with exces...

Страница 140: ...camera in a place where electrical products AV OA devices and so on generate magnetic fields and electromagnetic waves If the camera is affected by magnetic fields and electromagnetic waves it may not be able to communicate If the camera is used near a TV or a radio poor reception or TV screen glitch may occur If there are multiple wireless LAN access points near the camera and the same channel is...

Страница 141: ...ition Multimedia Interface are trademarks or registered trademarks of HDMI Licensing LLC in the United States and or other countries All other trademarks are the property of their respective owners This product uses the RICOH RT font designed by Ricoh Company Ltd This product supports PRINT Image Matching III PRINT Image Matching enabled digital still cameras printers and software help photographe...

Страница 142: ...ht notice this list of conditions and the following disclaimer in the documentation and or other materials provided with the distribution 3 The name of the author may not be used to endorse or promote products derived from this software without specific prior written permission THIS SOFTWARE IS PROVIDED BY THE AUTHOR AS IS AND ANY EXPRESS OR IMPLIED WARRANTIES INCLUDING BUT NOT LIMITED TO THE IMPL...

Страница 143: ...to the complicated customs procedures required If the camera is covered by warranty repairs will be made and parts replaced free of charge and the camera will be returned to you upon completion of servicing If the camera is not covered by warranty regular charges of the manufacturer or of its representatives will apply Shipping charges are to be borne by the owner If your camera was purchased outs...

Страница 144: ...receiving antenna Increase the separation between the equipment and receiver Connect the equipment into an outlet on a circuit different from that to which the receiver is connected Consult the dealer or an experienced radio TV technician for help FOR CALIFORNIA U S A ONLY Perchlorate Material special handling may apply The lithium battery used in this camera contains perchlorate material which ma...

Страница 145: ...n Customer Service Manager Date and Place January 2015 Colorado Information for Users on Collection and Disposal of Old Equipment and Used Batteries 1 In the European Union These symbols on the products packaging and or accompanying documents mean that used electrical and electronic equipment and batteries should not be mixed with general household waste Used electrical electronic equipment and ba...

Страница 146: ...or the correct method of disposal For Switzerland Used electrical electronic equipment can be returned free of charge to the dealer even when you don t purchase a new product Further collection facilities are listed on the home page of www swico ch or www sens ch OPKS2101 EN The CE Mark is a Directive conformity mark of the European Union KS2_OPM_EN book Page 144 Friday February 20 2015 12 10 PM ...

Страница 147: ...HFKDUJHDEOH LWKLXP LRQ DWWHU DWWHU FKDUJHU SOXJ FRUG 6WUDS 2 67 6RIWZDUH 520 6 6 6WDUW XLGH HQVHV RX FDQ XVH HQVHV WKDW FDQ EH XVHG ZLWK WKLV FDPHUD DUH DQG OHQVHV DQG OHQVHV WKDW KDYH DQ 9 XWR SRVLWLRQ RQ WKH DSHUWXUH ULQJ 7R XVH DQ RWKHU OHQV RU DFFHVVRU VHH S 0HPR e_kb551_cover_6 5mm fm Page 2 Thursday February 19 2015 4 20 PM ...

Страница 148: ...ORXJK HUNV 6 31 8 KWWS ZZZ ULFRK LPDJLQJ FR XN 5 2 0 1 0 5 6 25325 7 21 WK 6WUHHW 6XLWH HQYHU RORUDGR 8 6 KWWS ZZZ XV ULFRK LPDJLQJ FRP 5 2 0 1 1 1 SORUHU ULYH 6XLWH 0LVVLVVDXJD 2QWDULR 1 KWWS ZZZ ULFRK LPDJLQJ FD 5 2 0 1 1 2 7 XQ DR QWHUQDWLRQDO 3OD D KDRMLDEDQJ 5RDG X XL LVWULFW 6KDQJKDL 1 KWWS ZZZ ULFRK LPDJLQJ FRP FQ 2SHUDWLQJ 0DQXDO 7R HQVXUH WKH EHVW SHUIRUPDQFH IURP RXU FDPHUD SOHDVH UHDG W...

Отзывы: