Using Wireless LAN
179
11
EEEE
Press the
{{{{
1
}}}}
key.
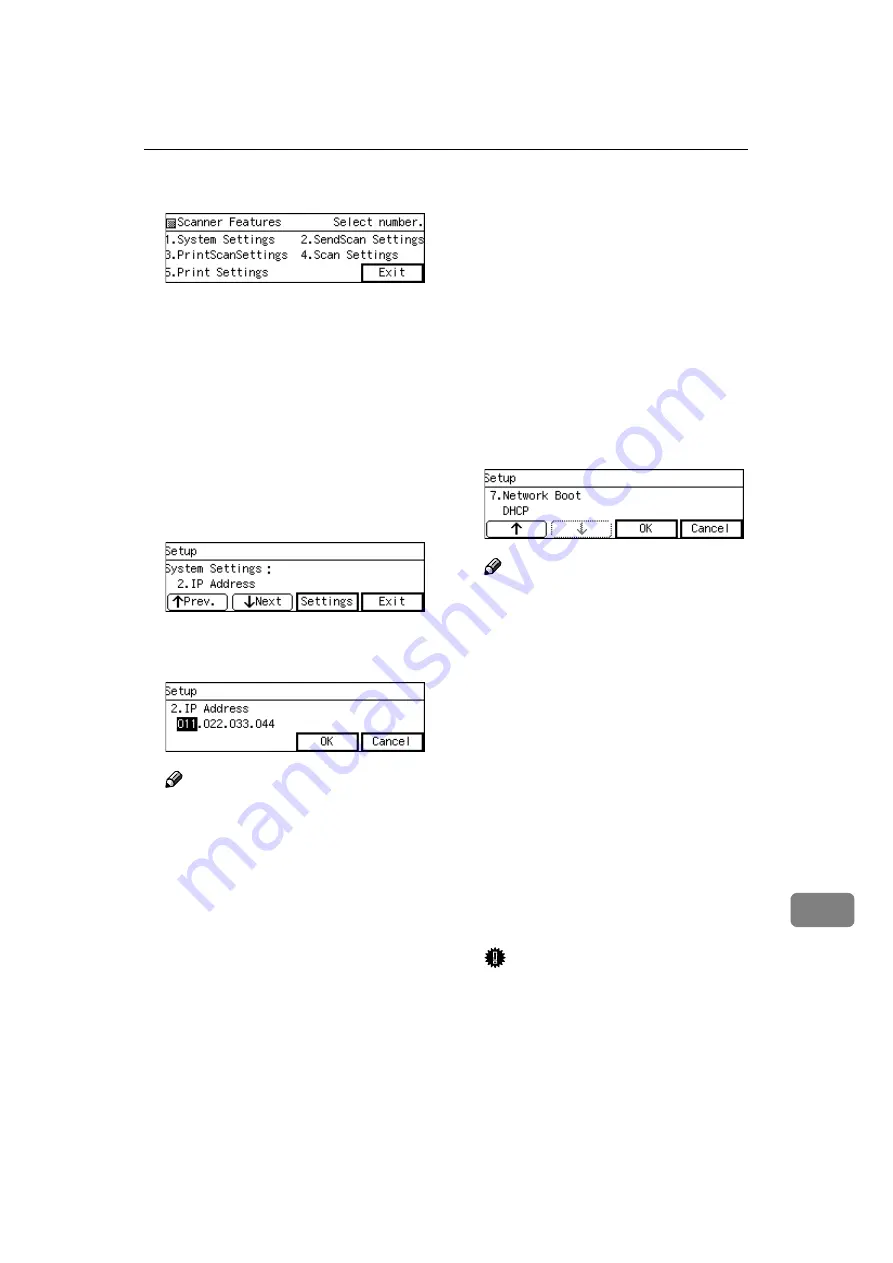
The System Settings menu is dis-
played, and “1. Function Priority ”
appears as the setup item currently
selected.
FFFF
Press
[
↓↓↓↓
Next
]
.
“1. Function Priority ” appears and
press
[
↓↓↓↓
Next
]
again.
“2. IP Address ” appears as the set-
up item currently selected.
GGGG
Press
[
Settings
]
.
HHHH
Enter “192.168.1.2” with the Num-
ber keys.
Note
❒
Enter each part of the IP address
in three digits.
❒
You can use
{{{{
1
1
1
1
}}}}
(or
{{{{
#
}}}}
) and
{{{{
0
0
0
0
}}}}
key to move the highlight-
ing to right and left.
❒
You can use the
{{{{
Clear/Stop
}}}}
key
to clear the three-digit number
currently highlighted.
IIII
Press
[
OK
]
.
This returns to the System Settings
menu.
JJJJ
Press
[
↓↓↓↓
Next
]
.
“3. Subnet Mask ” appears as the
setup item currently selected.
KKKK
Set
[
Subnet Mask
]
to 255.255.255.0
in the same way you have done in
the steps
through
“4. Default Gateway Address ” ap-
pears as the setup item currently
selected.
LLLL
Press
[
↓↓↓↓
Next
]
three times, and then
press
[
Settings
]
.
The setting screen for “7. Network
Boot ” appears.
MMMM
Confirm that
[
7. Network Boot
]
is set
to “ NONE ”, and press
[
OK
]
.
Note
❒
The “*” mark appears along
with the option currently select-
ed.
❒
If
[
7.Network Boot
]
is set to “
DHCP ”, change it to “ NONE ”,
and then press
[
OK
]
.
NNNN
Confirm that
[
10.Transmission Speed
]
is set to “ Auto ” and
[
11.LAN Type
]
is set to “ Ethernet ”, in the same
way you have done for
[
7.Network
Boot
]
.
OOOO
Press
[
OK
]
, and then
[
Exit
]
.
This exits the Scanner Features
menu, and returns to the standby
screen that is displayed when you
turn on the power.
Important
❒
Never turn off the power of this
machine before the standby
screen is displayed. Doing so
will discard all the settings you
have configured, and return this
machine to its factory default
status.
Содержание Network Scanning Unit A
Страница 8: ...vi ...
Страница 28: ...What You Can Do With This Machine 20 1 ...
Страница 36: ...Setting Up the Machine 28 2 ...
Страница 118: ...Configuring the Scanner Settings 110 3 ...
Страница 138: ...Sending Scan File by E mail 130 5 ...
Страница 148: ...Sending Scan File by Scan to Folder 140 6 ...
Страница 154: ...Sending Scan File by Scan to FTP 146 7 ...
Страница 164: ...Printing Scanned Image Files 156 8 ...
Страница 168: ...Sending Scan Files Using Delivery Server 160 9 ...
Страница 172: ...Using the Network TWAIN Scanner Function 164 10 ...
Страница 204: ...196 EN USA G829 8602 ...
Страница 206: ...Network Scanning Unit Type A Operating Instructions EN USA G829 8602 ...


