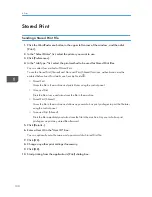
Stored Print
Sending a Stored Print File
1.
Click the WordPad menu button in the upper left corner of the window, and then click
[Print].
2.
In the "Select Printer" list, select the printer you want to use.
3.
Click [Preferences].
4.
In the "Job Type:" list, select the print method to be used for Stored Print files.
You can select four methods of Stored Print:
To use the Stored Print (Shared) and Store and Print (Shared) functions, authentication must be
enabled beforehand. For details, see Security Guide .
• Stored Print
Stores the file in the machine and prints it later using the control panel.
• Store and Print
Prints the file at once and also stores the file in the machine.
• Stored Print (Shared)
Stores the file in the machine and allows any user who has print privileges to print the file later
using the control panel.
• Store and Print (Shared)
Prints the file immediately and also stores the file in the machine. Any user who has print
privileges can print any stored file afterward.
5.
Click [Details...].
6.
Enter a User ID in the "User ID:" box.
You can optionally set a file name and a password of a Stored Print file.
7.
Click [OK].
8.
Change any other print settings if necessary.
9.
Click [OK].
10.
Start printing from the application's [Print] dialog box.
5. Print
100
Содержание Aficio MP 4002
Страница 2: ......
Страница 7: ...INDEX 219 5 ...
Страница 28: ...1 What You Can Do with This Machine 26 ...
Страница 59: ...CJW007 1 2 1 Limit mark 2 Original guide Placing Originals 57 ...
Страница 60: ...2 Getting Started 58 ...
Страница 104: ...5 Print 102 ...
Страница 124: ...7 Document Server 122 ...
Страница 128: ...8 Web Image Monitor 126 ...
Страница 154: ...9 Adding Paper and Toner 152 ...
Страница 224: ...MEMO 222 ...
Страница 225: ...MEMO 223 ...
Страница 226: ...MEMO 224 EN GB EN US EN AU D129 ...
Страница 227: ... 2011 ...
Страница 228: ...GB EN US EN AU EN D129 7802 ...


