

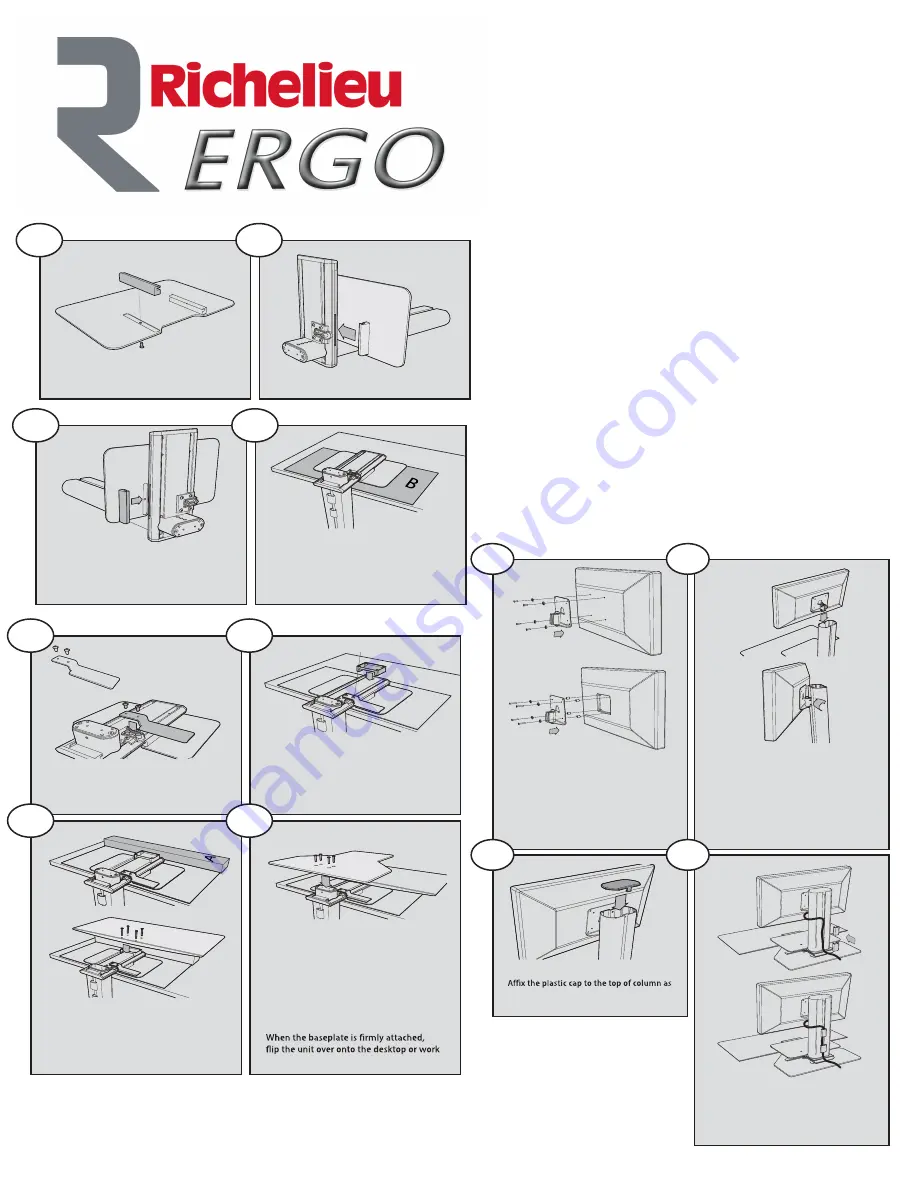
1.
2.
3.
4.
Remove one track from the underside of the
work surface and set aside.
Insert the attached work surface track into
the plastic guide on the column arm.
Insert the unattached work surface track
into the opposite plastic guide on the
column arm and attach using the screw you
removed in step 1.
Rest the unit upside down over the edge
of a desktop or work surface on top of
cardboard divider (marked with “B” in
packaging).
5.
6.
7.
8.
Attach the actuator handle as shown using
the M5x12mm screws.
Set the keyboard tray spacer in alignment to
the holes on the column arm.
Place the cardboard spacer (labeled “A” in
packaging) in front of the unit as shown (to
support the keyboard tray) and attach the
keyboard tray to the column arm using the
M5x38mm screws through the spacer.
Place some of the bubble wrap on top of the
keyboard tray and then attach the baseplate
to the vertical column using the M5x25mm
screws. Note: The countersunk holes and
felt pads of the steel baseplate should be
facing you.
surface where you plan to use it.
10.
Slide mounted monitor into the channel
adjusting to the appropriate height.
Tighten the 2 side screws to lock the
monitor into place.
9.
For standard monitors attach the VESA
mount to the monitor with the M4 x 12mm
screws and the countersunk washers. For
monitors with a recessed area for VESA
mounting place the spacers between the
monitor and the VESA mount then mount
the monitor with the M4 x 22mm screws
and the countersunk washers.
11.
shown.
12.
Align cables from monitor towards the
center of the column, insert cables into the
cable management clips, and clip the cable
management clips into the center channel
of the column.


