7
Once the first side of the record is finished, press the STOP button . The display will read ―CLOSE TK‖ for
one second and then change to ―PHONO‖.
8 Turn the record over and repeat steps 4-7 to record the other side.
9 After recording is completed, press the STOP button .The display will read "CLOSE TK" for two second and
then change to "PHONO".
10 Once you have finished the recording, press the FINALIZE button button. The display will read "Finalize".
11 Once the CD has been finalized, the unit will return to Phono mode and the display will show "PHONO".
The CD is now ready for use.
NOTE:
If the CD is not finalized, it will not play in any other CD player. Not all CD players are compatible
with CD-R and CD-
RW’s. Check the owner’s manual for other CD players for compatibility.
Recording Cassettes to CD
1 Load a compatible blank CD-R or CD-RW into the unit.
2 Press the FUNCTION button to set the unit to Phono mode.
3 Load a pre-recorded cassette tape into the cassette player. Press to PLAY to get the cassette to the point in
which you want to start the recording.
4. Adjust the sound to the required Volume level. This cannot be done once recording has started!
5
Once the cassette is ready and playing, press the CD RECORD button ―Record‖ will flash on the LCD. The
CD will begin recording.
6 Once the first side of the cassette
is finished, press the STOP button. The display will read ―CLOSE TK‖for
one second and then change to ―PHONO‖.
7 Eject the cassette tape and flip it over to the other side.
8 Repeat steps 4 and 6 to record the other side of the cassette.
9 After
recording is completed, press the STOP button. The display will read ―CLOSE TK‖ for one second
and then change to "PHONO".
10 Once you have finished the recording, press the FINALIZE button. The display will read "Finalize".
11 Once the CD has been finalized, the unit will return to Phono mode and the display will show "PHONO".
The CD is now ready for use.
NOTE:
If the CD is not finalized, it will not play in any other CD player. Not all CD players are compatible
with CD-R and CD-
RW.s. Check the owner’s manual for other CD players for compatibility.
Manual Track Division
You can divide your recording into separate tracks if you wish. By doing this, each song will have its own
sequential track number. To do this, you must use the Split Track button.
While Recording your record or cassette, listen for the end of each song. There will usually be a brief silence
between songs. Once you are at the end of the song, press the Split Track button. The recording will then go to
the next track number by increments of one. Once the recording is finished, you can press the Forward Skip or
Backward Skip buttons to go to the beginning of each song.
Erasing a CD-RW
If using a CD-RW, you can erase the whole CD and rerecord it. Erase procedures are only possible with CD-RW
discs. It is not possible to erase or rerecord a CD-R CD. To erase a CD-RW, follow the steps below.
1 Press the FUNCTION button to set the unit to CD mode.
2 Load a recorded CD-RW into the unit.
3 Press the STOP button to stop playback.
4 Press the ERASE button . ERASE will appear on the display ,Press PLAY button to confirm and the erasing
process will begin. When finished, the display will first read ―F Done‖ and then ―BLANK‖.
5 The CD is now ready to record.
NOTE:
Once a CD is erased, the contents that were on the CD cannot be retrieved.
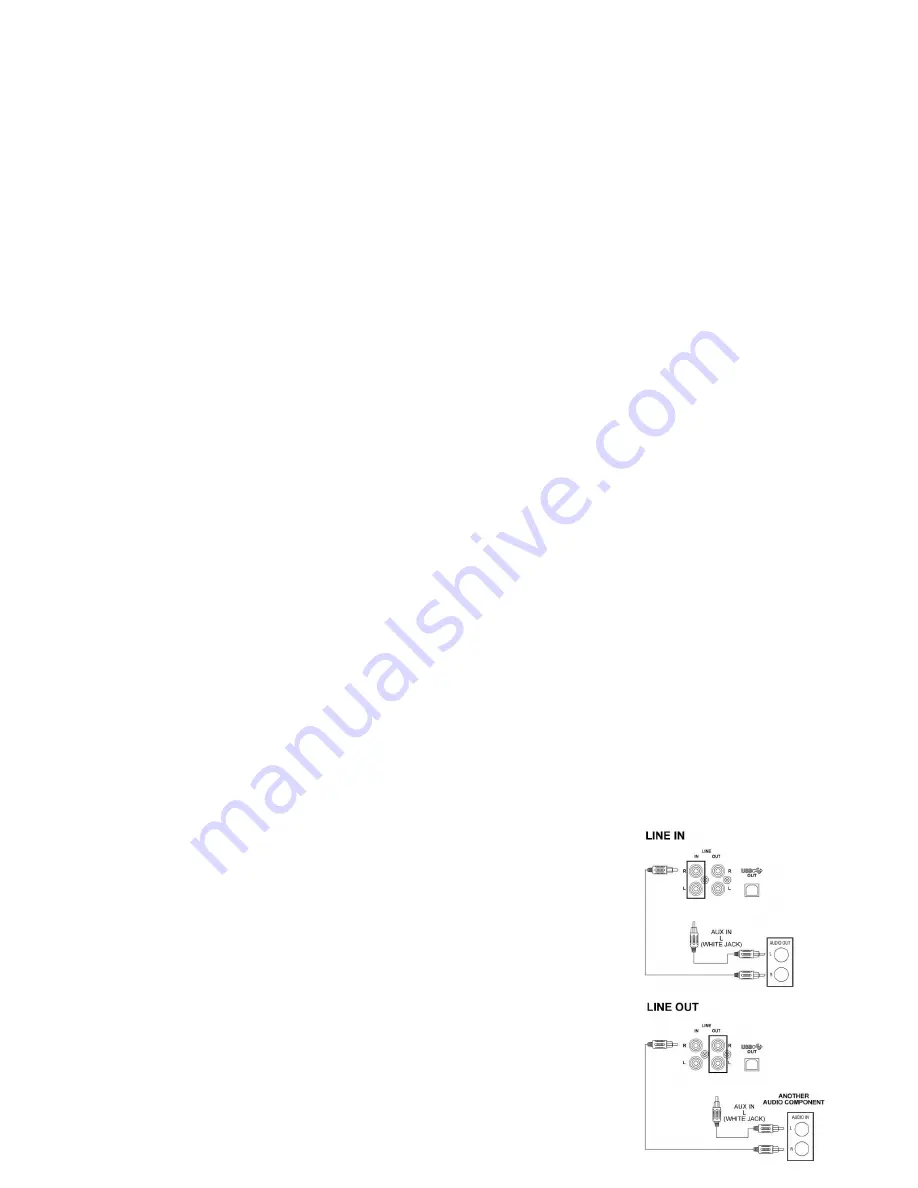
Audio Connections
LINE IN
Using the LINE IN front input jack or rear input jack will allows you to hook
up additional external audio components and listen to them through your
unit. Any component with an audio output such as a Tuner, can be
connected by using the correct cables. This unit uses 3.5mm mini pin
cable (front), standard RCA cables (back). Simply plug the connector on
3.5mm mini pin cable (front) or standard RCA cables (back). red and white
one end of the cable to the red and white Aux In jacks on the back of your
unit. The other end of the cable will plug into the Audio Output jack on the
external component. For more information on hooking up the external
component, see the owner’s manual for that component.
Содержание RMC400
Страница 1: ...RMC400 USER MANUAL GEBRUIKERSHANDLEIDING MODE D EMPLOI BEDIENUNGSANLEITUNG MANUAL DE USUARIO ...
Страница 9: ...Control Locators ...
Страница 10: ...Control Locators ...


