INSTALLATION
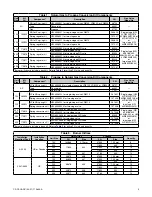
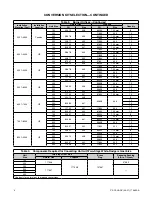
Install the conversion kit in accordance with the following steps. Ensure that the kit (refer to
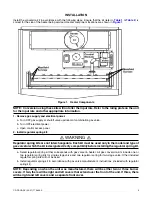
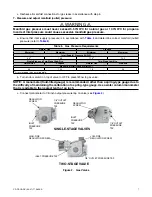
correct for the size of the heater being serviced. Heater component locations are shown in
Figure 1. Heater Components
NOTE: Conversion using these kits will not alter the input rate. Refer to the rating plate on the unit
for the input rate and other appropriate information.
1. Remove gas supply and electrical power:
a. Turn OFF gas supply at shutoff valve upstream of combination gas valve.
b. Turn OFF electrical power.
c. Open
control access panel
.
2. Install regulator spring kit:
⚠ WARNING ⚠
Regulator spring kits are not interchangeable. Each kit must be used only in the model and type of
gas valve for which the kit is designated. Verify compatibility before installing the regulator spring kit.
a. Select regulator spring kit that corresponds with gas valve on heater. All gas conversion kits include one or
two regulator spring kits for single-stage valve and one regulator spring for two-stage valve. Other included
regulator spring kits will not be used.
b. Install regulator spring kit in accordance with gas valve manufacturer’s instructions (included with regulator
spring kit).
NOTE: Depending on when the unit was manufactured, there will be either two or three burner
covers. If two, there will be right and left covers that extend over the front of the unit. If three, there
will be right and left covers and a separate front cover.
5
CP-CAUA-GC (04-21) 170635-A


