background image

1.  The LED indicator lamp on the underside of the Serial Edge Device does not illuminate.

a. Check incoming ac power to Serial Edge Device Power Supply Unit is connected and live.

b. Check dc cable from Power Supply is plugged into Serial Edge Device.

c. If problem persists, consult 1-866-REXNORD.

2.  The remote mounted Andon light does not illuminate.

a. Verify that the cable connections to the Andon Light are secure and that the cables show no sign of damage.

b. Check that the Green LED light located on the underside of the Serial Edge Device is illuminated. If not, verify 

that incoming ac power is properly connected.

c. Check ac power to the Serial Edge Device Power Supply.

d. Check dc cable from Power Supply is plugged into Serial Edge Device.

e. If the problem persists, consult 1-866-REXNORD.

3.  The Andon light illuminates, but no data is available from the cloud

a. If the connection is cellular:

•  Check that the GPS location currently has AT&T cellular coverage (

www.att.com/maps/wireless-coverage

)

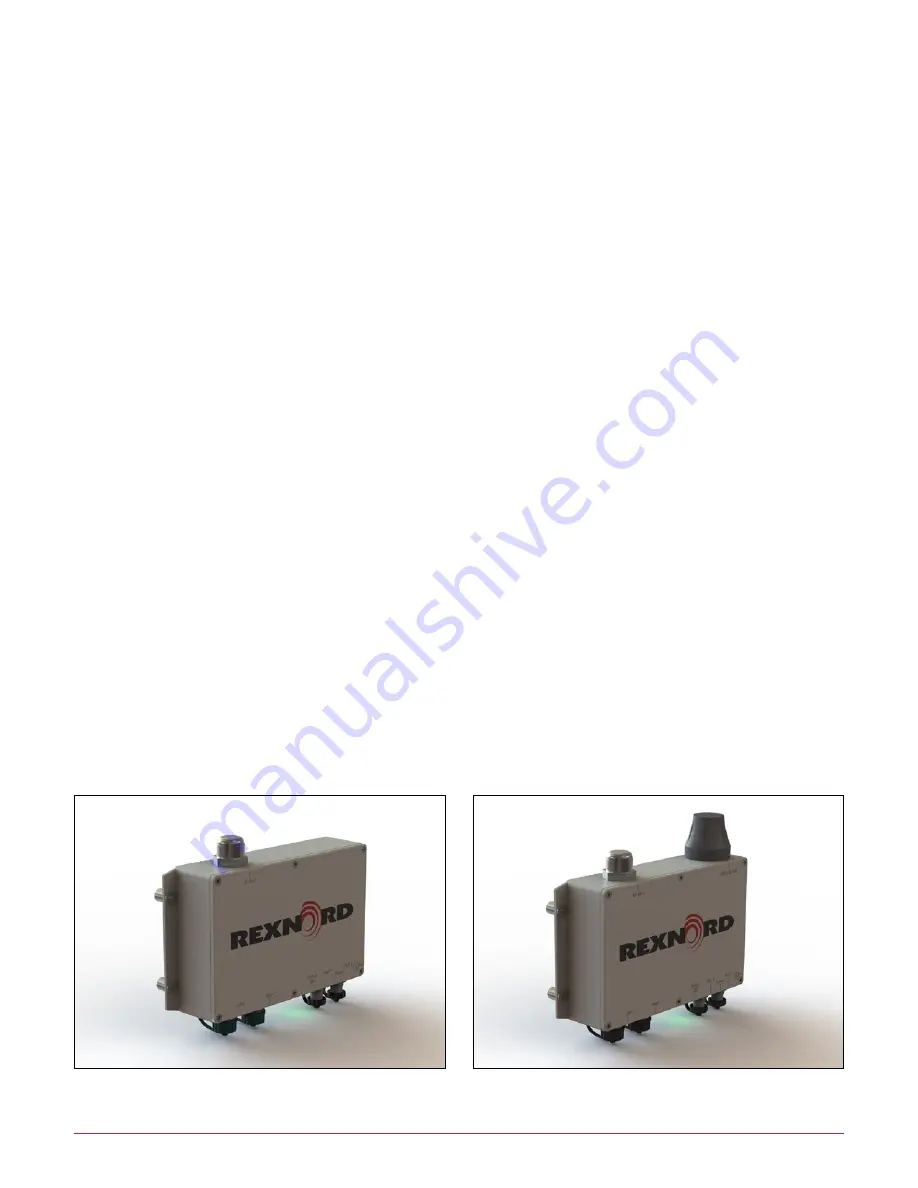
•  Check for excessive metal shielding around the cellular antenna that could impede cellular reception. The GPS/

Cellular antenna is the black round hyperbolic stack located at top-right of the edge device as shown in 

Figure 18

If excessive metal shielding exists, the unit will have to be hard-wired to ethernet via WAN connection.

b. If the WAN connection is hard-wired with Ethernet:

•  Check that the network settings allow functionality from the Edge device. Please see Rexnord Smart Condition 

Monitoring System Security Guidelines for additional details. (

SS5-001 

in the 

Rexnord Documentation Library

•  Verify external Ethernet cable to hard wired public internet is connected to “WAN” and the PLC Ethernet 

connection (if provided) is connected to the port marked “LAN”.

•  If the problem persists, contact 1-866-REXNORD.

13

Smart Condition Monitoring System Electrical and Communications Manual 

Appendix A: Troubleshooting

Figure 17 — Standard Serial Edge Device without cell data

Figure 18 —  Serial Edge Device with optional cell data

Appendix B: Enclosure Details

Содержание Smart Condition Monitoring System 1050

Страница 1: ...communications for all Rexnord Smart Condition Monitoring System models This work is intended for a licensed electrician as proper safety precautions should be taken when working with high voltage These instructions also cover how to connect the transducer used to monitor motor current when provided as part of the model package For details on sensor placement and attachment please refer to the pro...

Страница 2: ...ta Cable Connection 7 Transducer Connection 8 Network Connection Security Guidelines 12 PLC Interface Set Up 12 Appendix A Troubleshooting 13 Appendix B Enclosure Details 13 Appendix C FCC Statements 14 Safety Requirements The gear drive and power to Edge Device needs to be locked out during installation and troubleshooting ...

Страница 3: ...18 Mounting post 190V 220V gear drives only 2 19 Channel Nut with Spring 1 5 8 series 1 2 13UNC 2 20 Socket head cap screw M12x1 75 x 30mm grade 8 8 V Class 120V 180V 2 Socket head cap crew M12x1 75 x 45mm Grade 8 8 V Class 190V 220V 2 Socket head cap screw 5 16 18UNC x 5 8 A Plus and Y Unit 2 21 Lock washer M12 V Class 2 Lock washer 5 16 zinc plated A Plus and Y Unit 2 22 Flat washer M12 V Class ...

Страница 4: ...st be connected to AC power to operate The input power specifications include Nominal voltage 100V to 240V ac nominal 50 60Hz Maximum power 120 Watts Figure 2 Drawing of third generation Smart Condition Monitoring System Serial Edge Device showing variant with optional cellular antenna Figure 3 Serial Edge Device showing all available user connections 9 96 9 41 3 54 4X 0 26 8 64 7 87 2 68 4X 0 50 ...

Страница 5: ...orrect location in the connector front after slackening the core wire clamp screws Typically the wires will be black to L white to N and green to ground symbol on connector front See Figure 6 6 Hold the front of the connector very firmly with dry fingers and screw on the connector backshell Do not use tools or you will overtighten and break the connector Firmly hand tight will achieve a good IP65 ...

Страница 6: ... Device 3 100 240V ac power plug included with power supply Attach to customer supplied ac power lead see instructions above 4 Mating ac power plug on power supply that connects to newly terminated connector from 3 above 9 96 9 41 3 54 4X 0 26 8 64 7 87 2 68 4X 0 50 Figure 11 Reference schematic of power supply unit 1 3 4 2 7 13 181 2 2 09 53 2X 0 18 Ă 4 5 7 53 191 2 2 48 63 AC IN DC OUT VIEW OF P...

Страница 7: ... White Blue Blue White Green Brown White Brown pins 1 to 8 then trim to a neat straight line Steps G H then I to give J 4 Push the wires into the clear RJ45 connector Pin 1 is to the left when the cable is facing you and the tang is under the connector as shown in Step K 5 Crimp the wire cores into the RJ45 connector using suitable crimping pliers Step L 6 Gently pull the RJ45 plug back into the c...

Страница 8: ...Figure 14 Connecting to the Rexnord Edge Converter Box If the molded connector end of the CT cable is not already connected please attach to terminal 4 Yellow on the small black converter box mounted next to the Edge Figure 15 Mounting and Mechanical Din Rail Mounting tool needed 3mm blade screwdriver 1 Hook the stationary lip of the bottom case to one side of the 35mm DIN Rail The side without th...

Страница 9: ... the cable jacket 1 and strip each of the 2 core wires back to bare wire Step B 4 There are only 2 screw down terminals inside the cable joint Loosen insert a bared core wire and tighten the terminal and repeat It is not important at this stage which core wire is connected to which terminal Step C 5 Screw terminal cover onto cable joint slide down blue cable gland seal and insert into fingers then...

Страница 10: ... repeat 7 above ensuring the multimeter displays a positive voltage reading then disconnect the cable from the test box and connect it to the small black converter box 9 If the multimeter reads more than 5V dc or less than 5V dc further investigation by a qualified electrical technician is required If the signal is to the correct 4 20mA signal a multimeter connected red to red and black to black o...

Страница 11: ...re and tighten the terminal and repeat It is not important at this stage which core wire is connected to which terminal Step G 5 Screw terminal cover onto cable joint slide down blue cable gland seal and insert into fingers then slide down gland nut and loosely tighten Step H 6 Connect the 0 5V CT or PLC cable at the source end and connect the Polarity Test Box to the EN2 connector on the end of t...

Страница 12: ... dc or less than 5V dc If the voltage is out of range do not connect the CT cable to the converter box 11 If and only if a successful test was achieved remove the polarity test box and connect the EN2 connector on the end of the cable from the VSCC9001 to the lower Left Hand Yellow port on the converter box Check that after the equipment is back in service that motor power draw is being sent to th...

Страница 13: ...on currently has AT T cellular coverage www att com maps wireless coverage Check for excessive metal shielding around the cellular antenna that could impede cellular reception The GPS Cellular antenna is the black round hyperbolic stack located at top right of the edge device as shown in Figure 18 If excessive metal shielding exists the unit will have to be hard wired to ethernet via WAN connectio...

Страница 14: ...en the radiator and your body This transmitter must not be co located or operating in conjunction with any other antenna or transmitter FCC Class A digital device notice This equipment has been tested and found to comply with the limits for a Class A digital device pursuant to part 15 of the FCC Rules These limits are designed to provide reasonable protection against harmful interference when the ...

Отзывы: