Revo REHVD0309-1 Скачать руководство пользователя страница 6


REHVD0309-1, Quick Installation Guide 


3.3 Setting the admin password over a secure connection 

 
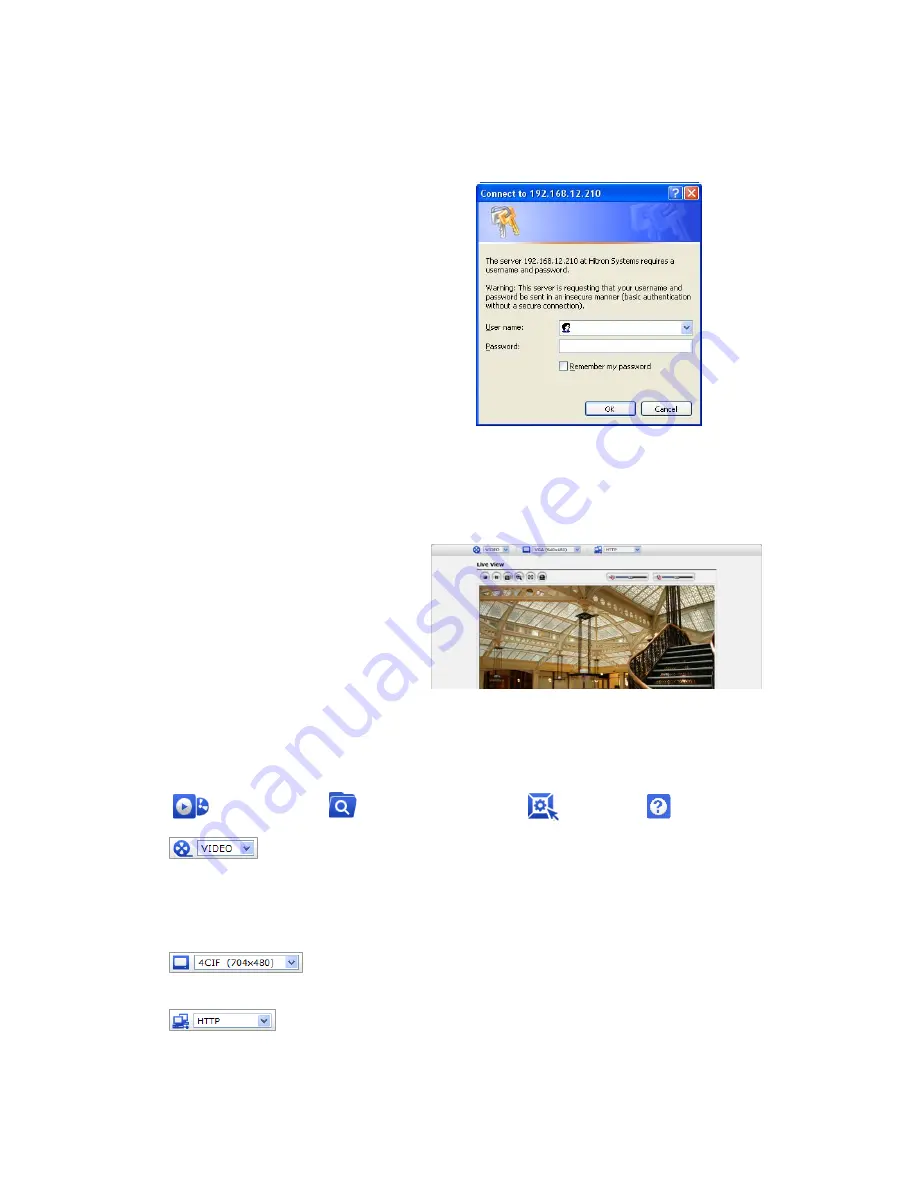
To gain access to the product, the password for 

the administrator must be set. This is done in the 

“Admin Password” dialog, which is displayed 

when the network 

camera 

is accessed for setup 

the first time. Enter your admin name and 
password. 

Note: The default administrator username and 

password is “admin”. If the password is lost, the 

Network Camera must be reset to the factory 
default settings. See “3.6 Resetting to the Factory 

Default Settings”. 


3.4 Live View Page 

 
The live view page comes in eight screen 

modes: 1920x1080, 1280x1024, 1280x720, 

720x480(576), 640x480, 352x240(288), 

and 320x240. Users are allowed to select 
the most suitable one out of those modes. 

Please, adjust the mode in accordance with 

your PC specifications and monitoring 

purposes. 


1) General 

controls 

 
                      Live View Page              Search & Playback Page              Setup Page              Help Page 


    The video drop-down list allows you to select a customized or pre-programmed 

video stream on the live view page. Stream profiles are configured under Setup > Basic 
Configuration > Video & Image. . For more information, please see “3.5.1 Basic Configuration > 
Video & Image” of User’s Manual. 


                                        The resolution drop-down list allows you to select the most suitable one 
out of video resolutions to be displayed on live view page. 


                                  The protocol drop-down list allows you to select which combination of 
protocols and methods to use depending on your viewing requirements, and on the properties of 
your network. 


6

Содержание REHVD0309-1

Страница 1: ...n the network as real time full frame rate Motion JPEG and H 264 or MPEG 4 video streams The alarm input and alarm output can be used to connect various third party devices such as door sensors and al...

Страница 2: ...monitored 2 Extension Cable 26pin camera extension cable Extension Cable NO Wire Color Description 1 Red AC24V DC12V White AC24V GND Main Power 2pin terminal DC12V AC24V max 4 0Watt 2 Green AC24V DC1...

Страница 3: ...deo Switch SW2 on the board to On position to output the video signal Video Output is restricted to VGA 640x480 resolution Caution After lens installation you must set the Video Switch to the Off posi...

Страница 4: ...the camera on the list and click right button of the mouse You can see the pop up menu as below 4 Select Assign IP you will see an Assign IP window Enter the required IP address Note For more informat...

Страница 5: ...k Live View or Setup to enter web page 4 The network camera s Live View page appears in your browser 3 2 Access from the internet Once connected the Network Camera on your local network LAN will be ac...

Страница 6: ...352x240 288 and 320x240 Users are allowed to select the most suitable one out of those modes Please adjust the mode in accordance with your PC specifications and monitoring purposes 1 General control...

Страница 7: ...to fill the entire screen area No other windows will be visible Press the Esc button on the computer keyboard to cancel full screen view The Manual Trigger button activates a pop up window to manually...

Страница 8: ...the Network Camera to the original factory settings go to the Setup System Maintenance web page described in 3 5 5 System Maintenance of the User s Manual or use the control button on the network cam...

Отзывы: