1
2
3
4
HOW TO USE
Place the appliance on a flat, level, water resistant surface, such as
on a desk.
Filling the unit:
1. Before filling the unit ensure that it is not plugged into the mains.
2. Extract the water tank and fill with water, fill to the MAX water level
indicator which can be found on the inside of the tank. Do not
exceed this level.
3. Insert the water tank back in the device.
Before starting any treatment always ensure that the water tank
is filled to the MAX level, ensuring the water tank is full will give
approximately 20 minutes of usage.
Live in a hard water area? Please use filtered tap water:
If you live in a hard water area where lime scale build-up in kettles
and on surfaces/taps/shower heads is common, then it is important to
only use filtered tap water in this appliance. Using non-filtered water
can lead to irreparable damage to the appliance, any failure caused
by lime scale build-up is not covered by the guarantee.
Switching On:
1. Insert the plug into a power outlet, ensure that the voltage of the
outlet matches the operating voltage of the appliance.
2. Press the power switch once (the white LED will be low white), the
device will activate a timer and will switch off automatically after
15min. Press the power switch twice if you want to activate a 20
minutes timer (the white LED will be a brilliant white). Once the
device is switched on, the warm steam is released after about 40
seconds. It is normal for hot water droplets to be discharged at
the beginning of the steam flow.
3. Keep your face at least 25 cm away from the edge of the steam
outlet.
4. Adjust the angle (up/down) of the nozzle. Whilst adjusting the
nozzle take care not to touch the steam. Directing the steam onto
your nose is effective on the T-zone.
5. Press the button for a third time, if you want to switch the device
OFF and stop the timer. When the device is out of water, a red
LED ring will show around the power switch. Do not operate
the appliance if it contains no water. Doing so will quicken the
accumulation of lime scale, which may result in poor steam
discharge.
6. After use, remove any surface moisture from the treated area with
a face towel, or paper tissue, and then apply a lotion to further
moisturize your skin.
CLEANING
Remove the plug from the power outlet before extracting the water
tank. Be sure to discard the water in the tank after every use. Wipe off
any water from the appliance.
Do not wash or soak the appliance in water.
Wipe the appliance with a cloth moistened with soapy water. Never
use alcohol, thinner, benzine, enamel remover, etc. Doing so may
result in damage to the appliance.
Even after draining the water, some water will remain in the appliance.
This does not cause any sanitary problems since the water will be
boiled during the next treatment.
If you see lime scale build up in the bottom of the unit where the
water tank would normally sit, then this can be removed using a small
amount of white vinegar, add a few drops of vinegar, enough to cover
the scale, leave to soak for 10 minutes, and then tip out, this can be
repeated as and when necessary.
STORAGE
Always unplug when not in use. Always store in a dry location.
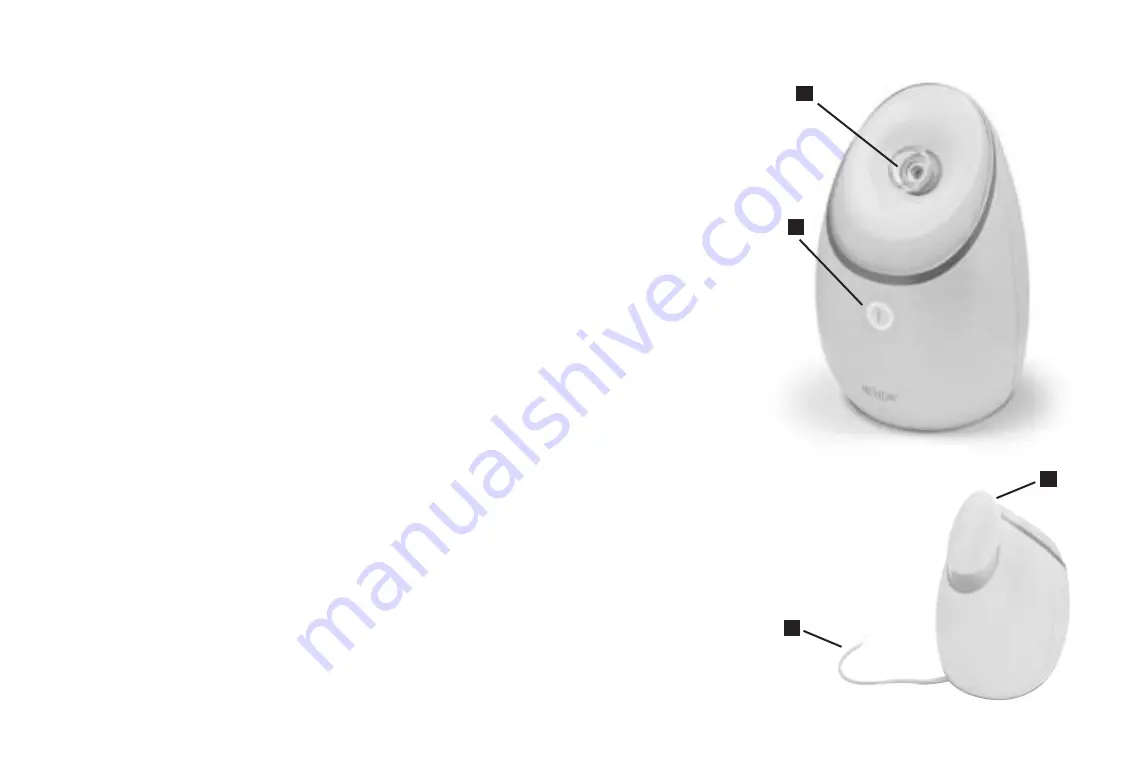
FEATURES
1. Nozzle
2. Power/Timer switch
3. Cord
4. Water tank
GUARANTEE AND SERVICE
Your Revlon appliance is guaranteed against defects under normal use
for three years from the original date of purchase. If your product does
not perform satisfactorily because of defects in materials or manufacture
within the warranty period, it will be replaced. Please retain your till
receipt or other proof of purchase for all claims within the warranty
period. The guarantee becomes void if the proof of purchase is not
presented. For all claims within the warranty period please contact your local
Authorised Service Centre, or local Distributor, for the full list of Authorised
Service Centre’s and Distributors please refer to the enclosed booklet. This
Guarantee does not cover defects which have occurred due to misuse,
abuse, or are caused by failure to follow the instruction contained within this
manual. This does not affect your consumer statutory rights. You may be
asked for the following information when contacting one of our Authorized
Service Centres or your local Distributor.
Production date: This is given by the 4 digit Batch Number marked on the
rear of the product. The first 2 digits represent the week of manufacture, and
the last 2 digits represent the year of manufacture.
E.g.: 3415 - product manufactured week 34 of the year 2015.
For more information regarding Revlon appliances, contact your
Authorised Service Centre, or Local Distributor:
For product information, visit us at: www.hot-europe.com


