background image

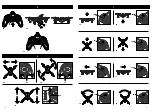
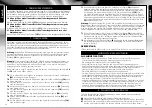
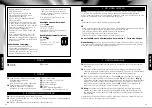
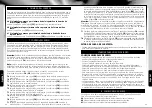
9A Switching to Mode 1:

• Hold control 

2A

 to the top left and control 

2B

 to the top right

• Simultaneously switch the ON/OFF switch 

2F

 to ON (the model remains off)

• To calibrate the controls rotate 

2A

 and 

2B

 completely at least twice

• Then press and hold a trim button for at least two seconds

9B Switching to Mode 2:

• Hold control 

2A

 and 

2B

 to the top left

• Simultaneously switch the ON/OFF switch 

2F

 to ON (the model remains off)

• To calibrate the controls rotate 

2A

 and 

2B

 completely at least twice

• Then press and hold a trim button for at least two seconds

9C Reversal of the control direction of the controls

The control direction of the controls can be adjusted in the setup menu. Only use this

function if you have already gathered adequate experience operating the 

model (Mode 2, the model is switched on):

• Hold the control for thrust 

2A

 all the way down 

• Simultaneously press the control for forward/backwards 

2B

 down vertically for at 

least one second. 

• The display shows SE. Now the control directions of the axes are reversed with the 

trim buttons. 

• To save the settings and exit the menu, press the control for forward/backwards  

2B

 down vertically for at least 2 seconds

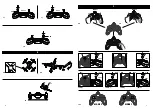
9D Sensitivity of the controls

The flying speed of the model can be adapted by changing the sensitivity of the  

controls. Only use this function if you have already gathered adequate experience with 

the model (Mode 2, the model switched on):

1.    Hold the control for thrust 

2A

 all the way down and hold. Press the control for  

forward/backwards 

2B

 down vertically for at least one second. When SE appears in 

the display, release all controls.

2.   Now push the control for thrust 

2A

 down vertically. Each time it is pressed again, 

you switch between rotation, forwards/backwards and banking. Three blinking dots 

in the trim strip indicate what can currently be changed.

3.  By pressing the appropriate trim button, the sensitivity can be adjusted between  

a value of 20 (slow) and 60 (fast).

4.  To save the settings and exit the menu, press the control for forward/backwards  

2B

 down vertically for at least 2 seconds.

9E Recalibration of the sensors

Sometimes it is necessary to recalibrate the gyro sensors of the model. Before starting 

the recalibration, the battery must be fully charged and the rotors must be inspected 

for damage. If the model continuously drifts in one direction and the trim does not 

provide sufficient compensation, proceed as follows:

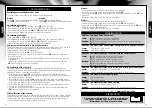
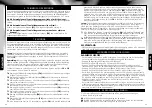
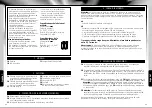
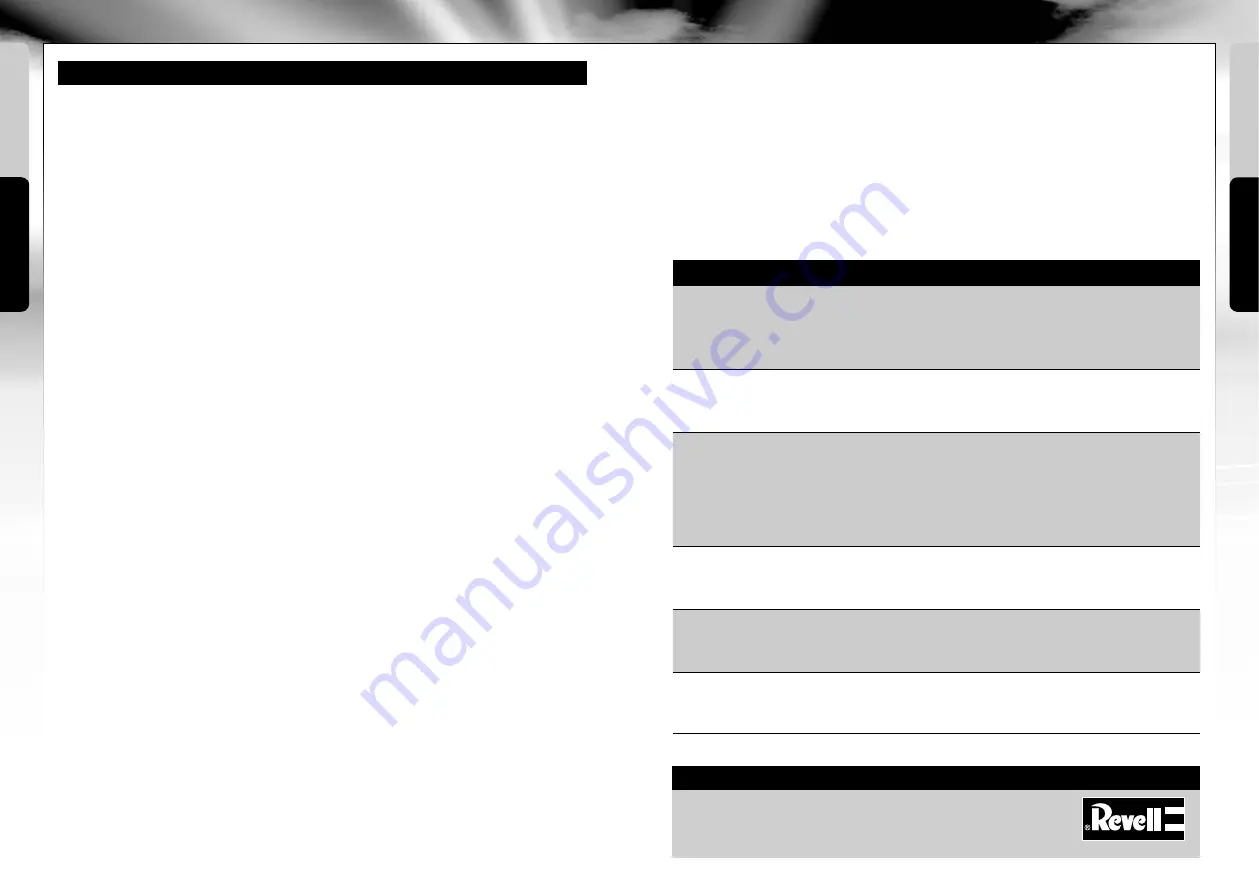
9   ADVANCED SETTINGS

Switching between Flight mode 1 and 2

The term flight mode refers to the assignment of the controls:

Mode 2:

• The model and remote control are switched on and paired

• Switch to the second speed level by pressing control 

2B

• Now hold control 

2A

 to the bottom right and simultaneously move control 

2B

 back 

and forth

• When the status LEDs blink, the process is finished

Mode 1:

• The model and remote control are switched on and paired 

• Switch to the second speed level by pressing control 

2B

 down vertically

• Now hold control 

2A 

to the bottom right and simultaneously hold control 

2B

 down 

and move quickly back and forth

• When the status LEDs blink, the process is finished

Mode 1

Control 

2A

: Forward/backwards and rotation

Control 

2B

: Thrust and banking

Mode 2

Control 

2A

: Thrust and rotation

Control 

2B

: Forwards/backwards and banking

English

English

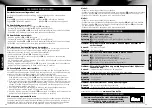
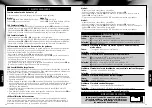
TROUBLESHOOTING

Problem: The propellers do not move.

Cause: 

A) 

No connection has been established.

B) 

The battery is too weak or depleted.

Remedy:  A) 

Switch everything off and switch on again in the correct sequence.

B) 

Charge the battery.

Problem: The model stops and descends during flight for no apparent reason.
Cause: 

• The battery is too weak. 

Remedy: 

• Charge the battery.

Problem: The model cannot be controlled with the remote control.
Cause:

A) 

The ON/OFF switch is in the „OFF“ position.

B) 

The batteries were not inserted correctly.

C) 

The batteries do not have enough power.

Remedy: A) 

Set the ON/OFF switch to the „ON“ position.

B) 

Check whether the batteries are inserted correctly.

C) 

Insert new batteries

Problem: The model only turns on its vertical axis or rolls over when started.
Cause:

• Incorrect arrangement of the propellers.

Remedy:

• Install the propellers and arms as outlined in the manual.

Problem: The model will no longer fly loops.
Cause:

• Battery too weak.

Remedy:

• Charge the battery.

Problem: The model overturns when starting.
Cause:

• The rotors are mounted incorrectly.

Remedy:

• Mount rotors A and B according to the assembly instructions.

22

23

Additional tips and tricks can be found online at 

www.revell-control.de

.

www.revell-control.de

SERVICE NOTES

Go to www.revell-control.de for ordering information 

and tips on replacing spare parts, plus other useful 

information  on all Revell Control models.

Содержание PURE

Страница 1: ...REVELL IS THE REGISTERED TRADEMARK OF REVELL GMBH GERMANY Made in China 23921 2 SPEED LEVEL HEADLESS MODE ERSATZTEILE REPLACING SPARE PARTS EPIÈCES DÉTACHÉES RESERVEONDERDELEN PIEZAS DE REPUESTO PEZZI DI RICAMBIO V 01 06 43672 Rotor Set Rotor Satz 43673 43674 Battery Protection rings Akku Schutzringe ...

Страница 2: ...g www revell control de 2016 Revell GmbH Henschelstr 20 30 D 32257 Bünde A subsidiary of Hobbico Inc REVELL IS THE REGISTERED TRADEMARK OF REVELL GMBH GERMANY Made in China 23921 2 SPEED LEVEL HEADLESS MODE Modello Modelo Model Modèle Model Modell USB Ladegerät Zubehör Schutzring USB charger Accessories protective ring Chargeur USB Accessoires anneau de protection USB lader Toebehoren beschermring...

Страница 3: ... X M1 M2 Expert T X R X M1 M2 Expert 5 5A 5C 5B 7 2D T X R X M1 M2 Expert 2A 2B 2F 7A 7B T X R X M1 M2 Expert 2A T X R X M1 M Expert 2A 7C 7D T X R X M1 M2 Expert 2B T X R X M1 M2 Expert 2B 7E 7F T X R X M1 M2 Expert 2B T X R X M1 M2 Expert 2B 7G 7H T X R X M1 M2 Expert 2A T X M1 Expert 2A 4 5 ...

Страница 4: ... 2 Sec 7K A A B B A A A A A A B B B B A A A B B 8A T X R X M1 M2 Expert 9 9A 9B 10C 10D 1 10D 2 10D 3 10D 4 10E 1 Sec 2 Sec MODE 2 MODE 1 MODE 1 MODE 2 2 Sec T X R X M1 M2 Expert 1 Sec T X R X M1 M2 Expert 2C 2E 2D T X R X M1 M2 Expert 2C 2E 2D 2A 2A 2B 2B 2B 2B 2A 6 7 ...

Страница 5: ... wird Sicherheitshinweise zum Ladegerät Nicht wiederaufladbare Batterien dürfen nicht geladen werden Dieses Ladegerät ist nicht geeignet für Personen einschliesslich Kindern mit körperlichen oder geistigen Einschrän kungen oder mit unzu reichender Kenntnis und Erfahrung mit Ladegeräten ausser unter Aufsicht oder nach sachkundiger Anleitung durch einen Erziehungsberechtigten Kinder müssen beaufsich...

Страница 6: ...en ca 15 30 Minuten abkühlen andernfalls können sie beschädigt werden Der Ladevorgang ist ständig zu überwachen Für den Aufladevorgang ist immer auf eine feuerfeste Unterlage und eine brandsichere Umgebung zu achten 4A Zum Laden den Akku aus dem Modell entfernen 4B Den USB Stecker des USB Ladegeräts in eine beliebige USB Schnittstelle an einem Computer oder ähnlichem mit mindestens 500 mA Leistung...

Страница 7: ...F Um nach rechts zu fliegen den Regler Vor Zurück und seitwärts 2B vorsichtig nach rechts bewegen 7G Um das Modell links herum zu drehen den Regler für Schub und Drehung 2A nach links bewegen 7H Um das Modell rechts herum zu drehen den Regler für Schub und Drehung 2A nach rechts bewegen 7I Ein senkrechter kurzer Druck etwa 0 3 Sekunden auf Regler 2A aktiviert den Headless Mode Der Headless Mode un...

Страница 8: ... und 60 schnell einstellen 4 Zum Speichern und Verlassen des Menüs Regler für Vor Zurück 2B mindestens 2 Sekunden lang senkrecht nach unten drücken 9E Neu Kalibrierung der Sensoren Manchmal kann es nötig sein dass die Gyro Sensoren des Modells neu kalibriert werden müssen Bevor Sie die Neu Kalibrierung starten bitte erst den Akku voll laden und die Rotoren auf Beschädigungen überprüfen Driftet das...

Страница 9: ...arging units unless under supervision or following proper directions from a parent or legal guardian Children must be supervised the charging unit is not a toy The charging unit for the LiPo battery is specially designed for the charging of the model battery The charging unit may only be used to charge the model battery not other batteries Transformers mains adapters or chargers that are used toge...

Страница 10: ...ot included 2 REMOTE CONTROL 2A Control for thrust and rotation Briefly press vertically Headless mode Longer vertical pressing Flip function 2B Control for forward backwards and banking Briefly press vertically Second speed level 2C Trim for rotation 2D Trim for forwards backwards 2E Trim for sideways 2F ON OFF switch 2G Display 2H Only with control mode 1 Trim for forwards and backwards 1 MODEL ...

Страница 11: ...ght always corresponds exactly to the direction specified with the control for forwards backwards and sideways move ment 2B An example If the model were to be turned 180 and flown towards the operator the operator would have to convert the forwards backwards and sideways movement accordingly This is no longer necessary if headless mode is activated as the internal processor always converts the con...

Страница 12: ...ully charged and the rotors must be inspected for damage If the model continuously drifts in one direction and the trim does not provide sufficient compensation proceed as follows 9 ADVANCED SETTINGS Switching between Flight mode 1 and 2 The term flight mode refers to the assignment of the controls Mode 2 The model and remote control are switched on and paired Switch to the second speed level by p...

Страница 13: ...circuiter les bornes de raccordement Retirer les piles de la télécommande si celle ci n est pas utilisée pendant une période prolongée Consignes de sécurité pour le chargeur Ne pas recharger les piles jetables Ce chargeur ne doit pas être utilisé par des personnes enfants y compris souffrant d un handicap physique ou mental ou n ayant pas assez de connaissances ou d expérience en ce qui concerne l...

Страница 14: ... modèle Alimentation Puissance nominale 1 x DC 3 7 V 2 Wh Batterie Li Po rechargeable incluse Capacité 520 mAh Indications relatives à la batterie aux piles de la télécommande Alimentation DC 6 V Piles 4 x 1 5 V AAA non incluses 2 TÉLÉCOMMANDE 2A Régulateur de poussée et de rotation Courte pression verticale Mode headless Longue pression verticale Fonction flip 2B Régulateur de déplacement avant a...

Страница 15: ...on opposée car quelle que soit l orientation du quadricoptère la direction de vol correspond toujours exactement au sens dans lequel le régulateur de déplacement avant arrière et de translation latérale 2B commande d appareil Un exemple Si le pilote faisait pivoter le modèle à 180 et voler vers lui il devrait changer de perspec tive pour le déplacement avant arrière et la translation latérale c es...

Страница 16: ...ecalibration veuillez d abord charger complètement la batterie et vérifier que les rotors ne sont pas endommagés Si le modèle continue à dériver dans la même direction et que la course de compensation ne suffit pas à en corriger la trajectoire veuillez procéder comme suit 9 PARAMÈTRES ÉTENDUS Basculer entre les modes de vol 1 et 2 Le terme mode de vol désigne la programmation des leviers de comman...

Страница 17: ...e lader is niet geschikt voor kinderen en voor personen met lichamelijke of geestelijke beper kingen of met ontoereikende kennis over en ervaring met laders behalve onder toezicht van of na vakkundige instructie door een persoon die bevoegd is om de ouderlijke macht uit te oefenen Op kinderen moet toezicht worden gehouden de lader is geen speelgoed De lader is specifiek afgestemd op het laden van ...

Страница 18: ...t model Voeding Nominaal vermogen 1 x DC 3 7 V 2 Wh Oplaadbare LiPo accu inbegrepen Capaciteit 520 mAh Benodigde batterijen accu s voor de zender Voeding DC 6 V Batterijen 4 x 1 5 V AAA niet inbegrepen 2A Regelaar voor liftkracht en draaiing Kort loodrecht indrukken Headless Mode Lang loodrecht indrukken flipfunctie 2B Regelaar voor voor achteruit en zijwaarts vliegen Kort loodrecht indrukken twee...

Страница 19: ...dt gestuurd met de regelaar voor vooruit achteruit en zijwaarts vliegen 2B ongeacht de draaiing die het toestel heeft ten opzichte van de piloot Een voorbeeld als het model 180 gedraaid is en u het naar u toe wilt laten vliegen moet u voor uw gevoel achteruit vliegen en links en rechts omwisselen Als de Headless Mode is geactiveerd is dat niet meer nodig omdat de interne processor de stuurrichting...

Страница 20: ...nieuw te kalibreren Controleer voordat u het model opnieuw kalibreert of de accu vol is en de rotoren niet beschadigd zijn Als het model nog steeds wegdrijft in een richting en het beschikbare trimbereik niet voldoende is om dit te compenseren ga dan als volgt te werk 9 GEAVANCEERDE INSTELLINGEN Omschakelen tussen vliegmodus 1 en 2 Het begrip vliegmodus heeft betrekking op de toewijzing van de stu...

Страница 21: ... al cargador Las baterías no recargables pilas no se deben recargar Este cargador no es adecuado para personas niños incluidos con limitaciones físicas o mentales o cuyos conocimientos o experiencia en el manejo de cargadores sea insuficiente salvo que estén super visados o hayan recibido las instruc ciones pertinentes por parte de un adulto responsable Los niños no deben utilizar en ningún caso e...

Страница 22: ...tarlo es necesario desmontar los cuatro rotores A continuación se debe montar el anillo protector desde arriba y encajarlo a presión El modelo no se debe volar sin el anillo protector Apague primero el helicóptero y a continuación la emisora al terminar de volar Desenchufe la batería del modelo y extraiga la batería del modelo El proceso de carga se debe realizar siempre sobre una superficie igníf...

Страница 23: ...el modo Headless o si la dirección de control ya no concuerda debido a una colisión es necesario reiniciar el modelo ESTADO DE CARGA DE LA BATERÍA Cuando el modelo pierde potencia quiere decir que la batería se está agotando Aterrice para evitar que el modelo se estrelle 7J Pulsando de forma prolongada en vertical unos 2 segundos la palanca 2A se activa la función Flip El siguiente movimiento con ...

Страница 24: ...r necesario recalibrar los sensores giroscópicos del modelo Antes de recalibrar se debe comprobar si la batería está completamente cargada y si los rotores presentan daños Proceda de la siguiente forma si el modelo continúa derivando en una dirección y se ha agotado el trimado 9 AJUSTES AVANZADOS Cambio entre el modo de vuelo 1 y 2 El término modo de vuelo designa las funciones de las palancas Mod...

Страница 25: ...tempo Avvertenze di sicurezza sul caricabatterie Non ricaricare batterie monouso Questo caricabatterie non è adatto a persone incluso bambini con ridotte capacità motorie o mentali oppure con scarsa conoscenza ed esperienza con i caricabatterie salvo non sorvegliati o guidati da un adulto esperto I bambini devono essere controllati il caricabatterie non è un giocattolo Il caricatore per le batteri...

Страница 26: ... batterie monouso ricaricabili del radiocomando Alimentazione DC 6 V Batterie 4 x 1 5 V AAA non in dotazione 5 PREPARAZIONE DELL AVVIO 5A Per avviare il modello attivare per prima cosa il radiocomando e inserire le batterie nell apposito vano del modello 5B Collegare poi la presa della batteria con la presa di collegamento del modello e collocare il modello su una superficie piana regolare e solid...

Страница 27: ...onde sempre esattamente alla direzione impostata con il regolatore di volo per volo in avanti indietro e laterale 2B Un esempio Per girare il modellino di 180 e farlo volare verso di sé è necessario controllare il volo in avanti indietro e laterale in modo contrario a quanto si farebbe normalmente Con la modalità Headless ciò non è più necessario in quanto il processore interno converte sempre aut...

Страница 28: ...urarsi di ricaricare completamente le batterie e controllare che i rotori non siano danneggiati Se il modello sbanda sempre nella stessa direzione e il percorso di regolazione non è sufficiente per la compensazione procedere come segue 9 IMPOSTAZIONI AVANZATE Commutazione tra le modalità di volo 1 e 2 Il termine modalità di volo si riferisce alla configurazione dei regolatori di comando Modalità 2...

Страница 29: ...eses Produkt in Übereinstimmung mit den grund legenden Anforderungen und den übrigen einschlägigen Bestim mungen der Richtlinie 1999 5 EC befindet Die Konformitätserklärung ist unter www revell control de zu finden Legge sui rifiuti elettronici Una volta concluso l utilizzo rimuovere le batterie e smaltire separatamente i vecchi apparecchi elettrici presso i punti di raccolta comunali per i rifiut...

Отзывы: