


5
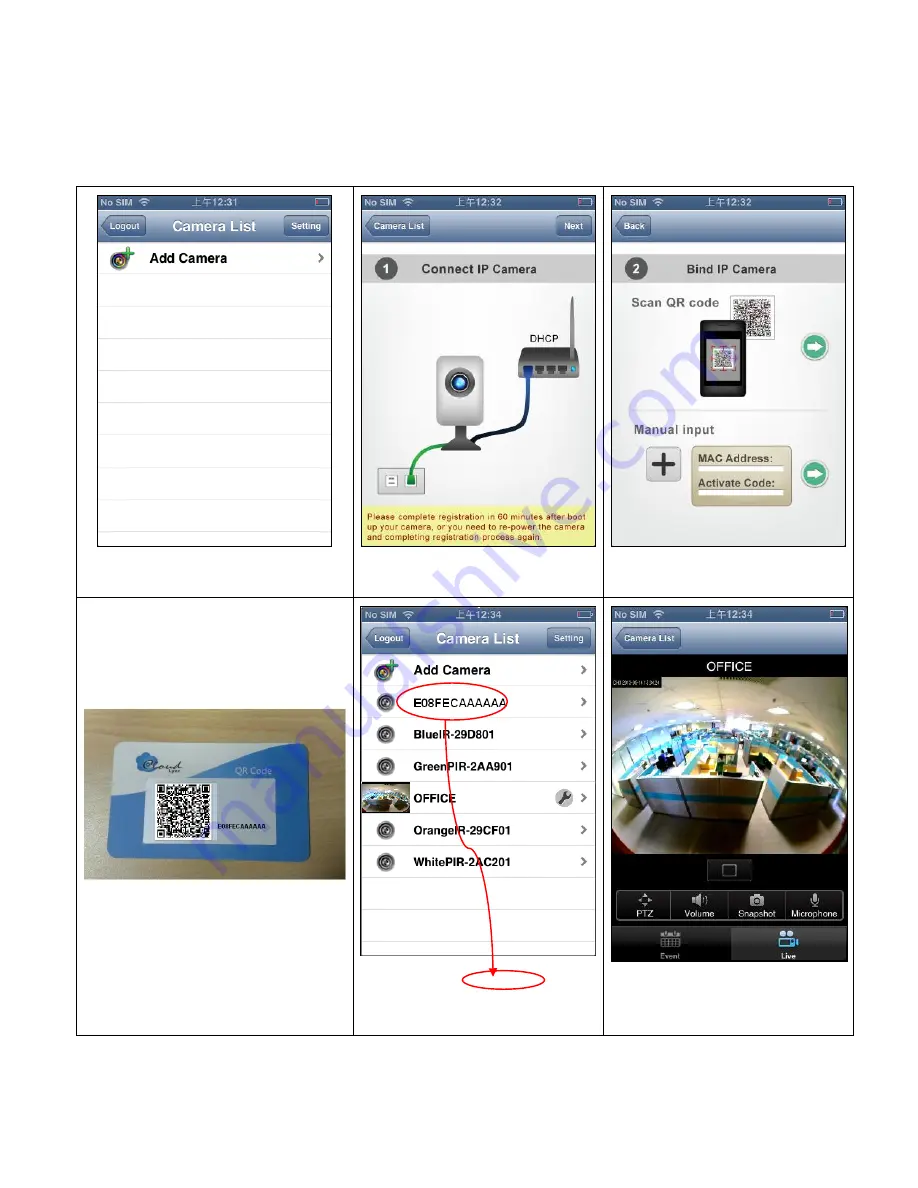
3. With CloudLync account successfully implemented, the “Camera List” dialog will display to
prompt you to start the new Camera(s) registration process as described below
:
NOTE:
Make sure the Camera(s) is properly connected with Internet.
1) Touch the
“Add Camera” button
2) Touch
the “Next” button
3) Get ready to scan the new Camera QR
Code card (see Figure 3-4 below) with
smartphone/tablet.
4) After scanning the QR Code card, touch
the “Next” button
5) MAC Address of the new Camera will
be treated as its default name. While
new Camera is added to the existing
list, just touch the Camera name to
view the on-line video
6) Live on-line video is now on display.


