Version 01/10
°
Digital Key Fob
Item-No. 95 47 08
Intended Use
By using the integrated display and rechargeable battery, the product is intended to be used as
a portable mini picture frame. The device has a inbuilt memory of 8 MByte.
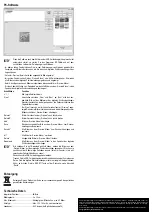
When the product is connected to a PC with Windows XP/Vista, the integrated software starts.
which enables the transfer of images.
No part of the product should be modified or reassembled.
Read the user manual carefully and fully before using the product for the first time, pay attention
to all the safety instructions and information in this user manual.
This product complies with the applicable National and European regulations. All names of com-
panies and products are the trademarks of the respective owner. All rights reserved.
Package Contents
• Digital key fob
• USB cable
• Operating Instructions
Safety Instructions
Please read all the instructions before using this device, they include impor-
tant information on its correct operation. The warranty will be void in the
event of damage caused by failure to observe these safety instructions! We
do not assume any liability for any consequential damage!
Nor do we assume any liability for material and personal damage caused by
improper use or non-compliance with the safety instructions! The warranty
will be void in such cases.
The unauthorized conversion and/or modification of the product is inadmissible for
reasons of safety and approval (CE).
The product is not a toy and should be kept out of the reach of children. The prod-
uct contains glass parts (the display). Moreover, it contains small parts that can be
swallowed, and a rechargeable battery.
Do not carelessly leave the packaging material lying around since it could become
a dangerous plaything for children.
Handle the product carefully, it can be damaged by impacts, blows or by falling from
a low height.
Notes on the rechargeable battery & recharging the
rechargeable battery
• Before using for the first time it needs to be charged for approx. 7 hours; after this, the recharg-
ing normally takes about 5-6 hours.
If you do not want to keep your computer on while recharging, we recommend you connect the
product to a USB hub with its own power supply (provided, the USB hub does not enter a spe-
cial power saving mode when the computer to which it is connected is switched off).
• Only recharge the battery via a computer’s USB port or a USB hub.
• If the product is not to be used for a while, recharge the battery at least every 2 months in order
to avoid a deep discharge and thus damage to the battery.
• The integrated rechargeable battery cannot be replaced. Therefore, do not dismantle the
product.
Switching On/Off
• Keep the „MENU“ key pressed for 3 seconds, to switch the device on or off.
☞
When using for the first time, the integrated rechargeable battery is flat and it must
be charged first, see „Notes on the rechargeable battery“.
• To switch the product off, the „MENU“ button can also be pressed briefly, following that, select
the menu option „Power off“, using the keys „UP“ or „DOWN“ and briefly press the „MENU“ key
again. Then select „Yes“ at the confirmation prompt, using the „UP“ or „DOWN“ key, and briefly
press the „MENU“ key.
Time Display
• First turn on the device, see above.
• Then press the „UP“ or „DOWN“ key, and keep it pressed for 4 seconds, to show or hide the
time display.
Ꮨ
O P E R A T I N G I N S T R U C T I O N S
Selecting and Using the Main Menu
To select the main menu, press the „MENU“ key while the device is switched on. The individual
menu options can be selected using the keys „UP“ or „DOWN“, confirm the selection by briefly
pressing the „MENU“ button.
If you have selected a function and you do not confirm with a key within a few seconds, the menu
will be exited automatically; unsaved settings might be lost.
• „USB Connect“ function
Select this function, after you have connected the digital key fob to the PC. When the follow-
ing confirmation prompt („Yes“ or „No“) is confirmed with „Yes“, a new drive is displayed in the
Windows file manager, where the software is located.
☞
When connecting for the first time, the Windows hardware recognition appears and
the required driver will be installed automatically.
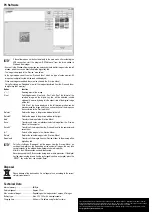
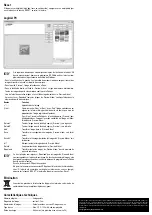
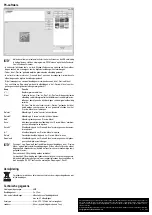
If you want to transfer images, start the program „DPFMate.exe“ (if the program does not start
automatically). This software is required to manage images on the digital key fob (to add new
images or delete existing ones).
• „Slide Show“ function
With the „UP“ and „DOWN“ keys, you can set the intervals for the automatic
slide show. If the time is set as „00“, the automatic slide show is switched off. Confirm the set-
ting, by briefly pressing the „MENU“ button.
• Function „Auto Off“
Using the „UP“ and „DOWN“ keys, you can set the time after which the device will
switch off automatically, if no key is pressed. If you set the time to „00“ minutes, the device only
switches off when the rechargeable battery battery is low. Confirm the setting, by briefly press-
ing the „MENU“ button.
• „Power Off“ function
After this function is selected, „Yes“ and „No“ appear on the display. If you select „Yes“, and
press the „MENU“ key briefly, the device will be switched off. If you choose „No“, you will be
returned to the main menu.
• Function „LCD Contrast“
This option lets you set the desired contrast for the LCD display, by using the keys „UP“ and
„DOWN“. Confirm the setting, by briefly pressing the „MENU“ button.
• „Backlight“ function
This option lets you set the desired display brightness by using the keys „UP“ and „DOWN“.
Confirm the setting, by briefly pressing the „MENU“ button.
• „Display Clock“ function
Select between „Digital Clock“ and „Analogue Clock“, using the keys „UP“ and „DOWN“, and
confirm the selection with the „MENU“ button; a digital or analogue clock will be shown in the
display.
To exit the clock display, briefly press the „MENU“ button.
• „Set Clock“ function
With this option, the date and time can be set. Change the corresponding value, by using the
„UP“ or „DOWN“ key. Change to set the next value, by briefly pressing the „MENU“ key (order:
year, month, day hour, minute, second, day of week).
After confirming the weekday setting and confirming with the „MENU“ button, you automati-
cally return to the display of the images.
• Function "Stopwatch"
To take the time (max. 59 minutes and 59.99 seconds), you can use the stopwatch's
„Stopwatch“ function.
Press the „MENU“ key to start the stopwatch.
Press the „MENU“ key again to stop the stopwatch.
To reset the stopwatch, keep the key pressed (press MENU key). Then press the „DOWN“ key.
After this, you can start timing from zero again.
Press the „UP“ key to exit the stopwatch function.
☞
When 00:00:00 is shown on the display, the stopwatch function cannot be exited to
return to the main menu. First, you must start the stopwatch and then stop the
timing (do not reset). Then, you can return to the main menu using the „UP“ key.
• „Delete One“ function
With this function you can delete the image, which was shown before selecting the main menu.
After a confirmation prompt („YES“ = yes, delete image) and confirmation with the „MENU“
key, the image will be deleted. Deleted images cannot be recovered!
If you select „No“ (=no, do not delete) at the confirmation prompt, and confirm with the „MENU“
button, you exit the menu and the image is shown in the display again.
• „Delete All“ function
With this function, you can delete all the images on the digital key fob. After a confirmation
prompt („YES“ = yes, delete all images) and confirmation with the „MENU“ key, all the images
will be deleted. Deleted images cannot be recovered!
If you select „No“ (=no, do not delete) at the confirmation prompt and confirm with the „MENU“
button, you exit the menu; the images are not deleted.
• „Exit“ function
After confirming with the „MENU“ button, the main menu is exited.
Reset
If the device does not react any longer (even though the rechargeable battery is not flat), press
the „RESET“ key, which is located in the countersunk hole on the rear, using a sharp object
(e. g. toothpick).

