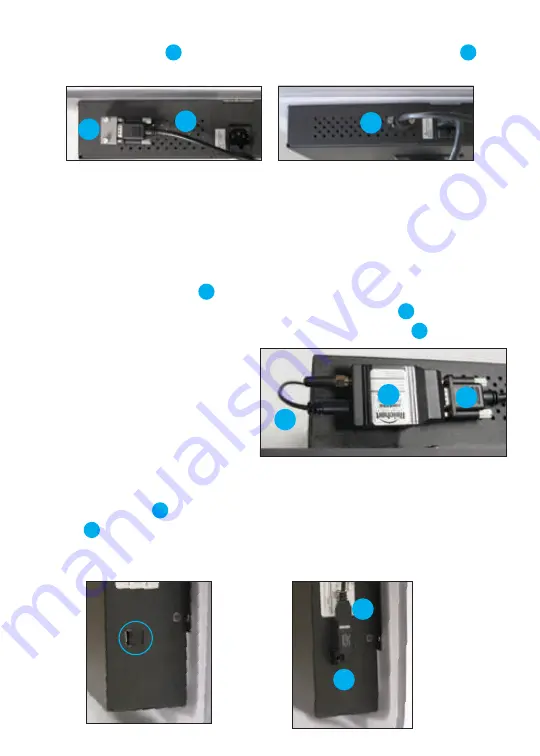
Continue connecting ClearChart 2 to the Wireless Dongle by plugging in
the Extension Cable
4
into either the Right Angle Serial Adapter
7
or
directly into the serial port (
A
) – depending on model.
ClearChart 2 w/ serial port
at bottom left corner
ClearChart 2
w/ serial port at bottom center
A
7
4
4
NOTE:
Once the Extension Cable is connected, you can easily run the cable up to the top
of the ClearChart 2 between the ClearChart 2 and the wall, in the space allowed by the
ClearChart 2’s wall bracket. If desired, Cable Tie Mounts and Cable Ties are provided to
secure the cable.
Affix the Wireless Dongle
1
to the top left corner of the ClearChart 2
with provided Fasteners, then connect Extension Cable
4
routed up the
back of the ClearChart 2 unit. Connect USB Power Cable
5
.
NOTE:
There are some models of
ClearChart 2 not configured with USB
ports, therefore the Wireless Dongle will
need to be powered via the AC-Power
Supply instead (not shown).
For this configuration, the
USB port (
B
) on the left side
of ClearChart 2 will power the
Wireless Dongle by using the
USB Power Cable
5
. For easier USB port accessibility a Flexible USB
Adapter
6
is supplied. If desired, Cable Tie Mounts and Cable Ties are
provided to secure the USB power cable or hide it from view.
ClearChart 2 USB port
B
ClearChart 2 w/ USB Power
Top left corner of ClearChart 2.
1
5
4
6
5


