background image

-7- 


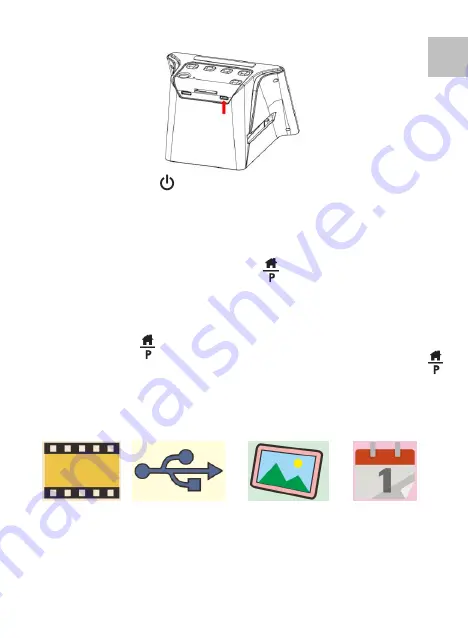
Press the Power      Button of your scanner to turn on the 
electric  power.  You  will  see  a  pop  up  screen  of  Home 
Page  on  the  LCD,  select  the  item  you  want  to  operate. 
There are 4 items (icons) for selection. 
 

Note: The Home Page and the        Button 

The Home Page is an important page for the operation of 
the  scanner.  From  the  Home  Page  you  can  go  to  the 
preview mode of the scanner for scanning film directly by 
pressing  the        Button  once  again,  after  all  the  settings 
for  the  film  are  made.  You  may  frequently  use  the                     
Button in the operations of the scanner later on.   


Film icon      USB Trident      Photo Gallery    Calendar 


EN 

Содержание x11-Scan

Страница 1: ...0 x11 Scan User s Manual...

Страница 2: ...Scanner 6 Settings for Film Scanning 9 Image Resolution 11 4 Placing holder into the scanner 14 5 Image Brightness and Color Adjustment 13 6 Playback and Delete Mode 13 7 Preview and review images on...

Страница 3: ...Maintenance and repairs should be performed only by authorized service providers Keep the x11 Scan away from water and other liquids Do not use it with wet hands Keep the scanner and its accessories...

Страница 4: ...3 2 Preparation Standard Accessories Digital Film Scanner User s Manual 135 holder for negatives 135 holder for slides Power adapter Cleaning brush USB cable EN...

Страница 5: ...4 Part Names EN...

Страница 6: ...373 Note We suggest using bundled brush to insert into the scanner s slot and clean the glass surface periodically to produce a clear image Please make sure your film negatives mounted slides and cove...

Страница 7: ...be locked automatically if it is inserted properly Note Only accept SD and SDHC card Maximum 32GB Card with SDXC class is not compatible 2 Connect the electric power to your Scanner Connect the Type C...

Страница 8: ...Note The Home Page and the Button The Home Page is an important page for the operation of the scanner From the Home Page you can go to the preview mode of the scanner for scanning film directly by pr...

Страница 9: ...he USB Trident icon For downloading the image files from the SD Card to the computer For more detail please see page 20 Downloading the images from Card to Computer The Photo Gallery icon For you to r...

Страница 10: ...ions for you to select the type of film Slide Color Negative B W Negative Select the type of film you want to scan by pressing Button then OK Button to confirm your selection You will then move to the...

Страница 11: ...ilm will be shown on the LCD screen ready for you to convert the photos into digital images and store them in the SD Card Quick guide to Preview Mode for scanning film In any condition press the Butto...

Страница 12: ...s of scanning and storing your image in the SD Card 14 megapixels and 22 megapixels by interpolation The resolution is set by pressing the button on the Preview mode The set value is shown on the lowe...

Страница 13: ...holder or your negative strips into the negative holder Make sure the shiny side of the film is facing upward Now insert the holder into the slot of the scanner from the right side When moving on the...

Страница 14: ...t Press the Button to select the value of adjustment you want then press the OK Button to confirm your selection The adjusting icons will disappear then press the OK Button once more to scan the adjus...

Страница 15: ...mode pressing the OK Button will return to the Home Page of the scanner You may also select the Playback Mode from the Home page of the scanner by selecting the Photo Gallery icon The operation of th...

Страница 16: ...e all the captured images You may select No not to delete from the or Button to leave the Delete Mode Formatting SD Card If the SD Card maximum 32GB you use is not compatible with the scanner and no s...

Страница 17: ...mage of your film or select the Galley Icon from the Home Page then press the OK Button to review your scanned images on the TV screen You may also connect the scanner to TV set via USB setting to rev...

Страница 18: ...n OK Button to activate the connection Use it as a mass storage device or card reader that is connected to your computer to download the image files Connection success Connection fail If the connectio...

Страница 19: ...en OK Button to confirm your selection You will see a date adjustment table as shown below Press the Playback Button to select the item you want to adjust Use the Button to increase or reduce the numb...

Страница 20: ...lide 1 1 Support Film Type Auto Converting 50x50mm Slide 135 110 126 Color Negative Film 135 110 126 Black White Negative Film Focusing Fixed Focus EV adjustment Yes 2 0 EV RGB Color adjustment Yes PC...

Страница 21: ...re size film For 126 film 28X28mm picture size film Selected film type shown on preview Transparent film Selected film type shown on preview Color negative film Selected film type shown on preview B W...

Страница 22: ...le RGB color adjustment scale RGB color adjustment recover to default setting RGB color selection and reset Single image delete selection All scanned images delete selection Indicate SD card and compu...

Страница 23: ...on systems for recycling of electronic equipment in the EU For more information please contact the local authority or your retailer where you purchased the product reflecta GmbH Merkurstra e 8 72184 E...

Отзывы: