Reeva RUBPB20SS Скачать руководство пользователя страница 14

14


B. Install the Oven 

1. Fix ADJSUTSCREW A on the UPPER AIR TUNNEL of the oven, and then 

install the oven into the cabinet. 

  Adjust the height of ADJUST SCREW A to keep 1mm gap between the 

ADJUST SCREW A and the top plane of cabinet. 

  Do not trap or kink the power cord. 

  Make sure that the oven is installed in the center of the cabinet. 

2.  Open  the  door;  fix  the  oven  to  the  cabinet  with  SCREW  B  at  the 

to the INSTALLATION HOLE. 

TRIM-KIT

UPPER AIR TUNNEL

ADJUST SCREW A

ADJUST HEIGHT

ADJUST SCREW A

TRIM KIT

INSTALLATION HOLE

TRIM-KIT PLASTIC COVER

INSTALLATION HOLE

SCREW B

INSTALLATION HOLE of TRIM KIT. Then fix the TRIM-KIT PLASTIC COVER 

Содержание RUBPB20SS

Страница 1: ...STRUCTIONS CAREFULLY Read these instructions carefully before using your microwave oven and keep it carefully If you follow the instructions your oven will provide you with many years of good service...

Страница 2: ...r seals are damaged the oven must not be operated until it has been repaired by a competent person ADDENDUM If the apparatus is not maintained in a good state of cleanliness its surface could be degra...

Страница 3: ...with reduced physical sensory or mental capabilities or lack of experience and knowledge if they have been given supervision or instruction concerning use of the appliance in a safe way and understan...

Страница 4: ...ave heating has ended 15 This appliance is intended to be used in household and similar applications such as staff kitchen areas in shops offices and other working environments by clients in hotels mo...

Страница 5: ...dren with reduced physical sensory or mental capabilities or lack of experience and knowledge unless they have been given supervision or instruction concerning use of the appliance by a person respons...

Страница 6: ...he microwave oven must be operated with the decorative door open for ovens with a decorative door 33 Surface of a storage can get hot READ CAREFULLY AND KEEP FOR FUTURE REFERENCE 3 The microwave oven...

Страница 7: ...t be plugged into an outlet that is properly installed and grounded Consult a qualified electrician or serviceman if the grounding instructions are not completely understood or if doubt exists as to w...

Страница 8: ...for 10 minutes Wipe the oven clean using a soft dry cloth UTENSILS CAUTION Personal Injury Hazard It is hazardous for anyone other than a compentent person to carry out any service or repair operation...

Страница 9: ...splattering or a wrap for steaming Microwave safe only Follow the manufacturer s instructions Should be labeled Microwave Safe Some plastic containers soften as the food inside gets hot Boiling bags...

Страница 10: ...essories Glass tray 1 Turntable ring assembly 1 Instruction Manual 1 Hub underside Glass tray Turntable ring assembly a Never place the glass tray upside down The glass tray should never be restricted...

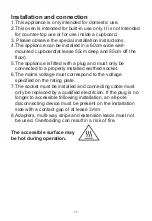
Страница 11: ...with a plug and must only be connected to a properly installed earthed socket 6 The mains voltage must correspond to the voltage specified on the rating plate 7 The socket must be installed and conne...

Страница 12: ...nstalled earthed socket In accordance with the appropriate regulations the socket must only be installed and the connecting cable must only be replaced by a qualified electrician If the plug is no lon...

Страница 13: ...The built in cabinet shall not have a rear wall behind the appliance Minimum installation height is 85cm Do not cover ventilation slots and air intake points 1 2 362 600 560 8 18 18 3 min 600 560 8 4...

Страница 14: ...ne of cabinet Do not trap or kink the power cord Make sure that the oven is installed in the center of the cabinet 2 Open the door fix the oven to the cabinet with SCREW B at the to the INSTALLATION H...

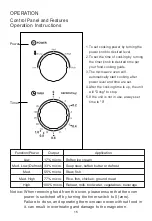
Страница 15: ...ease ensure that the oven power is switched off by turning the timer switch to 0 zero Failure to do so and operating the microwave oven without food in it can result in overheating and damage to the m...

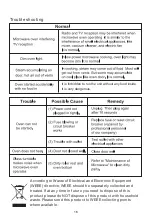
Страница 16: ...be separately collected and treated If at any time in future you need to dispose of this product please do NOT dispose of this product with household waste Please send this product to WEEE collecting...

Страница 17: ...17...

Отзывы: