background image

2

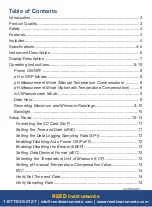
Table of Contents

Introduction ................................................................................................ 3
Product Quality ........................................................................................... 3
Safety ......................................................................................................... 4
Features ...................................................................................................... 4
Included ...................................................................................................... 4
Specifications ..........................................................................................4-5
Instrument Description ............................................................................... 6
Display Description .................................................................................... 7
Operating Instructions ...........................................................................8-10

Power ON/OFF ...................................................................................... 8
pH or ORP Modes.................................................................................. 8
pH Measurement Mode (Manual Temperature Compensation) ............. 8
pH Measurement Mode (Automatic Temperature Compensation) ........ 9
mV Measurement Mode ......................................................................... 9
Data Hold ............................................................................................... 9
Recording Maximum and Minimum Readings ..................................9-10
Backlight .............................................................................................. 10

Setup Mode .........................................................................................10-14

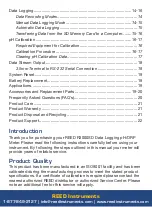
Formatting the SD Card (Sd F) ........................................................... 11
Setting the Time and Date (dAtE) ....................................................... 11
Setting the Data Logging Sampling Rate (SP-t) ................................. 12
Enabling/Disabling Auto Power Off (PoFF) ......................................... 12
Enabling/Disabling the Beeper (bEEP) ............................................... 12
Setting Data Decimal Format (dEC) .................................................... 13
Selecting the Temperature Unit of Measure (t-CF) ............................. 13
Setting pH manual Temperature Compensation Value ....................... 13
ESC .................................................................................................... 14
Verify Set Time and Date .................................................................... 14
Verify Sampling Rate .......................................................................... 14

continued...


REED Instruments

1-877-849-2127 | [email protected] | www.reedinstruments.com

Содержание R3000SD

Страница 1: ...Data Logging pH ORP Meter Instruction Manual R3000SD REED Instruments 1 877 849 2127 info reedinstruments com www reedinstruments com ...

Страница 2: ... 9 Recording Maximum and Minimum Readings 9 10 Backlight 10 Setup Mode 10 14 Formatting the SD Card Sd F 11 Setting the Time and Date dAtE 11 Setting the Data Logging Sampling Rate SP t 12 Enabling Disabling Auto Power Off PoFF 12 Enabling Disabling the Beeper bEEP 12 Setting Data Decimal Format dEC 13 Selecting the Temperature Unit of Measure t CF 13 Setting pH manual Temperature Compensation Val...

Страница 3: ...l and Recycling 21 Product Support 22 Introduction Thank you for purchasing your REED R3000SD Data Logging pH ORP Meter Please read the following instructions carefully before using your instrument By following the steps outlined in this manual your meter will provide years of reliable service Product Quality This product has been manufactured in an ISO9001 facility and has been calibrated during ...

Страница 4: ...curacy Accepts pH ORP Electrodes with BNC connector Real time datalogger with integrated SD memory card optional User selectable sampling rate Easy to read backlit LCD display Data hold and Min Max functions Tripod mount for long term monitoring Low battery indicator and auto shut off Included Soft Carrying Case Batteries Specifications Temperature Automatic Temperature Compensation ATC Manual 33 ...

Страница 5: ...s External Memory Yes expandable up to 16GB with SD card optional Auto Shut off Yes after 10 minutes off Kick Stand Yes Tripod Mountable Yes Low Battery Indicator Yes Power Supply 6 x AA batteries or AC Adapter optional Data Output Yes RS 232 Battery Life Sampling Time Dependent Product Certifications CE Operating Temperature 32 to 122 F 0 to 50 C Storage Temperature 14 to 140 F 10 to 60 C Operati...

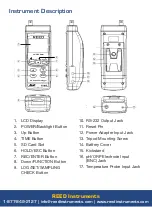
Страница 6: ...t Button 3 Up Button 4 TIME Button 5 SD Card Slot 6 HOLD ESC Button 7 Rec Enter Button 8 Down Function Button 9 Log SET Sampling Check Button 10 RS 232 Output Jack 11 Reset Pin 12 Power Adapter Input Jack 13 Tripod Mounting Screw 14 Battery Cover 15 Kickstand 16 pH ORP Electrode Input BNC Jack 17 Temperature Probe Input Jack REED Instruments 1 877 849 2127 info reedinstruments com www reedinstrume...

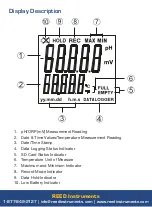
Страница 7: ...ent Reading 3 Date Time Stamp 4 Data Logging Status Indicator 5 SD Card Status Indicator 6 Temperature Unit of Measure 7 Maximum and Minimum Indicator 8 Record Mode Indicator 9 Data Hold Indicator 10 Low Battery Indicator REED Instruments 1 877 849 2127 info reedinstruments com www reedinstruments com ...

Страница 8: ...e meter and the temperature of the solution under test is manually entered The temperature compensation value appears on the lower part of the LCD display For automatic temperature compensation an external temperature probe is connected to the meter R3000SD ATC and inserted into the solution under test The temperature compensation value will also appear on the lower part of the LCD display pH Meas...

Страница 9: ...s a built in mV millivolt measurement function which enables you to make ion selective ORP oxidation reduction potential in the range of 1999 mV 1 Connect the Optional ORP Electrode into pH ORP Input BNC Jack 2 Press the FUNCTION button to select mV ORP mode 3 The top of the LCD will display the mV value Data Hold 1 While taking a measurement press the HOLD button to freeze the current readings on...

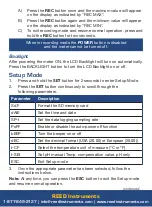
Страница 10: ...SET button for 2 seconds to enter Setup Mode 2 Press the SET button continuously to scroll through the following parameters Parameter Description Sd F Format the SD memory card dAtE Set the time and date SP t Set the data logging sampling rate PoFF Enable or disable the auto power off function bEEP Turn the beeper on or off dEC Set the decimal format USA 20 00 or European 20 00 t CF Select the tem...

Страница 11: ...ing process fails or if no card is inserted the meter will display Setting the Time and Date dAtE Follow steps 1 through 4 when dAtE appears on the LCD 1 Press the and buttons to adjust the year as indicated by YY 2 Press the ENTER button to confirm selection 3 Repeat steps 1 and 2 for month day hour minute and seconds as indicated by mm dd h m s 4 Press the SET button to save the time stamp and j...

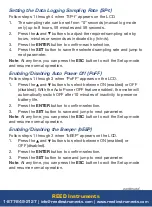
Страница 12: ...ess the and buttons to select between ON enabled or OFF disabled With the Auto Power OFF feature enabled the meter will automatically switch OFF after 10 minutes of inactivity to preserve battery life 2 Press the ENTER button to confirm selection 3 Press the SET button to save and jump to next parameter Note At any time you can press the ESC button to exit the Setup mode and resume normal operatio...

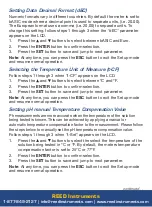
Страница 13: ...SET button to save and jump to next parameter Note At any time you can press the ESC button to exit the Setup mode and resume normal operation Setting pH manual Temperature Compensation Value Ph measurements are more accurate when the temperature of the solution being tested is known This can be achieved by applying a manual or automatic temperature compensation factor to the measurement Please fo...

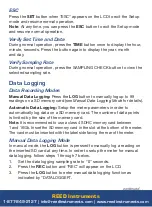
Страница 14: ...a Logging Setup the meter parameters in order to automatically log data on a SD memory card The number of data points is limited by the size of the memory card Note It is recommended to use a class 4 SDHC memory card between 1 and 16Gb Insert the SD memory card in the slot at the bottom of the meter The card must be inserted with the label side facing the rear of the meter Manual Data Logging Mode...

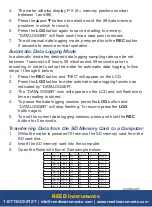
Страница 15: ...d 4 To pause the data logging session press the LOG button and DATALOGGER will stop flashing To resume press the LOG button again 5 To end the current data logging session press and hold the REC button for 2 seconds Transferring Data from the SD Memory Card to a Computer 1 While the meter is powered Off remove the SD memory card from the SD card slot 2 Insert the SD memory card into the computer 3...

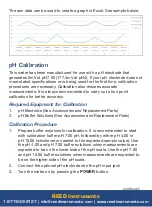
Страница 16: ...placement Parts 2 pH Buffer Solutions See Accessories and Replacement Parts Calibration Procedure 1 Prepare buffer solutions for calibration It is recommended to start with calibration buffer pH 7 00 pH followed by either pH 4 00 or pH 10 00 whichever is nearest to the expected sample value Use the pH 4 00 and pH 7 00 buffer solutions when measurements are expected to be on the lower side of the p...

Страница 17: ...l the screen displays PH at the top of the screen and CAL on the lower part of the screen and release to enter the calibration mode 9 Press the and buttons to scroll to pH 7 00 or whichever screen matches your buffer solution 10 Press the Enter button to save your selection 11 Repeat steps 5 through 10 for the pH 4 00 and pH 10 00 buffer solutions Clearing pH Calibration Data 1 While under normal ...

Страница 18: ...050000000010 Upper Value 10 pH Reading Decimal Place 0 3 Positive 0 Negative 1 C 01 F 02 pH 05 mV 18 1 Upper display value 2 Lower display value 4 41050000000010 Valeur supérieure 10 pH Lecture Position décimale 0 3 Positif 0 Negatif 1 4 1 valeur d affichage supérieure 2 valeur d affichage inférieure C 01 F 02 pH 05 mV 18 3 5mm Terminal to RS 232 Serial Connection RS 232 Mono Jack Pin 2 RX Pin 4 D...

Страница 19: ...st authorized REED distributor or authorized Service Center for repair Battery Replacement When the low battery icon appears on the LCD the batteries must be replaced 1 Remove the two 2 Phillips screws on the back of the meter directly located above the top of the kickstand 2 Remove the battery cover 3 Replace 6 x AA batteries 4 Secure the battery cover with the two 2 Phillips screws Applications ...

Страница 20: ...uxe Hard Carrying Case SD 4GB 4GB Class 4 SDHC Memory Card RSD 16GB 16GB Micro SD Memory Card w Adapter Don t see your part listed here For a complete list of all accessories and replacement parts visit your product page on www reedinstruments com Frequently Asked Questions FAQ s I cannot turn off my meter do you know why Often times the meter cannot be turned off because it is in recording mode R...

Страница 21: ...r Do not spray the cleaner directly on the instrument Use on external parts only Product Warranty REED Instruments guarantees this instrument to be free of defects in material or workmanship for a period of one 1 year from date of shipment During the warranty period REED Instruments will repair or replace at no charge products or parts of a product that proves to be defective because of improper m...

Страница 22: ...EED distributor or REED Instruments Customer Service by phone at 1 877 849 2127 or by email at info reedinstruments com Please visit www REEDINSTRUMENTS com for the most up to date manuals datasheets product guides and software Product specifications subject to change without notice All rights reserved Any unauthorized copying or reproduction of this manual is strictly prohibited without prior wri...

Страница 23: ...Test Measure with Confidence Check out our latest Products REED Instruments 1 877 849 2127 info reedinstruments com www reedinstruments com ...

Страница 24: ...REED Instruments 1 877 849 2127 info reedinstruments com www reedinstruments com ...

Отзывы: