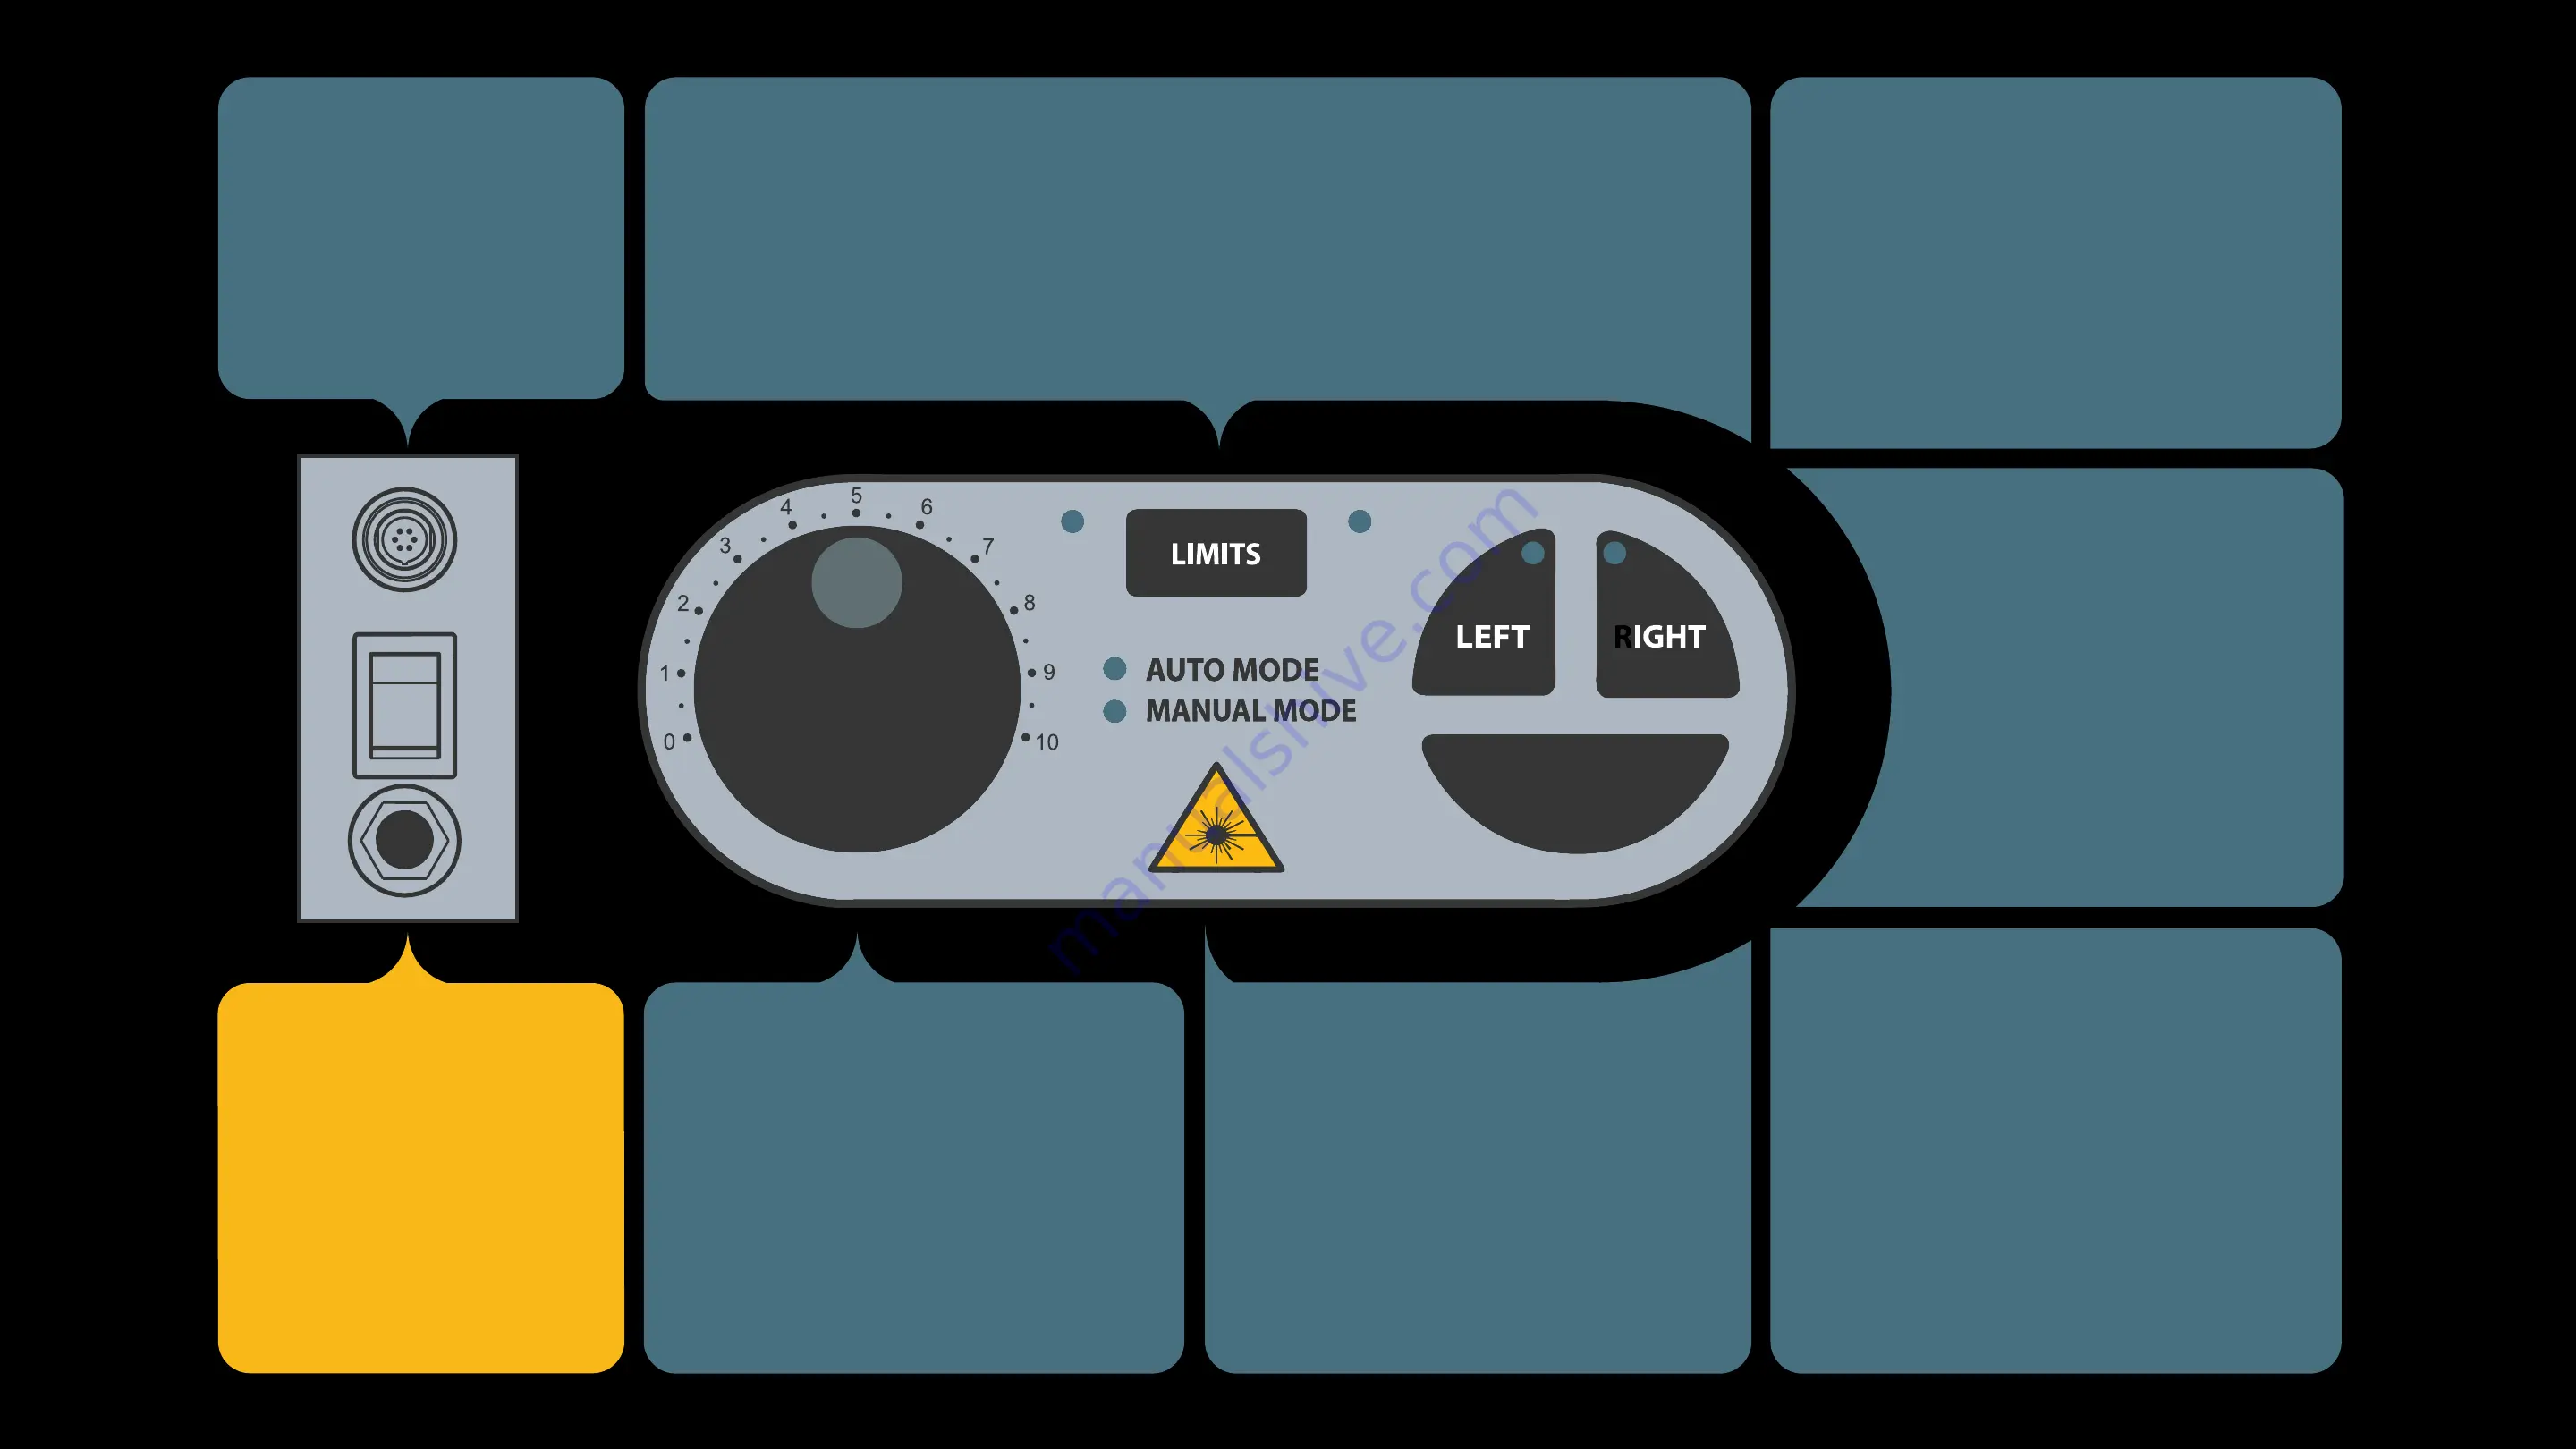
LEFT BUTTON
Starts Trolley moving left (away
from control panel). LED indicates
left movement. Pressing LEFT
when trolley is already traveling left
pauses OMC (indicated by blinking
LED’s).
LIMIT ACTIVATION
Use the LIMITS button to set endpoints along the track. While trolley is in
motion press LIMITS once to set the left endpoint. Press LIMITS a second
time to set the right endpoint. Pressing LIMITS a third time clears the set
endpoints. See Quick Start Guide
(Section 7)
for more details.
LASER BUTTON
Lasers indicate optimal position of
subject (approx. 6 ft. from OMC).
Press to activate, press again to
deactivate. Lasers turn off auto-
matically after 30 seconds.
SPEED DIAL
Use dial to select your desired
travel speed. Dial is also used for
custom settings and feature
modes. See ‘Setting Modes’ sec-
tion for details. Turning dial to “0”
stops Trolley in all modes.
RUN/STOP
PORT
Plug in run/stop cable
here and control camera
with mobile device app
POWER PORT/
POWER SWITCH
Located on the back of
One Man Crew. Plug in
power cable here and put
switch in the “ON” position
to power on unit.
RIGHT BUTTON
Starts Trolley moving right
(towards control panel). LED
indicates right movement.
Pressing RIGHT when trol-
ley is already traveling right
pauses OMC (indicated by
blinking LED’s).
AUTO BUTTON
Toggles between Auto and Manual
modes. Default mode is Auto.
Press AUTO button once to switch
to Manual. Trolley motion and di-
rection is now controlled by holding
LEFT or RIGHT. Manual Mode is
useful for camera tests and fram-
ing.
AUTO
R


