


www.altronics.com.au
Redback® Proudly Made In Australia 17
Redback® A 4432
4+4 Channel Mixer
The Micro SD card contains two folders, the Labels folder and the A 4433 Firmware folder. The Labels folder contains the
files used for the naming of the Audio Input Sources. The A 4433 Firmware folder is supplied in the event that the wall
plate needs to be restored to it’s original firmware. Open the Labels folder and you should see a window that looks like
figure 15.
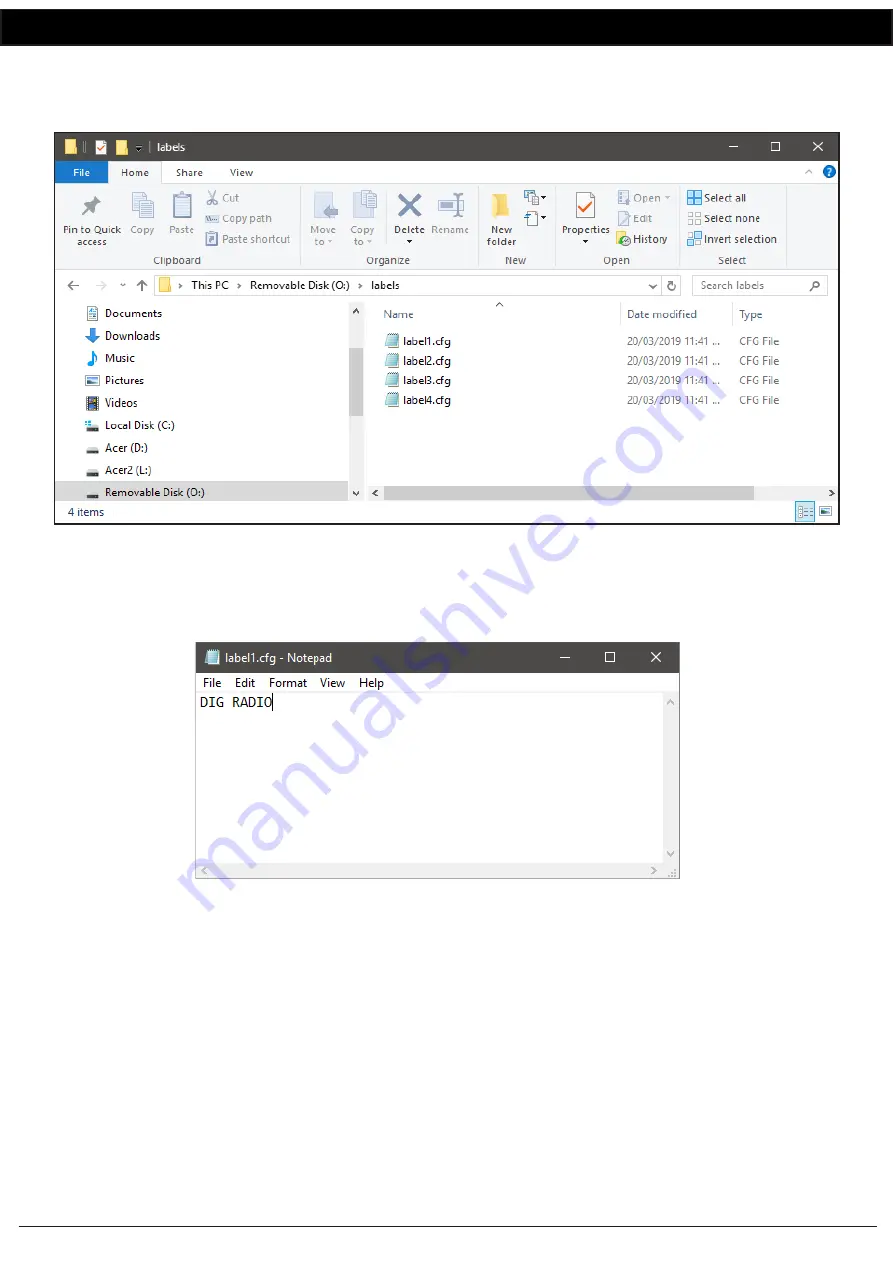
Fig 15
The contents of the “Labels” folder include four files as shown. These files can be opened with a simple text editor such as
Notepad. Label1.cfg relates to button 1 on the A 4433 wall plate, label2.cfg to button 2 and so on. Open the file by double
clicking on it and then using a program such as notepad, the file will open and look like the image shown in figure 16.
Fig 16
The label in the image shown is “DIG RADIO”. Simply rename this text to the desired label and then save the file.
NOTE: The descripition for the label has a maximum of 12 characters.
Repeat this procedure for all cfg files making sure to save them.
Remove the Micro SD card from the PC or laptop using safe removal procedures and then re-insert into the A 4433 wall
plate.
Power up the A 4432, press the “Menu” button and then select the “Labels From SD Card” option from the menu. The
new labels will be automatically uploaded from the MIcro SD card to the A 4433 wall plate.


