


Connecting the Power Cables
Installing the Hardware
4-9
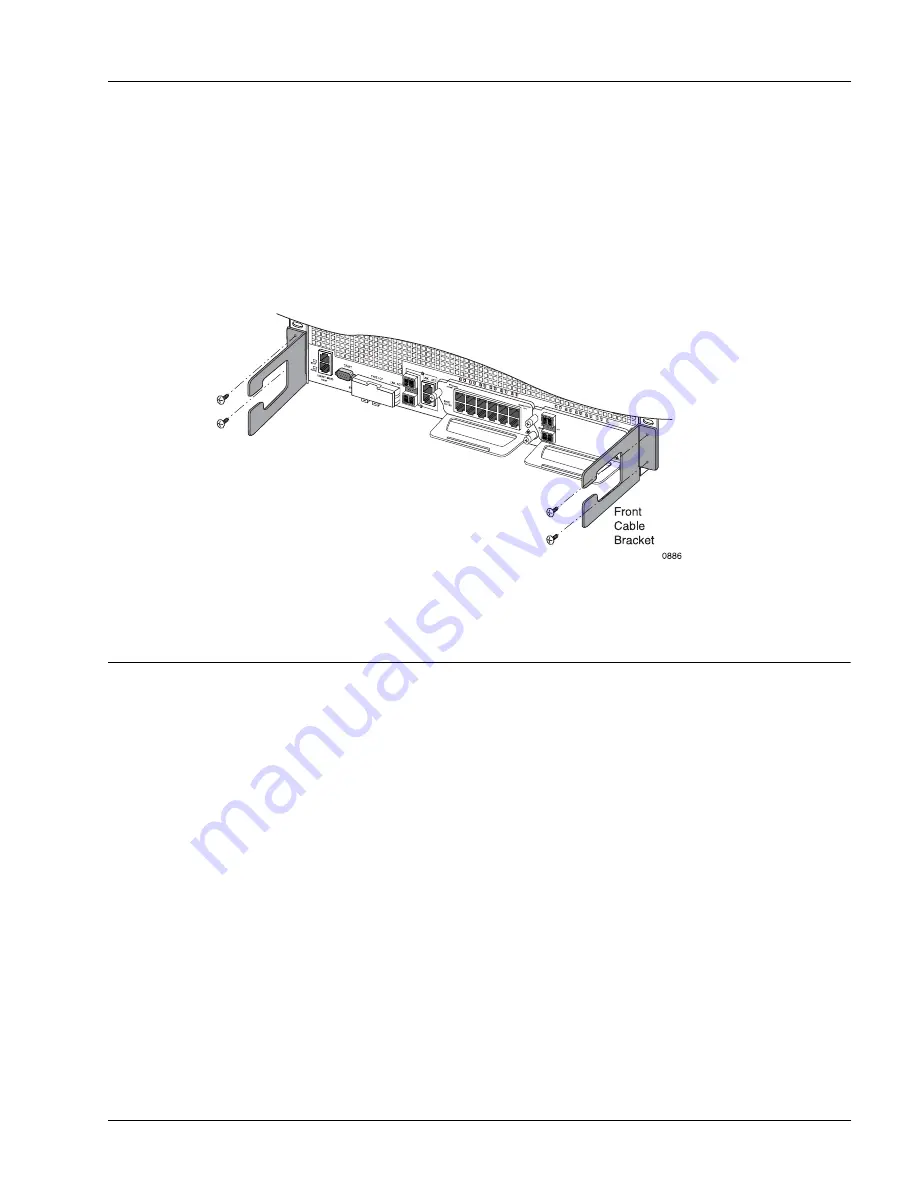
Install the Cable Management Brackets
The SmartEdge 100 router is shipped with a pair of cable management brackets for the front of the chassis.
When installed, each bracket accommodates both fiber-optic and nonfiber cables.
To install a bracket, align it with two unused screw holes in the attached flange, as shown in Figure 4-5;
using a Phillips screwdriver, secure it with two 6-32 x 0.25-inch flat-head screws provided with each
bracket. Then tighten each screw using 9.6 inch-lbs torque (1.1 Newton-meters) maximum.
Figure 4-5
Install the Cable Brackets
Connecting the Power Cables
You can power the SmartEdge 100 router from a DC or AC power source. To connect a DC power source
to the SmartEdge 100 chassis, perform the tasks described in the following sections:
•
Connect the Chassis Ground Cable
•
To connect an AC power source to the SmartEdge 100 chassis, perform the tasks described in the following
sections:
•
Connect the Chassis Ground Cable
•
Содержание SmartEdge 100
Страница 4: ......
Страница 8: ...viii SmartEdge 100 Router Hardware Guide...
Страница 14: ...Ordering Documentation xiv SmartEdge 100 Router Hardware Guide...
Страница 52: ...Connecting and Routing the Cables 4 18 SmartEdge 100 Router Hardware Guide...
Страница 72: ...Obtaining Assistance 5 20 SmartEdge 100 Router Hardware Guide...
Страница 90: ...FE and GE MIC and Native Port Cables A 6 SmartEdge 100 Router Hardware Guide...
Страница 94: ...FE and GE Port Alarms B 4 SmartEdge 100 Router Hardware Guide...