6
www.redbacklasers.com.au
XLG44
OPERATING INSTRUCTIONS
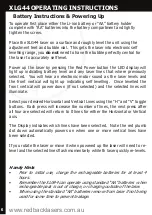
Battery Instructions & Powering Up
Place the XLG44 laser on a surface and roughly level the unit using the
adjustment feet and bubble vial. This gets the laser into electronic self
levelling range, you
do not
need to have the bubble perfectly central for
the laser to accurately self level.
Power up the laser by pressing the Red Power button the LED display will
light up indicating battery level and any laser lines that where previously
selected. You will hear an electronic motor sound as the laser levels and
the front vertical will light up indicating self levelling. Once levelled the
front vertical will power down (if not selected) and the selected lines will
illuminate.
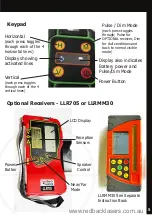
Select your desired Horizontal and Vertical Lines using the “H” and “V” toggle
buttons. Each press will increase the number of lines, the next press after
all four are selected will return to 0 lines for either the Horizontal or Vertical
axis.
The Display indicates which lines have been selected. Note the red plumb
dot down automatically powers on when one or more vertical lines have
been selected.
If you rotate the laser or move it when powered up the laser will need to re-
level and the selected lines flash momentarily while th laser quickly re-levels.
Handy Hints
•
Prior to initial use, charge the rechargeable batteries for at least 4
hours.
•
Remember the XLG44 can operate using standard “AA” batteries when
rechargeable pack is out of charge, or charging outside of the laser.
•
When using the standard “AA” batteries remove from laser if not being
used for some time to prevent leakage.
To operate first place either the Li-ion battery or “AA” battery holder
complete with “AA” batteries into the battery compartment and lightly
tighten the screw.
Содержание XLG44
Страница 1: ......


