Red Sea MAX
®
NANO
8
5 Assembly
Perform the assembly and installation of all of the components in the
order described below before adding the water to the system.
5.1 Cabinet assembly
Detailed instructions for the assembly of the MAX
®
NANO cabinet can be
found in the accompanying graphic manual.
The assembly of the cabinet requires the use of a regular crosshead
screwdriver. Do not use an electric screwdriver.
Adjustment of the Push-To-Open (PTO)
door opening unit.
Pressing the end of the PTO unit by 1.5mm
(
1/16”) will spring the shaft
forward by 5cm (2”) to the open position.
Pushing the PTO shaft back inside the cabinet will lock it in the closed
position.
After assembling the cabinet door, make sure that the PTO is in the closed
position and allow the soft close hinges to fully close the door. With the
door in the closed position press the door in the region of the PTO. The door
should spring open. If the door does not spring open adjust the position
of the PTO by rotating the front end of the shaft anticlockwise half a turn.
Repeat this adjustment until pressing the door causes the PTO to operate.
After assembly, place the cabinet in the desired location.
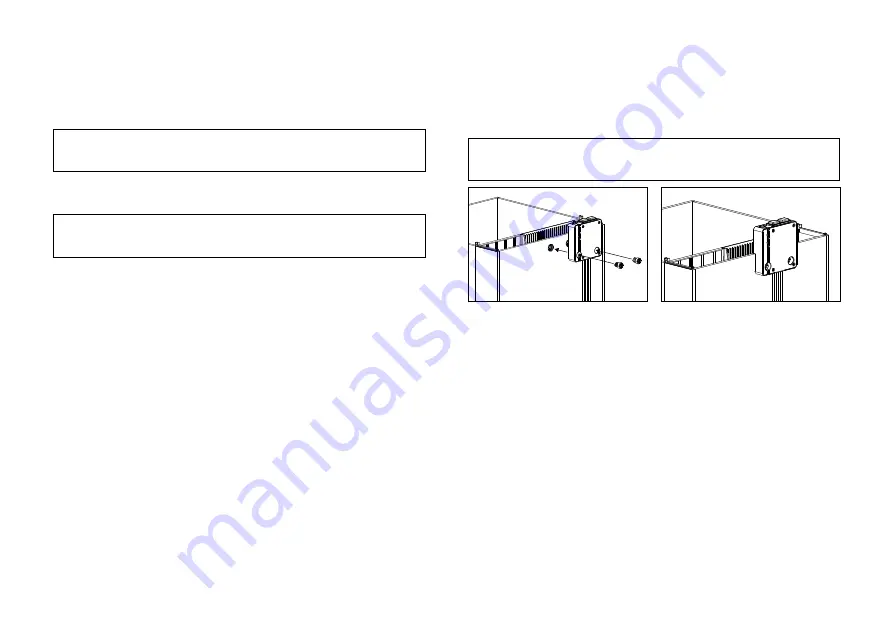
5.2 Pump Switch-box
Align the Pump Switch-box with the holes provided in the rear wall of the
aquarium and fix into position with the screws provided. Do not attach
the LED mounting arm or module at this time.
5.3 Placing Aquarium
Lifting the glass aquarium onto the cabinet will require 2 people. The top
of the cabinet is approximately 86cm (34”) from the floor. Ensure that
anyone lifting the aquarium is physically suitable for such an operation
and has been instructed in the correct methods of lifting heavy objects.
Aquarium must be lifted from the bottom.
Place the EVA mat on the top of the cabinet or other surface that will be
supporting the aquarium. The EVA mat is smaller than the aquarium. Place
the glass flush with the back of the mat and 3mm (1/8") from each of the
sides.
Before lifting aquarium, place the assembled cabinet in the final
operating position (see location above) and set the glass aquarium in
position on top.
The back and sides of the glass should be flush with the rear and side
edges of the top of the cabinet.
Once the aquarium is correctly aligned with the cabinet, check that the
cabinet has not moved. If necessary readjust the position of the cabinet.
NOTE
: Left and Right designations in this manual are when looking
from the front of the Aquarium.
NOTE
: Do not plug the Switch-box power cable to your power outlet
until instructed to do so.
WARNING
: If you are not experienced in the construction of self
assembly furniture, seek suitably qualified assistance.
Home
Installation and Operation Manual


