2
3
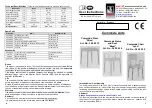
Product Advisories
The tubular frame is made of aluminium tubing. The seat height is adjustable (to 7
positions) using the telescoping aluminium tube. A non-adjustable version for seat
height is also available as an option (single-piece tube). The leg tips for the stool
legs are made of a slip-resistant plastic. The commode aid can be completely
assembled or disassembled with the clip-system and thus offers easy mobility for
location changes.
First-time Use
The commode aid is not delivered ready for use. It first has to be assembled before
using it the first time. Using the packing list, check to be sure all parts are at hand
before starting the assembly. The parts can vary depending on the commode aid
model!
Cleaning and Disinfection
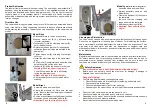
The chair can be cleaned with a commercially available household cleaning agent.
Do not use an aggressive or foaming type of cleaner. For disinfecting the surface,
use a commercially available disinfectant (be sure to follow the instructions). Then
wipe away with clean water and wipe dry. Inadequate or negligent care and
maintenance leads to limitations or annulment of the warranty and product liability
by the Manufacturer.
Maintenance
Regular maintenance and care of the commode aid assures long-term reliable use.
For safety reasons and for preventing accidents whose cause may be due to
undetected wear or damage resulting from improper use, be sure to have the
commode aid checked at least every six months by an authorised dealer
.
Safety Advisories
Do
not exceed the stool’s specified maximum allowable weight!
Before each use, carefully check the stool over for damage. If damage is
detected, then do not use the stool!
Danger of tipping!
The following points must be checked before using:
Check the commode aid for stability (after assembly and before use).
Check seat plate for damage.
Check height-adjustment clips for firm mounting.
Depending on the model, check clip locking of the armrests and backrests.
Do not carry the commode aid while the patient is on it.
Use the commode aid only inside and on solid, even surfaces.
Depending on the model, be sure that the armrests and backrest are used only
when they are fully and properly installed.
Do not lean too far out beyond the commode stool.
Model Dijon
Place seat plate (A) on an even surface.
Loosen sleeve nut (B) by left-hand turning
(counter-clockwise).
Insert tube (C) into the clamping element (D)
until it strikes the end.
Rotate the tube so that clip (F) is positioned
outwards. Be sure all legs are installed in the
same way!
Tighten sleeve nut (B) by turning it to the right
until firm.
Install the other three legs in the same exact
way.
Pull out clip (F) completely and adjust the seat
height by pulling out the inner tube.
Insert clip (F) inside the borehole in the tube.
Warning! Push the clip all the way in!
You will know when the clip is all the way
inside the aluminium tube.
Adjust all 4 legs to the same height!
After assembly check the commode aid for
stability!
Model Lyon
(with basin receptacle)
Assembly same as model Dijon
Armrest assembly same as with
Model Brest
.
Clamp the backrest (A) firmly onto
the seat plate.
Be sure that the clamping unit
snaps on below the seat plate.
Attach backrest using clip (B).
Attention! Press the clip all the
way in!
Model Brest
Assembly same as model Dijon.
Clamp the armrests (A) firmly onto the seat
plate. Be sure that the clamping unit snaps on
below the seat plate.
Pull the armrest supports slightly apart until the
boreholes line up and fasten with clip (B).
Attention! Press the clip all the way in!
A
B
A
A
B
B
Basin-receptacle
pre-installed
C
D
F


