Features
• Plug-and-Play installation
• Up to 200Mbps* bandwidth over standard home power lines
• HomePlug signal easily passes through circuit breaker
• 128-bit AES encryption ensures data security
• Encryption completed by hardware, without sacrifice to bandwidth
• Each adapter includes 1 IEEE 802.3 computer Ethernet port
• HomePlug Powerline Specification 2.0-compliant
• Contains 2 Adapters, 2 Ethernet cables, and installation CD
Product Specifications
• Computer Interface: IEEE 802.3/802.3u
• Operating Temperature: 0 ~ 45 degrees C
• Storage Temperature: -20 ~ -80 degrees C
• Humidity: Max. 5%-90% (non-condensing)
LED Behavior
Security LED (Top LED labeled PWR)
Solid Green – Connected to powerline
Off – Power off
Blinking Green – Encryption setting up
Solid Green – Encryption setup successful
Double Green – Fail in encryption
HomePlug Powerline Link LED (Middle LED labeled HP)
Blinking – Powerline data transmitting or receiving
Color Green – Physical link rate greater than 100Mbps
Color Red – Physical link rate less than 50Mbps
Color Yellow – Physical link rate in between 50Mbps to 99Mbps
Off – No Activity
Ethernet Link LED (Bottom LED labeled ETH)
Solid Green – 10/100Mbps port linked
Blinking – Ethernet data transmitting or receiving
Off – No Ethernet link
USER MANUAL
HD network Adapter
High Speed Data/Video Streaming
*The standard transmission rate – 200Mbps – is the physical data rate. Actual data throughput will be lower.
System Requirements
• At least 2 HomePlug devices
• Available Ethernet port on each computer or network device
• Available power outlet
Hardware Setup
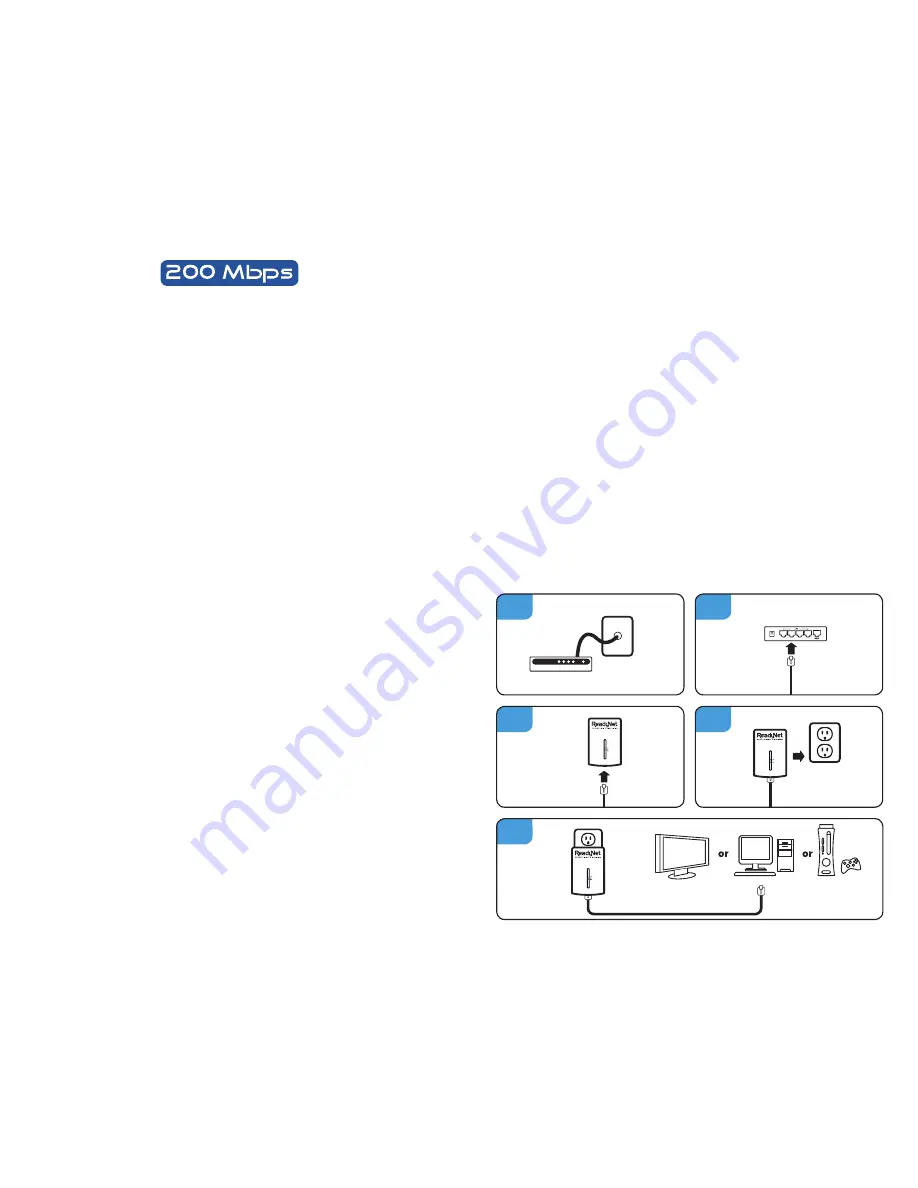
1. Locate modem or router at the broadband access point.
2.
Plug your network cable (provided) into the modem or router’s
RJ45 network adapter port.
3. Plug the other end of your network cable into the RJ45 port located
at the bottom of the Adapter.
4. Plug the Adapter into any wall socket or Powerline supported
Power Center.
Note: Do not plug the device into a UPS or power strip with surge
protection as they may filter the powerline signal.
5.
Use the steps 3 and 4 for the second Adapter to connect your
computer, IPTV, or other network device to the network.
1
3
2
4
5


