
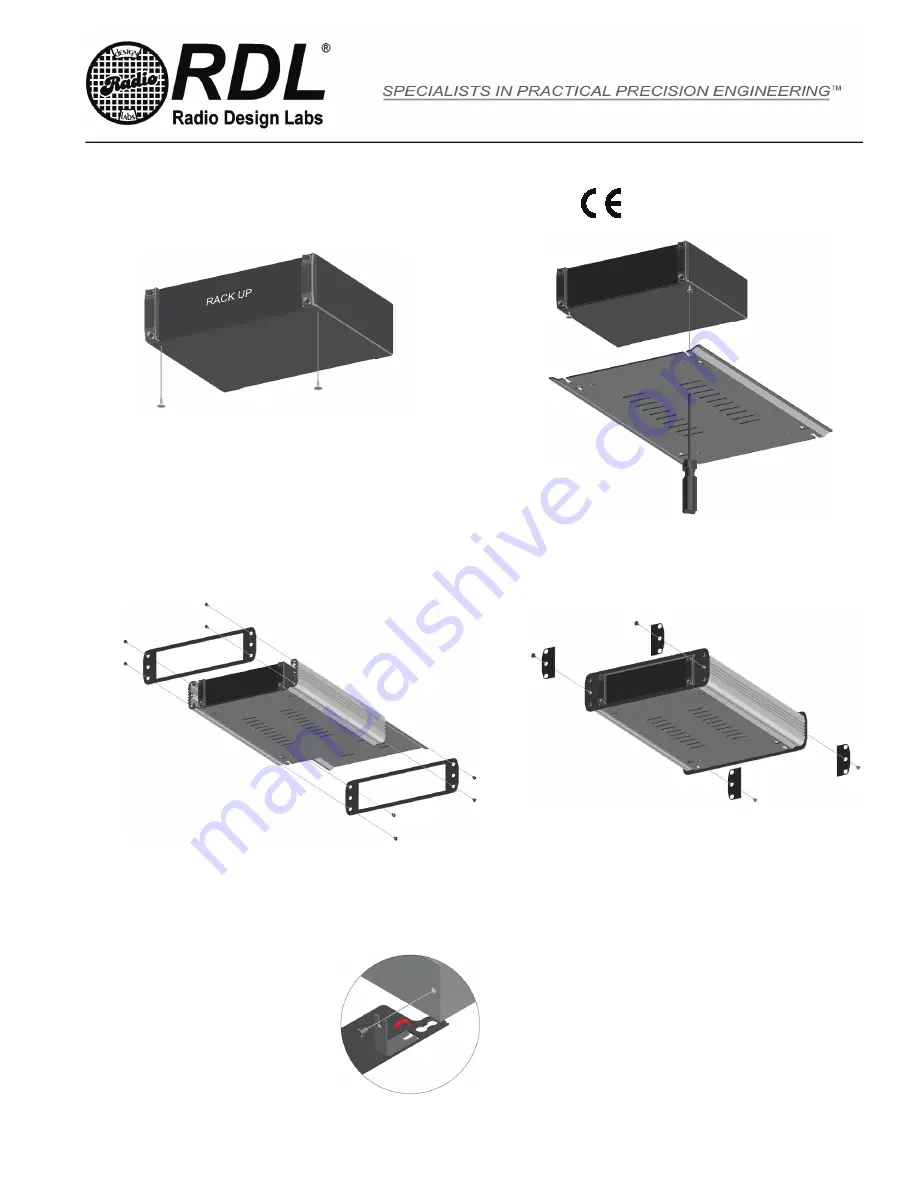
STEP #1
Start the screws into the bottom of the RACK UP but do not
install them all the way.
ACCESSORIES
Model UC-1R
RACK-UP Enclosure
891-xxxx
STEP #2
Secure the unit to the mounting chassis by sliding the unit
rearward so that the screws seat into the mounting holes
and tighten the screws. Repeat steps #1 and #2 for any
other RACK-UPs or filler panels that are to be installed.
STEP #3
Slide the top and bottom plates onto the side pieces and
secure the front and back plates to the side pieces with the
8 torx head screws.
STEP #4: Install the trim plates with the 4 crosshead undercut
screws.
Radio Design Labs Technical Support Centers
U.S.A. (800) 933-1780, (928) 778-3554; Fax: (928) 778-3506
Europe [NH Amsterdam] (++31) 20-6238 983; Fax: (++31) 20-6225-287
Installation/Operation
EN55103-1 E1-E5; EN55103-2 E1-E4
Typical Performance reflects product at publication time
exclusive of EMC data, if any, supplied with product.
Specifications are subject to change without notice.
NOTE: When installing a RACK UP product that is in a
plastic box start by removing the screws from the back
of the RACK UP. Bend the tabs on the mounting unit up
at a 90° angle. Secure the unit to the mounting chassis
using the screws.


