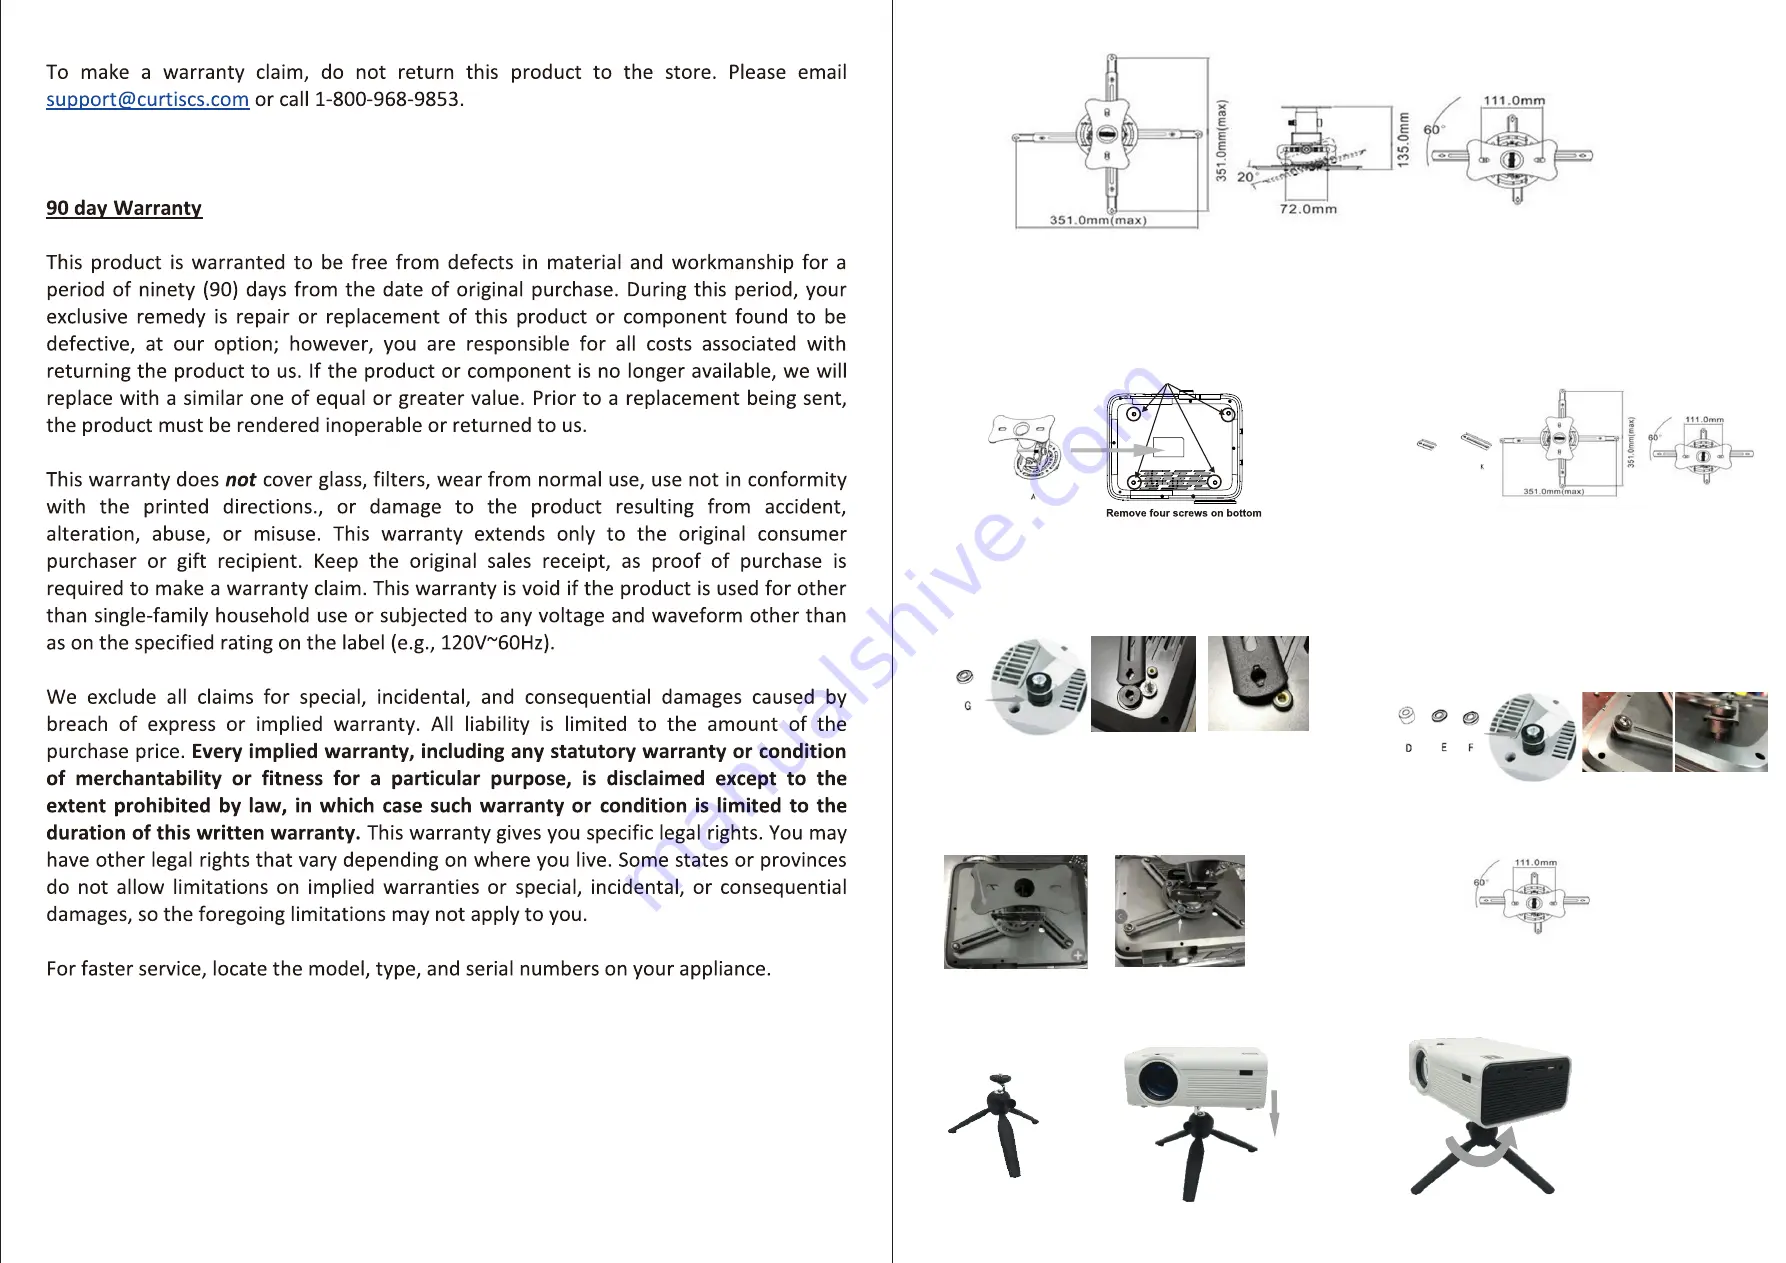
View of product
No ce: 1 The installer must ensure that the ceiling can safely supports four mes the weight of all addi onal equipments.
2 This ceiling mount is available to adjust the angle b-30
º
。
INSTALLATION OF TABLE MOUNT
A ach the 240P or 480P small projector to the moun ng bracket , and ghten the screw securely to hold the projector in posi on
INSTALLATION OF CEILING MOUNT
1. Take out the projector that you want to install, put it on table
upside down. Place "A1" part at the middle of the bo om of
the projector.
3. Place the gasket G under the screw hole of the extension
metal bracket .
5. Adjust the middle bracket of A1 to be parallel to the unit front
face, and then ghten the four screws by "I" tool.
Note:
If installing the ONA19AV901 projector on this ceiling
mount, please remove the four screws on the bo om firstly.
2. According to you product side to select extension
metal bracket K or L .
Note:
the ONA19AV901 projector need to use the long
metal bracket K.
6. Finally ghten the mount to the Ceiling .
4. According to your product, choose different thickness
gasket (D, E, F for op on) , place the gasket on the
screw hole of the extension metal bracket, and then
select the correct screw as per the product screw hole
size ( A,C for op on). Then ghten the screw.
L
1
Содержание RPJM030
Страница 1: ...尺寸 A3纸 材质 80克书纸黑白印刷 ...


