background image

Table of Contents

4

Important Information ........................................................................................................... i

Warning ........................................................................................................................ ii

Important Information ......................................................................................................... iii

Before You Begin ................................................................................................................... 6

Unpacking Your Unit ............................................................................................................. 6

Things to consider before you get started... ....................................................................... 7

Computer System Requirements ................................................................................. 7
Warning ........................................................................................................................ 7
Caution .......................................................................................................................... 7
Caution While Driving .................................................................................................. 7
Back up your data ........................................................................................................ 8
Important Battery Information ................................................................................... 8

Insert the Included CD-ROM into the CD-ROM Drive ......................................................... 9

Installing Software Components ....................................................................................... 10

Install the USB Driver & System Applications (Windows 98SE and Me Only) ......... 10
Install System Applications (Windows 2000 or XP) .................................................. 11
Install MusicMatch Jukebox ....................................................................................... 11
Install MusicMatch Plug-in ......................................................................................... 13
Launch the MusicMatch software ............................................................................. 14
Install Additional Services .......................................................................................... 14
Connecting Lyra Micro Jukebox to the Computer ................................................... 15

Transferring Files to Lyra Micro Jukebox ........................................................................... 15

Transfer Files via MusicMatch Jukebox ..................................................................... 16
Create Pre-defined Playlists and Transferring them to the Jukebox ....................... 17
Transfer Files via Windows Explorer (Drag and Drop) ............................................. 17

Disconnecting Your Lyra from the Computer (Windows 2000 or XP) ............................. 18

System Tray Applications .................................................................................................... 19

Profile .......................................................................................................................... 19
Updating System File .................................................................................................. 20
Verify User Playlists ..................................................................................................... 20
LyraSync ....................................................................................................................... 21

Overview of General Controls ............................................................................................ 23

Display Overview ................................................................................................................ 24

Menu Navigation ........................................................................................................ 25

Basic Operation ................................................................................................................... 25

Playback Operation .................................................................................................... 26
User Playlist ................................................................................................................. 27
Smart Tagging menu .................................................................................................. 27
Step-by-Step Example ................................................................................................ 28
Navigation Menu ........................................................................................................ 30

Содержание RD2760 - Lyra 1.5 GB MP3 Player

Страница 1: ...Lyra Micro Jukebox User s Guide Changing Entertainment Again RD2760 ...

Страница 2: ... risk of electric shock do not remove cover or back No user serviceable parts inside Refer servicing to qualified service personnel This symbol indicates important instructions accompanying the product CAUTION RISK OF ELECTRIC SHOCK DO NOT OPEN Product Registration Please fill out the product registration card and return it immediately Returning this card allows us to contact you if needed Product...

Страница 3: ...ederal Communications Commission has prepared a helpful booklet How To Identify and Resolve Radio TV Interference Problems This booklet is available from the U S Government Printing Office Washington DC 20402 Please specify stock number 004 000 00345 4 when ordering copies FCC Regulations state that unauthorized changes or modifications to this equipment may void the user s authority to operate it...

Страница 4: ...Jukebox 11 Install MusicMatch Plug in 13 Launch the MusicMatch software 14 Install Additional Services 14 Connecting Lyra Micro Jukebox to the Computer 15 Transferring Files to Lyra Micro Jukebox 15 Transfer Files via MusicMatch Jukebox 16 Create Pre defined Playlists and Transferring them to the Jukebox 17 Transfer Files via Windows Explorer Drag and Drop 17 Disconnecting Your Lyra from the Compu...

Страница 5: ... Repeat 39 Adjusting DSP Settings 40 Personalizing DSP output 41 Instant On 41 Audio Clips 42 System Settings 43 Profiler 44 Check for Updates 45 Portable Hard Drive Capability 45 Tips and Troubleshooting 46 FAQ Frequently Asked Questions 47 Specifications System Requirements 47 Hardware 47 Hard Disc 48 Software 48 PC Hardware Requirements 49 Accessories 49 Miscellaneous Specifications 49 Limited ...

Страница 6: ...your Lyra Micro Jukebox Lyra Micro Jukebox Music Management CD Contains the Lyra Micro Jukebox Applications MusicMatch Jukebox software AC DC adapter charger Clip Phones Armband carrying case Mini USB cable Plug the small end into your Lyra Micro Jukebox and plug the other end into your computer s USB port Go to page 24 for connection details Illustrations contained within this publication are for...

Страница 7: ...ommended Installed sound card 16 bit color video card Warning Use of this product is for your personal use only Unauthorized recording or duplication of copyrighted material may infringe upon the rights of third parties and may be contrary to copyright laws Caution Keep product out of direct sunlight Exposure to direct sunlight or extreme heat such as inside a parked car may cause damage or malfun...

Страница 8: ...to Limited Warranty page 50 for details Do not attempt to open the unit No user servicable parts inside To reduce risk of injury charge only rechargeable batteries recommended by the manufacturer for this product Other types of batteries may burst causing damage and personal injury Keep the unit away from children Do not disassemble or dispose product in fire Use only the specified chargers which ...

Страница 9: ...software also enables you to download files from the internet that are already compressed and then transfer those files to your Lyra Micro Jukebox or play the music on your computer Insert the Included CD ROM into CD ROM Drive Note Do not connect your Lyra Micro Jukebox to your computer before you have installed the required drivers Windows 98SE Me only 1 Turn on your computer and place the Music ...

Страница 10: ... the USB Driver and System Applications Windows 98SE and Me Only For Windows 98SE and Me systems you need to install a USB driver before your com puter can recognize your Lyra Micro Jukebox 1 Click Install USB Driver System Applications to install the required driver for your Lyra Micro Jukebox 2 Follow the on screen instructions to install all necessary files 3 Click Finish to complete installati...

Страница 11: ...ed to organize and manage digital audio files and transfer the music to your Lyra Micro Jukebox 1 Click Install MusicMatch Jukebox to run the MusicMatch setup program Wait while the installation program begins It may take up to 20 seconds for the installer to start Note It is recommended to uninstall any previous installations of the MusicMatch Jukebox software before proceeding After the uninstal...

Страница 12: ...ail address postal code country year of birth and sex male or female Click Next to continue Note You must enter an e mail address to proceed If you do not have an e mail address enter yourname home com 5 The Personalize Music Recommendation screen appears Read the screen to determine if you want to use this feature or not You can change the settings later Select Yes or No and click Next to continu...

Страница 13: ... or go to www musicmatch com Install MusicMatch Plug in MusicMatch requires a plug in for your particular device in order to download audio files using MusicMatch Jukebox and transfer the files from your computer to your Lyra Micro Jukebox 1 Click Install MusicMatch Plug in 2 Follow the on screen instructions to install all necessary files 3 Click Finish to complete installation and return to star...

Страница 14: ... software 4 Detailed information Getting Started tips and troubleshooting are available through the Help menu and the MusicMatch internet site accessed from the Help and Site menus We recommend you familiarize yourself with the MusicMatch Welcome Tips and view the On line FAQs before using and recording files Note Logging onto the internet while using MusicMatch Jukebox takes advantage of all its ...

Страница 15: ...ansferring files at hi speed mode of USB 2 0 This is up to 40 times faster than USB 1 1 If USB 2 0 port is available on your computer use it to connect to your Lyra Micro Jukebox The Lyra Jukebox is still backward compatible with the older USB 1 1 ports However you will not be able to take full advantage of the potential speed increase Transferring Files to Lyra Micro Jukebox You can transfer file...

Страница 16: ...the Lyra Micro Jukebox Profiler application automatically runs so it can sort profile the newly transferred files Caution Make sure all data are transferred to the Lyra Micro Jukebox before unplugging the USB cable If you re running Windows 2000 you must stop the device before unplugging it Click the icon the Unplug or Eject hardware icon from the system tray and select the USB Mass Storage device...

Страница 17: ...ant to transfer to your Lyra Micro Jukebox and drag them to the drive letter that is associated with it From Windows Explorer highlight the pre defined Transfer Files via Windows Explorer Drag and Drop If your Lyra Micro Jukebox isn t already connected to your computer connect the Lyra Micro Jukebox to the computer using the provided USB cable playlists that you have created in MusicMatch Jukebox ...

Страница 18: ...e corre sponding to your Lyra Micro player and click Stop The Stop a Hardware device screen appears Select the device to be stopped again for confirmation and click OK You can also stop your Lyra Micro Jukebox by right clicking on the icon from the system tray and selecting the drive corresponding to your player Disconnecting Your Lyra from the Computer Windows 2000 or XP ...

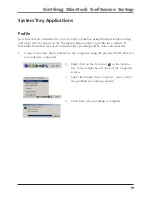
Страница 19: ...ontents If MusicMatch Jukebox was used to transfer files profiling will be done automatically 1 Connect your Lyra Micro Jukebox to the computer using the provided USB cable if it is not already connected 2 Right click on the Lyra icon in the System tray bottom right hand corner of the computer screen 3 Select the Profile Device Content item to start the profiling and sorting contents 4 Click Done ...

Страница 20: ... the System tray bottom right hand corner of the computer screen and select the Update System File item to start updating your system with the latest firmware Possible cause of system file damage System files and or folders were accidentally deleted from the device you have formatted your Jukebox Verify User Playlists Verify items in the User Playlists under the lyra_playlist system folder exists ...

Страница 21: ...ht hand corner of the computer screen and select LyraSync 3 The LyraSync Options screen appears LyraSync Files and folders can be synchronized between your PC and your Lyra Micro Jukebox 1 Connect your Lyra Micro Jukebox to the computer using the provided USB cable if it is not already connected ...

Страница 22: ...k Insert to select the paths of files and folders to synchronize between your PC and the Device Click OK 5 Select the desired LyraSync direction PC overwrites Device Device overwrites PC Synchronize PC and Device 6 Click Synchronize to start ...

Страница 23: ...sound volume 6 LOCK press and hold to activate deactivate key lock function 7 ENTER SCROLL KNOB Scroll up and down to netvigate the menu press to select the highlighted item 8 MENU Bring up the main menu each subsequent press will move up one level on the menu 9 PHONES headphones jack 10 USB port Attach the small end Type mini B of the mini USB cable here Attach the large end Type A to your comput...

Страница 24: ...shuffle all songs in the current play mode repeatedly indicates shuffle all songs in all the folders indicates shuffle all songs in all the folders repeatedly 5 The repeat icon is displayed when the repeat feature is activated indicates repeat all songs in the current folder indicates repeat one song indicates repeat all songs in the current play mode 6 EQ setting 7 Elapsed time of the currently p...

Страница 25: ...ate through the Lyra Jukebox s menu system combine with how the buttons operate will give you information you need for basic functionality Top Menu is the main menu The navigation scheme is the same no matter how many menus you access Menu Navigation 1 Scroll the ENTER button up or down to highlight the desired items on the screen 2 To enter and view the submenu press the Enter button 3 To go back...

Страница 26: ...ss the VOLUME button on the side of the unit The volume display bar updates to show the increase in volume level To turn down the volume press the VOLUME button on the side of the unit The volume display bar updates to show the decrease in volume level To add an item to the Playlist press SELECT to tag it only in navigation mode songs saved in this list can be played and viewed through the Playlis...

Страница 27: ...mart Tagging Menu scroll the ENTER button to highlight Clear Tagged items then press the ENTER button again to confirm User Playlist You can create more than one playlist and you can even name the playlist at your wish To save all of the tagged items into your playlist press and hold the ENTER button to bring up the Smart Tagging Menu scroll the ENTER button to highlight Save to User Playlist You ...

Страница 28: ... or music you already had loaded onto your computer 2 If you haven t already unplugged the Lyra Micro Jukebox from your computer disconnect the USB cable from the Lyra Micro Jukebox Note You must stop the device before unplugging it Click the icon the Unplug or Eject hardware icon from the system tray and select the USB Mass Storage device for the drive letter associated with the Lyra Jukebox and ...

Страница 29: ...ed R while the left ear clip phone is labeled L a Pull the ear hook away from the ear pad slightly You will hear a click sound b Slide the ear hook behind the ear with the ear pad on the front of the ear Rotate the clip phone so the ear pad fits closely with the ear c Lock the clip phone in place by pushing down on the top of the ear hook until it locks d For best sound quality make sure the earpa...

Страница 30: ...ist appear in alphabetical order To scroll up and down the Artist menu slide the Scroll button To return to the previous menu Artist press the Menu button 4 To see the songs on the album you ve highlighted press the Enter button the songs for that album appear To scroll up and down the Album menu slide the Scroll button To return to the previous menu Artist 1 press the Menu button Note To return t...

Страница 31: ...the display during playback To end playback press the Stop button Note The information provided in the INFO screen depends upon the ID3 tags that have been set up for the song You may use the ID3 tag editing feature in MusicMatch Jukebox to fix or correct the ID3 tags ALBUM 1 Song 1 Song 2 Song 3 Song 4 AC DC Ain t No Fun Back in Black Rock 1980 128k 0001 0037 01 33 EQ Rock ARTIST 1 Album1 Album 2...

Страница 32: ... item to be selected To scroll up and down the display scroll the ENTER buttom 2 To enter the highlighted folder press the Enter button To select the highlighted item press the Enter button After selecting all the items your want press and hold the ENTER Button to bring up the SmartTagging menu select Program Play in ALL FILES menu then you can enjoy the music in the sequence of selection TOP MENU...

Страница 33: ...t press and hold the ENTER button to bring up the Smart Tagging Menu scroll the ENTER button to highlight Save to User Playlist then press the ENTER button again to confirm Scroll the ENTER button to select whether to save to a new playlist Save NEW or to save into an existing playlist Append to To return to the TOP MENU press and hold the MENU button 2 To de select a selected item scroll the ENTE...

Страница 34: ...ently during Shuffle mode Refer to page 37 for Shuffle details 1 To add song to the Favourite List press and hold the ENTER button to bring up the Smart Tagging Menu scroll the ENTER button to highlight Save to User Playlist then press the ENTER button again to confirm 2 To de select a song from the Favourite list untag the song within Smart Tagging menu ...

Страница 35: ...s the ENTER button to show all the predefined system playlists 3 Scroll the ENTER button to select the desired playlist to be viewed 4 Press the ENTER button to view tagged items in the selected playlist Note All items added will be shown as individual songs TOP MENU Playlists Audio Files All Files Setting Profiler ...

Страница 36: ...ny files To see all of the files that are stored on your Lyra Micro Jukebox 1 Scroll the ENTER button to highlight All Files on the TOP MENU screen 2 Press the Enter button the All Files menu appears Folders are listed first and individual files are listed next indicates the item is a folder Note The folders and files are sorted in the order they were transferred to the Lyra Jukebox the folder you...

Страница 37: ...gins are played randomly After all the songs have been played the unit will randomly select another folder and shuffle all the songs in the newly selected folder 1 Scroll the ENTER button to highlight Shuffle on the Settings screen 2 Press the ENTER button repeatedly to toggle between Shuffle on and off The Shuffle icon will show on the display TOP MENU Playlists Audio Files All Files Setting Prof...

Страница 38: ...layback All songs folders in the folder where playback begins will be played randomly 5 To de select the shuffle option repeat steps 1 and 2 to select Shuffle Off Note Files in the Favourite playlist have a higher probability of being played Files in the Delete playlist have a lower probability of being played TOP MENU Playlists Audio Files All Files Setting Profiler Shuffle Mode Off On ...

Страница 39: ... the Settings screen 2 Scroll the ENTER button to adjust the setting and press again to confirm The corresponding repeat icon appears on the display 3 Press the MENU button to return to the main menu 4 Select the item you wish to play and press the Play Pause button If repeat All is activated all the songs on the Jukebox will be repeated If repeat One is activated the selected song where playback ...

Страница 40: ...OP BLUES SOUNDTRACK LATIN JAZZ CLASSICAL METAL GOSPEL ALTERNATIVE ROCK CLASSIC ROCK DANCE PUNK REGGAE HARD ROCK 3 Press the MENU button to return to the main menu SETTING MENU Shuffle Off Repeat Off DSP Flat Contrast 0 Backlight 10sec DSP Settings Flat Bass Rock Pop Rap Smart EQ Smart EQ allows you to tie a preset DSP mode to a corresponding Genre for enganced listening experience 1 Scroll the ENT...

Страница 41: ...ngs Classical Raggae Hip hop Funk Graphic EQ SETTING MENU Shuffle Off Repeat Off DSP Flat Contrast 0 Backlight 10sec GRAPHIC EQ Freq 60Hz 5dB 0 Instant On InstantOn allows the player to be instantly powered up while retaining the information of the last played track However after 48 hours of zero key activity on the player the player shall revert to a deep sleep state and the last played informati...

Страница 42: ...ton to select between ON OFF and press again to confirm 5 Scroll the ENTER button to select among options in setting OFFSET between 0 to 30 sec DURATION between 3 to 20 sec 5 Scroll the ENTER button to adjust the setting and press again to confirm 6 Press the MENU button to return to the main menu Settings PowerSave OFF SleepTimer OFF AudioClips OFF SmartEQ OFF InstantOn OFF AUDIO CLIPS OFF ON OFF...

Страница 43: ...ns in each setting Contrast between 5 to 5 Backlight Off 5 sec 10 sec 15sec or 20 sec PowerSave Disabled 1 2 3 5 min Sleep timer Disabled 30 60 or 90 min 5 Scroll the ENTER button to adjust the setting and press again to confirm 6 Press the MENU button to return to the previous menu TOP MENU Playlists Audio Files All Files Setting Profiler Contrast Adj 2 1 0 1 2 Backlight Adj OFF 5 seconds 10 seco...

Страница 44: ...ely 500 songs can be profiled on the Lyra Micro Jukebox If the number of audio files exceed this limit use your PC for profiling 1 Scroll the ENTER button to highlight Profiler in the Top Menu 2 Press the Enter button to view the Profiler Menu 3 Scroll the ENTER button to select YES NO to confirm whether you want to re profile the content or not 4 Press Enter to start profiling contents on the Lyr...

Страница 45: ...rt files from one computer to another computer For example instead of putting files at work on a zip or accessing them on your home computer via e mail or remote access you can put the files on your Lyra Micro Jukebox Capture internet downloads Share information Check for Updates Visit http www rca com digitalaudiodownloads for the latest news and firmware upgrades for our Lyra Micro Jukebox You m...

Страница 46: ...tem from the Lyra Micro Jukebox profiler system tray application on your PC to profile sort the contents of the device The icon in the system tray looks like this Problem Bad or missing file error message displayed on the Lyra Jukebox The Lyra Jukebox system files are corrupted or missing Select the Update System Files menu item from the Lyra Jukebox profiler system tray application on your PC to ...

Страница 47: ...the Fraunhofer Institut fur Integrierte Schaltungen and Thomson mp3 is an international standard and is well suited for the transfer of high quality audio files over telephone or ISDN lines and over the internet Specifications System Requirements Hardware Dimensions 2 2 L 1 W 2 3 H Unit Weight 3 2 Ounces 1500MB 1 5 Giga Byte Storage Stereo Headphone Jack Mini USB Connection Jack Battery Operated I...

Страница 48: ... Capacity 1 5 GB Rotational Speed 4400 RPM Connection USB 2 0 Hign Speed Software Includes Music Management software with the Lyra Jukebox applications and the MusicMatch Jukebox software MusicMatch Jukebox software lets the user organize all tracks in a digital music library create custom playlists through drag and drop interface Encodes mp3 files Auto DJ creates automatic Playlists based on the ...

Страница 49: ...f CD quality audio that will be stored on the PC CD ROM drive capable of digital audio extraction USB port Installed sound card 16 bit color video card Accessories CD ROM Music Management Software USB Connection Cable AC DC Adapter Clipphone Stereo Headphones Miscellaneous Specifications Signal to Noise Ratio 85dB THD 0 1 1MusicMatchandMusicMatchJukeboxareregisteredtrademarksofMusicMatchCorp 2Warn...

Страница 50: ...s replaced it will be with a new or at our option refurbished unit We will charge you a flat rate to repair or replace a defective Hard Drive This charge covers the labor cost for its repair How you get service Contact us on the Internet at www rca com and have your unit s date of purchase and model serial number ready The model serial number information is on your unit Self diagnostic screens wil...

Страница 51: ...for your software firmware information or memory data contained in stored on or integrated with any products returned to Thomson for repair or exchange whether in or out of warranty What your warranty does not cover Acts of nature such as but not limited to lightning damage Adjustment of customer controls Damage from misuse or neglect A unit that has been modified or incorporated into other produc...

Страница 52: ... OF ANY BREACH OF ANY EXPRESS OR IMPLIED WARRANTY ON THIS PRODUCT THIS DISCLAIMER OF WARRANTIES AND LIMITED WARRANTY ARE GOVERNED BY THE LAWS OF THE STATE OF INDIANA EXCEPT TO THE EXTENT PROHIBITED BY APPLICABLE LAW ANY IMPLIED WARRANTY OF MERCHANTABILITY OR FITNESS FOR A PARTICULAR PURPOSE ON THIS PRODUCT IS LIMITED TO THE APPLICABLE WARRANTY PERIOD SET FORTH ABOVE How state law relates to warran...

Страница 53: ...1976 2003 Thomson Inc Trademark s Registered Marca s Registrada s TOCOM Please do not send any products to the Indianapolis address listed in this manual or on the carton This will only add delays in service for your product visit us at www rca com ...

Отзывы:

Похожие инструкции для RD2760 - Lyra 1.5 GB MP3 Player