


C
HAPTER
O
NE
: Y
OUR
N
EW
TV
1
.1
List of Features
Your TV was designed with the latest technology. This TV is a high-performance unit that
includes the following special features:
• Easy-to-use remote control
• Easy-to-use on-screen menu system
• Automatic timer to turn the TV on and off
• Adjustable picture and sound settings that can be stored in the TV’s memory
• Automatic channel tuning for up to 181 channels
• A special filter to reduce or eliminate reception problems
• Fine tuning control for the sharpest picture possible
• Built-in, dual channel speakers
• A special sleep timer
• Headphone jack for private listening
• 16:9 letter-box format available (depending on signal source)
NOTE:
Illustrations are for representation only. Your product and on-screen displays might differ.
C h a p t e r 1
Y
O U R
N
E W
T V
Familiarizing Yourself with the TV
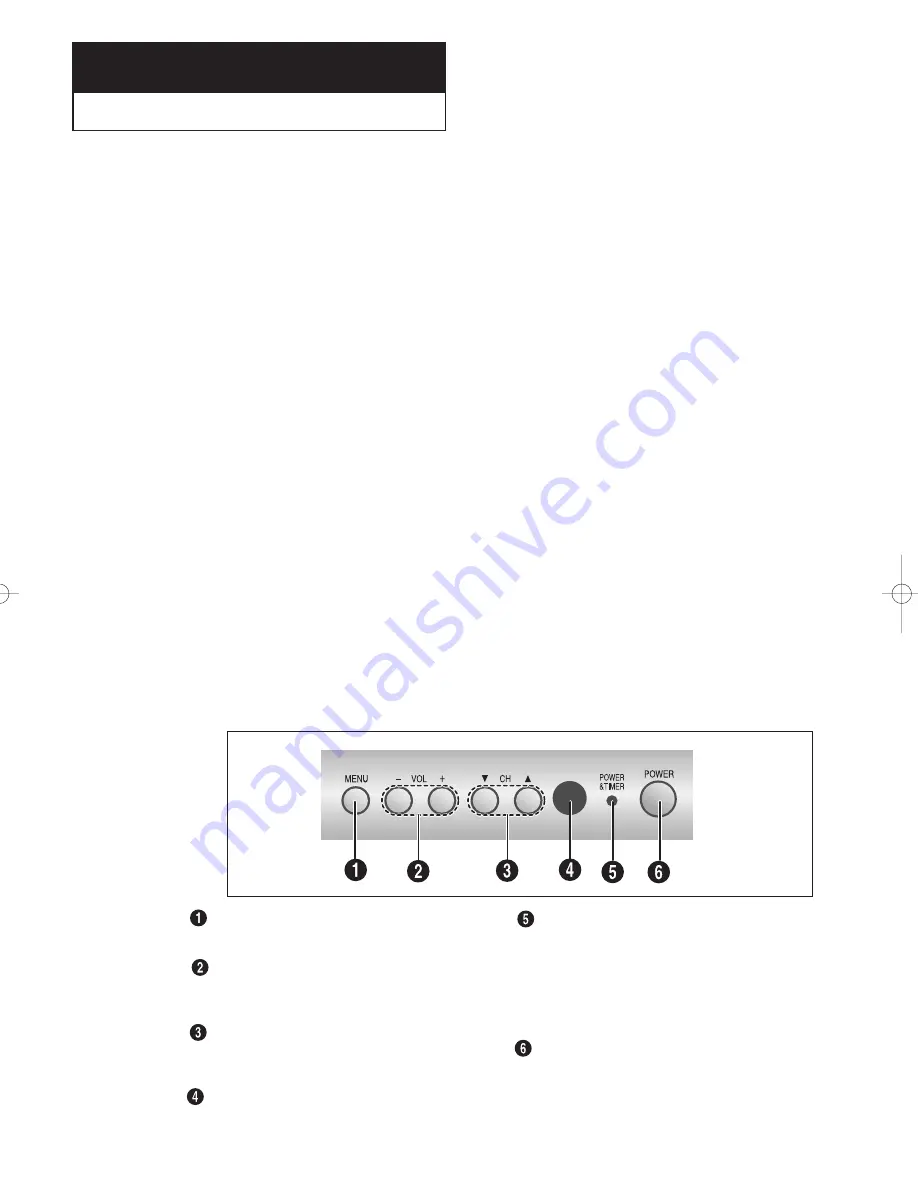
Front Panel Buttons
The buttons on the front panel control your TV’s basic features, including the on-screen menu.
To use the more advanced features, you must use the remote control.
MENU
Press to bring up the main menu.
VOL + and –
Press to increase or decrease the volume. Also used
to select items in the TV’s menu system.
CH
▼
and
▲
Press to change channels. Also press to move up or
down in the TV’s menu system.
Remote Control Sensor
Aim the remote control towards this spot on the TV.
POWER & TIMER indicator
This indicator blinks ten times when you turn on the
TV. It also illuminates when the TIMER mode is set to
the “On” position after setting the clock and either the
On timer or Off timer. Even if the power is turned off,
this indicator stays lit. (Clock must be set before using
this function.)
POWER
Press to turn the TV on and off.
15775750.01 5/9/01 5:20 PM Page 1
Содержание MR29410
Страница 34: ...This page intentionally left blank ...
Страница 44: ...This page intentionally left blank ...
Страница 47: ......