background image

Содержание LGB600

Страница 1: ...t Adiustxnent Air Adiusbent 40 Do It Yourself 19 FlooringI 35 Tuned Baking 17 18 41 Power Outage 9 LP Conv ion 42 44 Problem Solver 45 46 Oven 11 27 Safeti Instructions 2 5 15 17 Surface Cooking 8 1o M iIing Guide 22 23 Burners 8 9 Control S timzs 11 12 15 Control Settings 9 17 20 22 25 26 Cooktop Comparison 8 Door RemOval 31 Fluoresce t Night Light 13 Light Bulk Replacement 13 32 Cookware TIDS 10...

Страница 2: ...CES PACKED _ RANGE SEE INSTALLATION INS IIWC ONS 10 WARNING the iIlfOI IMtiOn in this guide is not followed exactiy a fire or explosion may result causing property e pe ti Wury or death h Donot mor N gasoihe or other flammable vapors and liquids in the vicinity of this or any other appliance WHAT TO DO IF YOU SMELL GAS Do not to light any appliance h IIOt tOUCh my ektdd switch do not use any phone...

Страница 3: ...revent fmeor smoke damage should the packing material ignite c Be sure your range is correctly adjusted by a qualified serviee technician or installer for the type of gas natural or LP that is to be used Yourrange can be converted for use with either type of gas See the Installation Instructions W G Theseadjustmentsmust be made by a qualiikd servicetechnician in accordance with the manufacturer si...

Страница 4: ...king Always heat fat slowly and watch as it heats Always use the LITE position when igniting the topburnersand make sure the burners have ignited Never leave the surface burners unattended at high flame settings Boilovers cause smoking and greasy spillovers that may catch on fire Adjust the top burner flame size so it does not extend beyond the edge of the cookware Excessive flame is hazardous Use...

Страница 5: ...se buildup Pulling out the shelfto the shelf stopis a conveniencein lifting heavy foods It is also a precaution against burns from touching hot surfaces of the door or oven walls The lowest ition R is not designed to slide Do not heat unopenedfood containers Pressure couid buildup and the container couldburst causing an injury Do not use aluminum foil anywhere in the oven except as described in th...

Страница 6: ...0 FEA S OF YOUR RANGE Features and appearance vary 7 1 Sealed Burners f L __ _J_ 6 ...

Страница 7: ...rface Burners 4 5 8 10 28 29 8 Elect nic Oven Control Clock and Timer 11 12 9 Oven Vent 4 5 14 32 10 Fluo scent Surface Light 13 29 11 Cookfop 4 8 10 30 12 Surf e Burner Control Knobs 4 9 10 32 13 Oven Door Latch 15 20 23 use for Self Cleaning only 24 26 14 Oven Shelves 5 14 15 20 easilyremovedor repositionedon shelfsupports 23 24 31 15 Oven Shelf Supports I 5 14 15 20 22 23 16 Oven Door Gasket 5 ...

Страница 8: ...ners kat the pan right awayandchangeheat settingsright away Whenyou turnthe controloff cookingstopsrightaway Heattravelsto the glasssurfaceandthen to the cookware so pans must be flat on thebottomfor goodcookingresults Theglass cooktopstayshot enoughto continuecookingafterit is turnedoff Removethe pan tim the surfaceunit if you wantcookingto stop Pansmustbe madeof ferrousmetals metalthat attractsa...

Страница 9: ...b ob stays at LITE it will continue to click A When one burner is turned to LITE all the burners spark Do not attempt to disassemble or clean around any burner while another burner is on An electric sh k may result which could cause you to knock over hot cookware lP L In ease of power fdure you can light the surface burners on your range with a match Hold a lighted match to the burner then turn th...

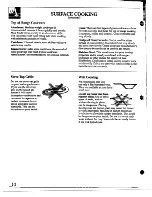
Страница 10: ...ne has poor heating properties and is usually combined with copper aluminum or other metals for improved heat distribution Combination metal skillets usually work satisfactorily if they are used with medium heat as the manufacturer recommends Stove Top Grills Do not use stove top grills on your sealed gas burners If you use the stove top grill on the sealed gas burner it will cause incomplete comb...

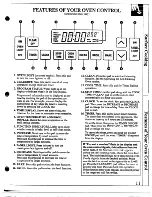
Страница 11: ...this pad to select the bake function o 11 BROIL Press this pad to select the broil fimction I ON PANEL LIGHT OFF 12 CLEAN Press this pad to select self cleaning function See the Operating the Self Cleaning Oven section 13 COOK TIME Press this pad for Timed Baking operations 14 STOP TIME Use this pad along with the COOK TIME or CLEAN pad to set the oven to start automatically at a time you select 1...

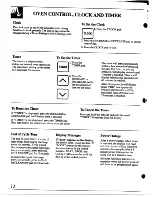
Страница 12: ... is reached ToReset the Timer To Cancel the Timer If TIMER is displayed press the INCREASE or Press and hold the TIMER pad until the word DECREASE pad until desired time is reached TIMER disappears born the display If TIMER is not displayed press the TIMER pad first then follow the instructions above to set the timer End of Cycle Tone Display Messages The end of cycle tone is a series of M d ti ap...

Страница 13: ...off and cannot be re lit until power is restored This is because the flow of gas is automatically stopped and will not resume when power is restored until the glow bar has reached operating temperature Oven Moisture As your oven heats up the temperaturechange of the air in the oven may cause water dropletsto form on the door glass Thesedropletsare harmless and will evaporateas the oven continuesto...

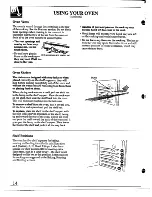
Страница 14: ...re coming completely out of the oven and will not tiIt when you are removing f from them or placing food on them When placing cookware on a shelf pull the shelf out to the bump on the shelf support Place the cookware on the shelf then slide the shelf back into the oven This will eliminate reaching into the hot oven To remove a shelf fkom the oven pull it toward you tilt the front end upward and pu...

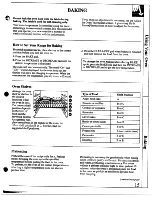
Страница 15: ...aches the temperatm you set a tone will sound Oven Shelves 9 Arrange the oven shelf or shelves in the desired locations while the oven is cool The correct shelf position depends on the kind of fti and the browning desired As a general rule place most fti in the middle of the oven on either shelf position B or C See the chart for suggested shelf positions Q o 0 Q Q I lJpe of Food I Shelf Position I...

Страница 16: ...oil on the oven bottom time but browning may be uneven because of reduced air circulation Do not use a cookie sheet so large that it touches the walls or the door of the oven Pies For best results bake pies in dark rough or dull pans to produce a browner crisper crust Stagger the pies for most even browning Frozen pies in foil pansshould b placed I 1 on aluminum cookie y sheet for baking since the...

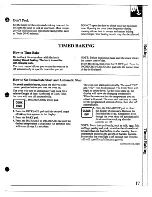
Страница 17: ...played The Cook Time will The oven will turn on immediately and cook for a begin to count down As the oven heats up the selected length of time At the end of Cook Time display will show the changing temperature the oven will turn off automatically When the oven reaches the temperature you set R 1 Press the COOK TIME pad a tone will sound The oven will continue to cook for the programmed amount of ...

Страница 18: ... day is 2 00 and the Cook Time is 3 hours Adding 3 hours to the time of day equals 5 00 4 Change the Stop Time from 5 00 to 7 00 by pressing the INCREASE pad until 7 00 appears in the display 5 Press the BAKE pad I AKE I 6 Press the INCREASE or DECREASE pad until 325 is displayed At 4 00 the oven will turn on automatically The word ON and 100 will be displayed The Cook Time will begin to count dow...

Страница 19: ...s to check the tempeti setting of your new oven These thermometers may vary 20 40 degrees To Adjust the Thermos t n 1 Press the BAKE pad BAKE 2 Select an oven tempera re between 500 F and 550 F 3 Immediately before the BAKE indicator stops flashing press and hold the BAKE pad for about 4 seconds The display will change to the oven adjustment display 4 The oven temperature can be adjusted up to 35 ...

Страница 20: ... for small size roast 3 to 5 lbs and at z f R position for jj Q larger roasts _ 2 Check the weight of the meat Placethe meat fat s de up or poul breast side up on roastinggrid in a shallowpan The melting f will baste the meat Selecta pan as close to the sizeof the meat as possible Thebroiler pan with grid is a good pan for this n 3 Press the BAKE pad BAKE 4 Press the INCREASE or DECREASE pad until...

Страница 21: ...nd Unthawed poultry often does not cmk evenly additional time 15 minutes per pound for roasts under Some commercial fimen poultry can be cooked e 5 pounds more time for larger roasts successfully without thawing Follow directions given on package label Meat Tender cuts rib high quality sirloin tip rump or top round Lamb leg or bone in shoulde Vealshoulder leg or loin Pork loin rib or shoulded Ham ...

Страница 22: ... pad and then the DECREASE pad once 7 When broiling is completed press the CLEAWOFF pad Serve the food immediately and leave the pan outside the oven to cool during the meal for easiest cleaning Use of Aluminum Foil You can use aluminum foil to line your broiler pan and broiler grid However you must mold the foil tightly to the grid and cut slits in it just like the grid Wkhout the slits the foil ...

Страница 23: ... 4 inch thick lDll ll 7 Space evenly Up to 8 patties take about same time Beef steaks Medium Well Done 1 inch thick 1 to 1 Ibs c c c 9 12 13 7 5 6 8 9 Steaks less than 1 inch thick will cook through before browning 4 Medium WellDone 1 inch tick 2 to 2XIbs c c c 10 12 15 25 6 7 10 12 16 18 Slash fat Chicken 1 whole 2 to 2Xlbs split lengthwise Bone in 4 bone in brmsts B B 3 35 I 15 20 Brush each sid...

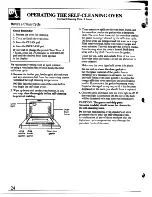
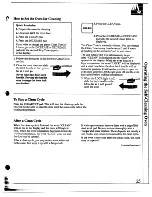
Страница 24: ...water or a soap filled steel wool pad Rinse well with a vinegar and water solution This will help prevent a brown residue from forming when the oven is heated Buff these areas with a dry cloth Do not clean the gasket Clean the top sides and outside front of the oven door with soap and water Do not use abrasives or oven cleaners Make sure the oven light bulb cover is in place I not rub or clean the...

Страница 25: ...ossible to open the far as it will go 11111 oven door until the LOCK light goes off and the oven Never force the door latch has cooled below locking temperature handle Forcing the handle r 5 When the LOCK light is off may damage the door lock slide the latch handle to the mechanism left as far as it will go and T open the door ml To Stop a Clean Cycle Press the CLEAR OFF pad This will stop the cle...

Страница 26: ...n If a shorter Clean Time is desired press the DECREASE pad until the desired Clean Tme is displayed c1 6 Press the STOP TIME pad 11 00 STOP appears in the display and STOP TIME ME flashes The control automatically sets the Stop Time by adding the Clean Time to the time of day In this example the time of day is 7 00 and the Clean Time is 4 hours Adding 4 hours to the time of day equals 11 00 7 Cha...

Страница 27: ...cycle Q Is the 64cracklin or ppin sound I hear during cleaning normal A Yes This is the sound of the metal heating and cooling during both the cooking and cleaning functions e Q Should there be any odor during the cleaning A Yes there will be an odor during the first few cleanings Failure to wipe out excessive soil tight also cause a strong odor when cleaning Q What causes the hair like lines on t...

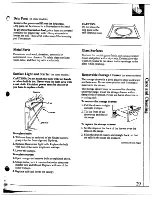
Страница 28: ...te Then lift the burner head straight Up To get rid of burned on f soak the burner head upside down in a solution of mild liquid detergent and hot water Soak the burner head for 20 to 30 minutes If the food doesn t rinse off completely scrub it with soap and water and a soft brush or plastic scouring pad For more stubborn stains use a cleanser like Soft Scrub brand or Bon Arni brand Rinse welI to ...

Страница 29: ...p Stafter k kA J g g 1 Light bulb To replace bulb 1 With one hand at each end of the hinged canopy P it by the fkont edge and flip it up 2 Removefluorescentlightbulb Replacethe bulb with one of the samelength and wattage 3 Lower the canopy To replace starter 1 Open canopy and remove bulb as explained above Z Graspstarter tum it counterclockwise about one quarter turn and lift out Replace with one ...

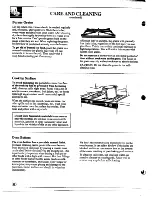
Страница 30: ... with a lot of acid tomatoes sauerkraut fruit juices etc or foods with high sugar content could cause a dull spot if allowed to set When the surface has cooled wash and rinse For other spills such as fat smatterings etc wash with soap and water once the surface has cooled Then rinse and polish with a dry cloth Do not store flammable materials in an oven or near the cooktop Do not storeor use combu...

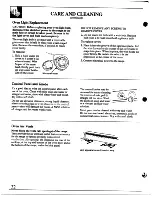
Страница 31: ...it has become displaced on the door you should have it replaced Inside Gasket Gasket Outside Gasket I Outside of the door Use soap and water to thoroughly clean the top sides and front of the oven door Rinse well You may also use a glass cleaner to clean the glass on the outside of the door Spillage of marinades fruit juices tomato sauces and basting materials containing acids may cause discolorat...

Страница 32: ...ect electrical power to the range Lifi off the cover Wirecove holder Control Panel and Knobs It s a good idea to wipe the control panel after each The control knobs may be use of the oven Clean with mild soap and water or removed for easier cleaning vinegar and water rinse with clean water and polish To remove a knob pull it dry with a soft cloth straight off the stem Wash Do not use abrasive clea...

Страница 33: ... the Instxdlation Instructions fir Wure use This applitmcp must be propedy grounded WARHIH6 Improper installation adjustmen alteration seq vice or maintenance can cause injury or property damage Refer to this guide For assistance or additional information consult a qualified installer service agenqy mandhcturer dealer or the gas supplier CAUTBOU Do not attempt to Operate the oven of this range cl ...

Страница 34: ...lation instructions packed with that appliance If cabinets are placed above the range allow a minimum cle T ce of 30 between the cooking surface and the ottom of unprotected cabinets If a 30 clearance between cooking surfiice and overhead combustible material or metal cabinets cannot be maintained protect the underside of the cabinets above the cooktop with not less than 1 4 insulating millboard c...

Страница 35: ...the range to be moved for cleaning or servicing Al o make sure your floor covering willWithstid l YI See the Important fety Instructions seation ofthe Installation Instructions KITCHEN C HETS Make sure the wall coverings around your range can withstand Me heat generated up to 200 E by the range se the hqn tant Safety Instructions Section ofthe Installation Instructions MODEL ANDSERIAL NUMBER LOCAT...

Страница 36: ...ain in the supply Iine regardless ofwhether nati or LP gas is being used A flexible metal appliance connector usecito connect the range to the gas supply line should have an I D of 1 2 and be 5feet in length for ease ofinstallation In Canad flexiblecomectors must be single wdl metal connectors no longer than 6 feet in length 36 hHJ TTHE RABJ6E T06AS Shut off the main gas supply valve before discon...

Страница 37: ...1 2 or 3 4 flare union adapter to the IWI internal thread of the manual shut off valve taking care to back up the shut off valve to keep it from turning 4 Connect flexible metal appliance comector to the adapter on the range Position range to permit comection at the shut ff valve 5 When all connections have been made make sure all range controls are in the off position and turn on the main gas sup...

Страница 38: ...ith a properly grounded three prong waUreceptacle DO NOT UNDER ANY CIRCuM mCES CUT OR REMOVETHE THIRD GROUND PRONG FROM THE POWER CORD III Usage Situations where Ap iance Power cord win be Disconnected Ir eqllmtly An adapter maybe used only on a 15 amp circuit Do not use an adapter on a 20 amp circuit Where local codes permit a TEMPORARY CONNECI ION maybe made to a properly grounded two prong waII...

Страница 39: ...llhear a snapping sound indicating proper operation of the spark module Once the air has been pur ed from n the supply lines burners should light wi 4 seconds After burner lights rotate knob out ofthe positiomT each burner in succession until L allburners have n checked L M of Fiamws The combustion quality of burner flames needs to be determined visually A Yellow flames Callfor service B Yellow ti...

Страница 40: ... burner should be steadywithapproximately1 blue cones and should not extend out over the edges ofthe burner baffle To determine ifthe bottom burner flames are burning properly remove the oven bottom Flames should have appro tely 1 blue cones and if range is supplied with n gZM should burn with no yellow tipping Wth most LP gas small yellow tips at the end of outer cones are normal Flames should no...

Страница 41: ...e range when not properly If the Anti Hpdevice supplied with the range does not fit this application use the universal Anti Tip device WB02X7909 1 Mark the wallwhere the RIGHTEDGEofthe range is to be located Be sure to allowforthe countertop overhang ifyou intend to installthe range next to cabinets Slotted Head W 2 Lncate the outside edge of the device 2 toward the center of the range from the ma...

Страница 42: ...n some models you may have to remove an access cover also 2 Follow the directions in box or that match your regulator type 42 h fltlsThisRe duton 1 Use an adjustable wrench to remove the nut from the pressure regulator _ i Range LP NAT v 2 Apply sideward finger pressure to remove the plastic pin from the nut HIN R To remove the pin place the nut on a flat surf ceand presi the pin sideways with you...

Страница 43: ... make sure the orifice spuds are securely screwed into the gas inlet tubes Use a small wrench to hold the inlet tube hex to prevent it from twisting 6 Put old orifice spuds back in the bag to save for possible future conversion NWI E If an orifice spud is accidentally dropped the cooktop can be raised by disengaging the 2 front clips with a large flat blade screwdriver e DO N YI attempt to raise t...

Страница 44: ...vidual shut offvalvefrom the gas supplypiping When using test pressures of 1 2 psig or less to test the gas supply system simplyisolate the range from the gas supply system by closing the individual shutdf valve ADJUST LOW FLAME SETTIH6 1 Light the top burners and continue turning all ofthe surface knobs to LOW 2 Remove all four knobs 3 With a small flat l blade screwdriver turn the valve set scre...

Страница 45: ...oundthe top of burnermay be clogged Remove the burnerheads andthe burnercaps Cleanthem with a sewingneedleor twist tie Makesureyou do not enlargethe holes Checkand clean the electrodearea for burned onfood or grease ge iSco to LP gas checkall stepsin the ImtaIlation Instructions H we play tihed F and a number YOU have a function error code If a fiction errorcodeappearsduringthe self cleaningcycle ...

Страница 46: ...improperly in the oven Oven bottom not securely seated in position Range electrical plug must be securely seated in alive power outlet Check for blown fuse or tripped circuit breaker GBulb may be loose or burned out e El trical plug must be pluggedinto a live poweroutlet WWX lgm tio in oven Adjust oven burner air shutter An odor from the insulation around the oven liner is normal for the f st few ...

Отзывы: