background image

Y

OUR

N

EW

TV 

4

C

HAPTER

O

NE

: Y

OUR

N

EW

TV

Learning about your new TV

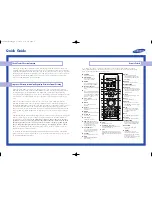
Front panel jacks, buttons and indicators

EARPHONE jack  

Connect a set of external earphones to this jack for

private listening. 

2

VIDEO and AUDIO input jacks   

Use these jacks to connect a cam-

corder or video game. 

3

MENU

Press to see an easy-to-use on-screen menu of your TV’s

features.

4

– VOL and VOL +  

Press to change the volume or to change fea-

tures on the menu.

5

CH 

and CH 

Press to change channels or to select features on

the menu.

6

Remote Control Sensor

Aim the remote control towards this spot

on the TV.

7

STAND BY 

Lights up when you turn the power off.

8

POWER

Press to turn the TV on or off.

The front panel above shows a typical button layout. The exact look of the buttons
may be different from those on the front of your TV.

Rear panel 

1

VIDEO and AUDIO input jacks

Use these jacks to connect a VCR or other video equipment.

2

VHF/UHF Antenna terminal

Use this terminal to connect an outdoor antenna or cable system.

For information on connecting equipment, please see page 6.

INPUT

OUTPUT

VIDEO

AUDIO

75

CAUTION

RISK OF ELECTRIC SHOCK.

DO NOT OPEN.

CAUTION :  

TO PREVENT ELECTRICAL SHOCK, DO NOT REMOVE

THIS COVER. NO USER-SERVICEABLE PARTS INSIDE.
REFER SERVICING TO QUALIFIED SERVICE PERSONNEL.

WARNING :  

TO PREVENT DAMAGE WHICH MAY RESULT

IN FIRE OR SHOCK HAZARD, DO NOT EXPOSE THIS
APPLIANCE TO RAIN OR MOISTURE.

1

2

VIDEO-IN-AUDIO

POWER

MENU

VOL

CH 

-

+

STAND BY

1

1

2

1

2

3

4

5

6

7

8

 1547278B(MR13-E)  3/27/01 3:42 PM  Page 8

Содержание CR14401

Страница 1: ...300 CR14401 CR20401 TV User s Manual Changing entertainment Again Before connecting operating or adjusting this product please read this instruction booklet carefully and completely TOCOM 1547278B 1547278B MR13 E 3 27 01 3 42 PM Page 1 ...

Страница 2: ...Important Safety Information Always be careful when using your TV receiver To reduce the risk of fire electrical shock and other injuries keep these safety precautions in mind when installing using and maintaining your machine Read all safety and operating instructions before operating the TV receiver Retain the safety and operating instructions for future reference Heed all warnings on the TV rec...

Страница 3: ...ould not be placed in the vicinity of overhead power lines or other electric light or power circuits or where it can fall into such power lines or circuits When installing an outside antenna system be extremely careful to keep from touching the power lines or circuits Contact with such lines can be fatal Do not overload the wall outlet or extension cords Overloading can result in fire or electric ...

Страница 4: ...n performance If you make adjustments yourself adjust only those controls that are covered by the operating instructions Adjusting other controls may result in damage and will often require extensive work by a qualified technician to restore the TV receiver to normal When replacement parts are required be sure the service technician uses replacement parts specified by the manufacturer or those tha...

Страница 5: ... control 9 Chapter 3 TV Operation 10 Turning the TV on off 10 Viewing the menus 10 Seeing special help 11 Selecting the menu language 11 Memorizing the channels 12 Storing channels in memory 12 Adding and erasing channels 12 Fine tuning channels 13 Changing channels 14 Using the channel buttons 14 Directly accessing channels 14 Scanning the channels 14 Selecting the previous channel 14 Setting the...

Страница 6: ...19 Using the SKIP TIMER 20 Viewing Closed Captions 21 Appendix 22 Troubleshooting 22 Identifying problems 22 Cleaning and maintaining your TV 23 Using your TV in another country 23 Specifications 23 CONTENTS 2 CONTENTS 1547278B MR13 E 3 27 01 3 42 PM Page 6 ...

Страница 7: ...trol Automatic timer to turn the TV on and off at any time you choose Special picture settings pre set at the factory for the highest resolution Automatic channel tuning for up to 181 channels A previous channel button to quickly see the last channel you were viewing Fine tuning control for the sharpest picture possible A special sleep timer Tri lingual on screen displays English Spanish and Frenc...

Страница 8: ...urn the TV on or off The front panel above shows a typical button layout The exact look of the buttons may be different from those on the front of your TV Rear panel 1 VIDEO and AUDIO input jacks Use these jacks to connect a VCR or other video equipment 2 VHF UHF Antenna terminal Use this terminal to connect an outdoor antenna or cable system For information on connecting equipment please see page...

Страница 9: ...m a con nected component VCR LDP etc 3 P STD Press to adjust the TV picture by selecting one of the spe cial factory settings or your own custom setting CH SCAN Channel Scan Press to have the TV auto matically scan all of the channels it has memorized SLEEP Press for the TV to automati cally turn off after an amount of time that you set PRE CH Previous Channel Press to see the last channel you wer...

Страница 10: ...e lead that looks like the illustration below see Antennas with 75 ohm Round Leads on page 7 If you have two antennas see Separate VHF and UHF Antennas on page 7 Antennas with 300 ohm flat twin leads If you are using an off air antenna such as a roof antenna or rabbit ears that has 300 ohm twin flat leads follow the directions below 1 Place the wires from the twin leads under the screws on the 300...

Страница 11: ...tem This TV is cable ready you don t need a converter for basic cable channels Cable without a Converter Box To connect cable without a converter box 1 Plug the incoming cable into the TV s antenna terminal Cable with a Converter Box To connect cable with a converter box to descramble channels 1 Find the cable that is connected to the ANTENNA OUT also named ANT OUT VHF OUT or OUT terminal on your ...

Страница 12: ...able to the VCR s AUDIO OUT terminal 6 Connect the other end of the cable to the TV s AUDIO IN terminal 7 Connect a video cable to the VCR s VIDEO OUT terminal 8 Connect the other end of the cable to the TV s VIDEO IN terminal INPUT OUTPUT VIDEO AUDIO 75 Video Cable VCR Rear Panel TV Rear Panel VIDEO OUT AUDIO OUT IN OUT ANTENNA INPUT OUTPUT VIDEO AUDIO 75 Audio Cable VCR Rear Panel TV Rear Panel ...

Страница 13: ... VIDEO IN terminal Installing batteries in the remote control 1 Pull the cover to the full to take it out 2 Install two AA size batteries Make sure to match the and ends of the batteries with the diagram inside the compartment 3 Replace the lid Remove the batteries and store them in a cool dry place if you won t be using the remote control for a long time The remote control can be used up to about...

Страница 14: ...hlighted All on screen displays and menus disappear from the screen in less than twenty seconds 2 With the main menu on the screen press MENU repeatedly You will cycle through the Video menu the Time menu and the Setup menu Video menu Time menu Setup menu If you press MENU while the Setup menu is on the screen the menus will disappear from the screen Simply press MENU again to bring the menus back...

Страница 15: ... the TV menus in English Spanish or French 1 Press MENU repeatedly until you see the Setup menu 2 Press CH until Language is highlighted 3 Press VOL or VOL to select either English Spanish or French 4 Press DISPLAY to exit the menus Canales Caption Language Memorizar Agr Borr Sint fina Español Video Tiempo Poner Channels Caption Language Memorize Add Erase Fine tune English Video Time Setup Channe...

Страница 16: ...emorizes the available channels This takes one to two minutes When the TV is finished it will display the Memorize channels screen Press MENU at any time to interrupt the memorization process and return to normal viewing 4 Press MENU twice to clear the screen Adding and Erasing Channels A channel can be manually added to or erased from memory 1 Press MENU repeatedly until you see the Setup menu Pr...

Страница 17: ... channel Fine tuning channels You can fine tune a channel to make it come in clearer 1 Press CH CH or the number buttons to select a channel 2 Press MENU repeatedly until you see the Setup menu Press CH until you select Fine tune 3 Press VOL and VOL until the channel becomes as clear as possible When the slide box displays a single vertical line this indicates the average fine tuning setting 4 Pre...

Страница 18: ...If you want to select a channel over 100 press the 100 button on the remote control For example to see channel 122 press 100 then 2 then 2 To change to single digit channels 1 9 faster press 0 before the single digit For example to change to channel 4 press 0 then 4 Scanning the channels You can automatically scan all of the channels in memory at the touch of just one button 1 Press the CH SCAN bu...

Страница 19: ...e that you select the proper time of day AM or PM You will see AM or PM to the right of the minutes 4 Press the CH or CH buttons to select the correct minute When you have selected the correct minute press DISPLAY to exit the menus The clock will now appear every time you press DISPLAY 1 2 3 4 Video Time Setup Clock Timer 11 00am Video Time Setup Clock Timer 12 00am Video Time Setup Clock Timer 11...

Страница 20: ...e with the VOL and VOL buttons Customizing the picture You can use the on screen menus to change the contrast brightness sharpness color and tint on your TV To customize your picture 1 Press MENU You will see the open Video menu 2 Press VOL or VOL until the word Custom appears 3 Press CH to select the item you wish to change Video Time Setup Settings Contrast Bright Sharpness Color Tint Video Time...

Страница 21: ...atic Picture This special feature automatically adjusts your picture for you 1 With the power on press P STD to select an automatic picture set ting Choose Standard to set the TV to operate at top performance according to your TV s specifications Choose Sports for viewing the TV during the day or when there is bright light in the room Choose Movies when viewing movies or VCR tapes Choose Mild when...

Страница 22: ...40 270 300 330 or 360 minutes 2 To cancel the sleep timer press SLEEP until the on screen display reads Off You can also cancel the sleep timer by turning the TV off then turning it on again Viewing a VCR or camcorder tape When you connect a VCR or camcorder to your TV with the A V jacks you need to adjust your TV To do this 1 Press the TV VIDEO button when you wish to view a video tape a video ga...

Страница 23: ...the timer to off 3 Press CH to highlight On time Press VOL 4 Press CH or CH to select the hour when you want the TV to turn on Make sure the correct time of day AM or PM appears to the right of the minutes Video Time Setup 11 00am Clock Timer On time Off time Video Time Setup 12 00am Clock Timer On time Off time Video Time Setup off on Clock Timer On time Off time Video Time Setup Clock Timer off ...

Страница 24: ...t the SKIP TIMER to 2 minutes then switch channels After 2 minutes the TV will return to the original channel To use the SKIP TIMER 1 While you are watching the channel to which you want to return press SKIP TIMER The on screen display will read Skip off 2 Press SKIP TIMER again to set the timer in thirty second intervals up to five minutes The time you set will begin counting down on the screen W...

Страница 25: ...de Press VOL or VOL to choose Capt captions or Text In caption mode captions appear and cover a small portion of the picture In text mode information unre lated to the program such as news reports are displayed and often cover a large portion of the screen 5 If you wish use CH CH or VOL to change the captioning channel or field Then press DISPLAY to return to normal viewing Different channels and ...

Страница 26: ... Try another channel Adjust the antenna No picture or sound Try another channel Press the TV VIDEO button Make sure the TV is plugged in Check the antenna connections No color wrong colors or tints Make sure the program is broadcast in color Adjust the picture settings Picture rolls vertically Adjust the antenna Check all wire connections The TV won t turn on Make sure the wall outlet is working A...

Страница 27: ...ts inside Wipe your TV with a clean dry cloth Never use water cleaning fluids wax or chemicals Do not put heavy objects on top of the cabinet Temperature If your TV is suddenly moved from a cold to a warm place unplug the power cord and allow at least two hours for moisture that may have formed inside the unit to dry completely Using your TV in another country If you plan to take your TV with you ...

Страница 28: ...NOTES 1547278B MR13 E 3 27 01 3 42 PM Page 28 ...

Страница 29: ...NOTES 1547278B MR13 E 3 27 01 3 42 PM Page 29 ...

Страница 30: ...NOTES 1547278B MR13 E 3 27 01 3 42 PM Page 30 ...

Страница 31: ...NOTES 1547278B MR13 E 3 27 01 3 42 PM Page 31 ...

Страница 32: ...North Meridian Street Indianapolis IN 46290 2001 Thomson multimedia Inc Trademark s Registered Marca s Registrada s Printed in Mexico TOCOM 1547278B Importer for Mexico only COMERCIALIZADORA THOMSON DE MEXICO S A DE C V SIERRA CANDELA NO 111 PISO 11 COL LOMAS DE CHAPULTEPEC DEL MIGUEL HIDALGO MEXICO D F C P 11000 R F C CTM 980723 KS5 Exporter 1547278B MR13 E 3 27 01 3 42 PM Page 32 ...

Отзывы: