background image

 
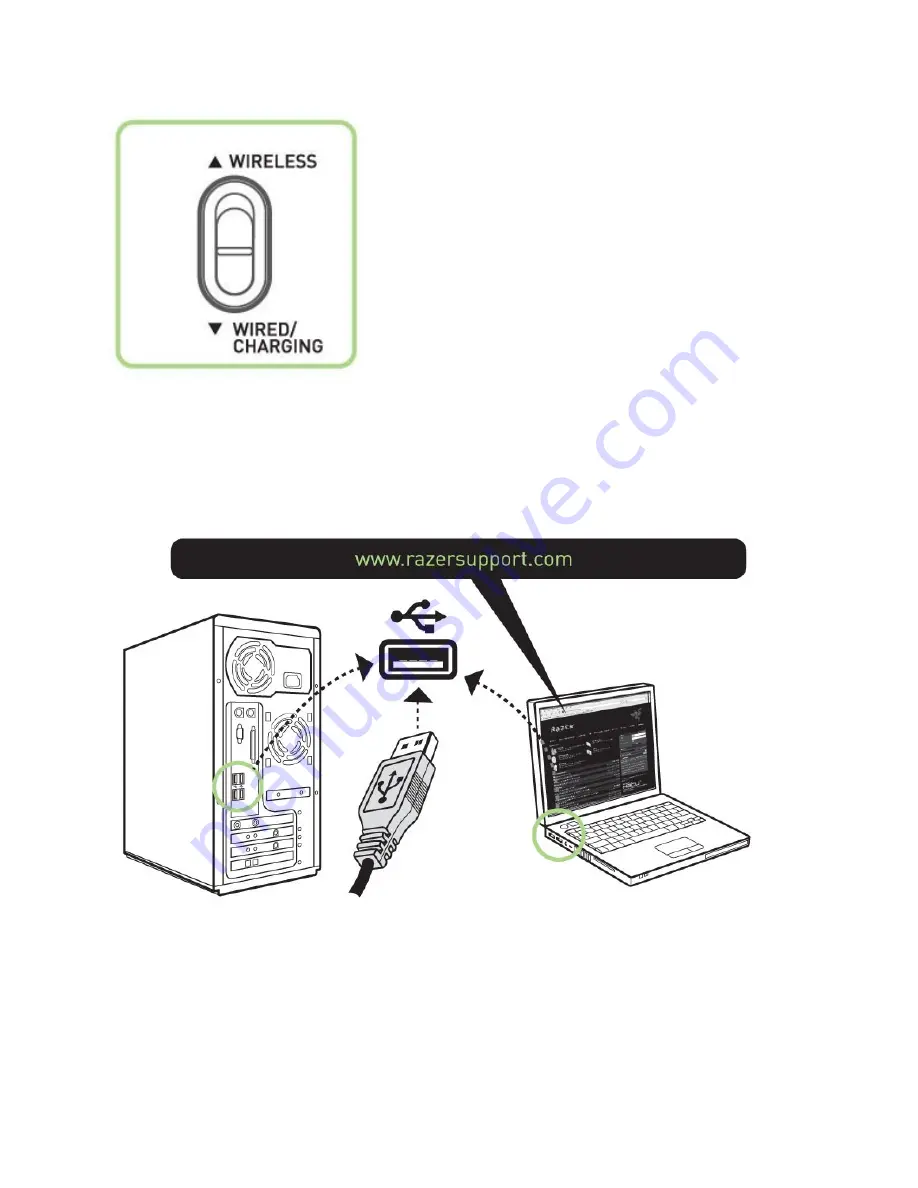
1. Do ensure that the shown switch is set to the Wired/Charging position. 


2. Connect the Cable Connector Jack to the Razer Naga Epic. 
3. Plug mouse into the USB port of your computer. The Razer Naga Epic is then ready for use as a high 
performance wired mouse. In addition, its battery will start charging automatically in this wired mode. 
4. To remove the cable, pull out the Cable Connector Jack. 


WINDOWS® 7 / WINDOWS VISTA® / WINDOWS® XP INSTALLATION INSTRUCTIONS 


Step 1: Plug your Razer Naga Epic into the USB port of your computer. 
Step 2: Download the Driver Installer from www.razersupport.com. 
Step 3: Run the installer and follow the onscreen instructions. 
 

REGISTERING YOUR RAZER NAGA EPIC 

Please visit 

www.razerzone.com/registration/

 for online product registration. 

What you’ll get: 
- 2 years limited manufacturer’s warranty 
- 6 months battery warranty 
- Free online technical support at 

www.razersupport.com 


Содержание Naga Epic

Страница 1: ...the Razer Anansi MMO gaming keyboard to use the Razer Naga Epic s 12 button mouse keypad seamlessly with the keyboard s 7 thumb modifier keys giving you an unprecedented level of battle control while...

Страница 2: ...l 5 Slide the shown switch to the Wireless position To conserve battery power always move the switch to the Wired Charging position when not using your mouse in wireless mode 6 Press the pairing butto...

Страница 3: ...Epic in wireless mode ensure that the shown switch is set to the Wired Charging position and place it on the Charging Dock Alternatively the Razer Naga Epic can be charged by plugging it directly int...

Страница 4: ...the cable pull out the Cable Connector Jack WINDOWS 7 WINDOWS VISTA WINDOWS XP INSTALLATION INSTRUCTIONS Step 1 Plug your Razer Naga Epic into the USB port of your computer Step 2 Download the Driver...

Страница 5: ...ttons Action Bar for MMO games G Razer Precision 3 5G Laser Sensor H Wireless and Wired Charging Switch I Pairing Button J Basic 123 Advanced Num Switch K Ultraslick Mouse Feet For optimum battery lif...

Страница 6: ...L Rechargeable Battery M Cable Connector Jack N Battery Charging Connector O Connector Jack Charging Dock P 3 Interchangeable Side Panels Classic Grip Claw Grip Palm Grip default...

Страница 7: ...Assign Buttons tab you can assign various functions to each of the buttons based on your own preferences The following functions are possible Click Perform a left mouse click Menu Open a context sens...

Страница 8: ...l your pre configured mouse settings When you select Profile Settings from the dropdown menu a sub menu will appear that allows you to choose your desired profile Forward Assign a Forward command in W...

Страница 9: ...cess to the 12 buttons Thumb Grid All 12 buttons can be assigned to various functions based on your own preferences In addition you can switch between the Basic 123 and Advanced Num configuration to a...

Страница 10: ...level in the X and Y axis you can select the Enable independent X Y sensitivity option and move the individual X and Y arrows along the slider c To display the On The Fly Sensitivity indicator onscree...

Страница 11: ...k on this row and select Rename to enter a profile name of your choice d Application Right click this row and select Assign Application to open up the directory browsing Select the executable file of...

Страница 12: ...Right clicking on any profile allows you to quickly access a list of extra commands...

Страница 13: ...y box You can even choose to insert a delay time and or a mouse button press b Delay ms Choose the amount of delay to be inserted between keystrokes of your macro c Basic Commands A list of basic comm...

Страница 14: ...light brightness to your liking POWER MANAGEMENT These settings are applicable in Wireless Mode a Brightness Upon entering Wireless Mode the brightness level will be reduced to the level that you def...

Страница 15: ...tions Basic 123 and Advanced Num 1 Basic 123 Configuration In Basic 123 configuration the twelve buttons 1 12 are assigned to 1 2 3 4 5 6 7 8 9 0 of the keyboard respectively This allows you to replic...

Страница 16: ...the Num Lock of the keyboard affects the function of the Thumb Grid when your Razer Naga Epic is in the Advanced Num configuration To change between the Basic 123 and Advanced Num configurations simpl...

Страница 17: ...Naga Epic in wireless mode Setting Sensitivity Stages A sensitivity stage is a preset sensitivity value you can swap to on the fly This means you can change to your preferred sensitivity instantly by...

Страница 18: ...g the function to a button in the Assign Buttons tab Example Selecting Profile 5 to be activated upon loading of Program A 1 Open up the Razer Naga Epic Configurator 2 Click on the Manage Profiles tab...

Страница 19: ...e button for faster response in your games Polling Rate The polling rate determines the time intervals that the PC retrieves data from your mouse A higher value would mean shorter intervals and theref...

Страница 20: ...OF PROCUREMENT For the avoidance of doubt in no event will Razer be liable for any costs of procurement unless it has been advised of the possibility of such damages and in no case shall Razer be liab...

Отзывы: