Are you Ready to #ShowTheWorld?
You’re almost good to go, just follow this Quick Start Guide and you will be
capturing your life in true HD in no time. We’ve included a whole bunch of
mounts and accessories to get you shooting straight out of the box!
Join Our Tribe
Let’s Get Started
STEP 1
Capturing Photos and Videos / Setting Modes
VIDEO SETTINGS
PHOTO SETTINGS
SETTINGS MODE
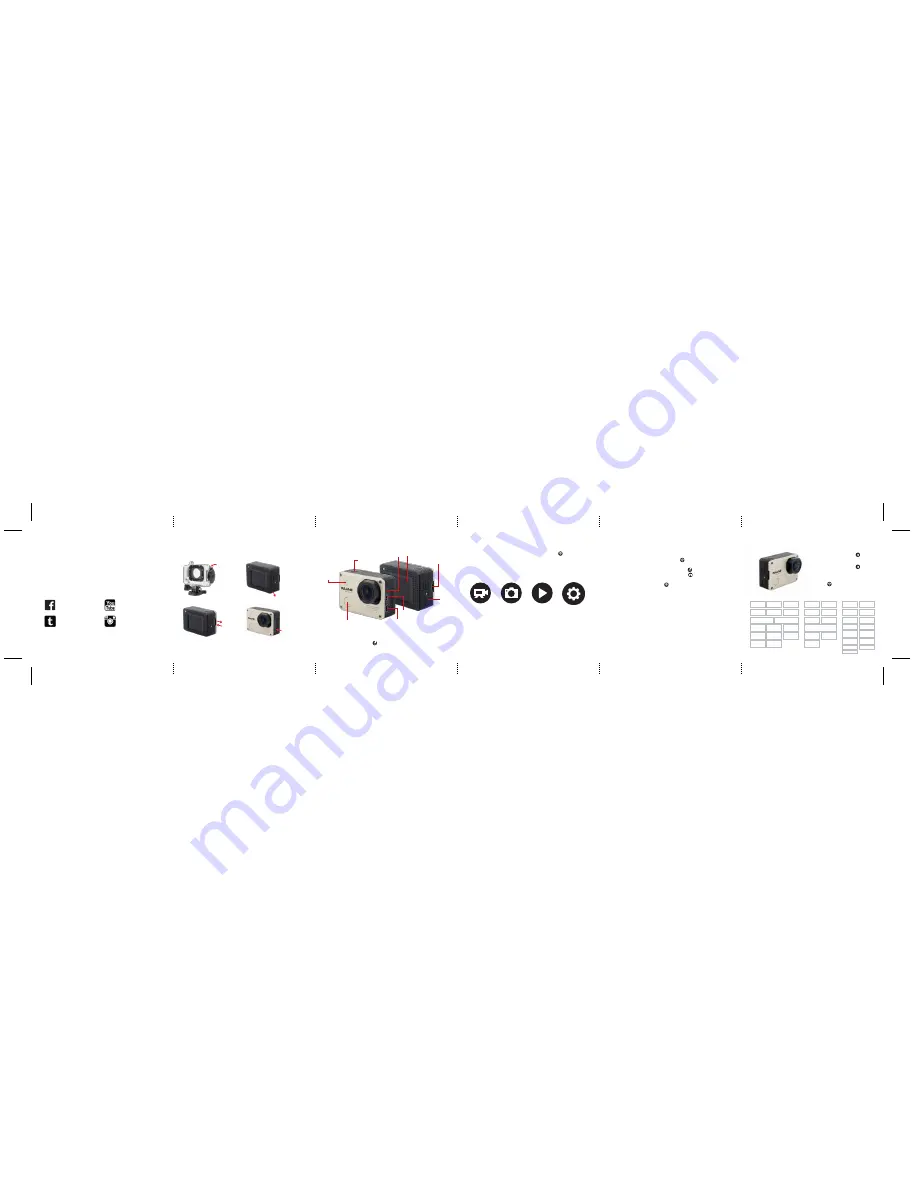
The Camera
Camera Modes and Settings
Video / Photo / System Settings
Turning Camera On and Off
Rayne Cams
Raynecam_official
Rayne Cam
Raynecam_official
www.raynecam.com
Remove camera from
waterproof housing
STEP 3
Remove camera battery
slider and insert battery
STEP 4
Charge battery using
provided USB cable
STEP 2
Insert micro SD card
Press the Shutter / OK Button to
take a photo or start recording.
Press the Shutter / OK Button to
take a photo or stop recording.
View your photo / video by pressing
Wifi Button
Video
Resolution
EV
Loop
Record
Record
Audio
Image Size
Date & Time
Language
Frequency
Image
Rotation
TV Mode
Screen Auto
Sleep
On Screen
Info
Version
Auto Power
Off
Remote
Pairing
Format
Beep
Date Stamp
Time lapse
Colour
EV
White
Balance
White
Balance
Self Timer
Date Stamp on / off
Sharpness
FOV
(normal / wide)
Motion
Detection
WDR
G-Sensor
Time Lapse
Custom White
Balance
Custom White
Balance
Turn camera ON and repeatedly press the MODE Button
to scroll through camera modes.
Quick Tip: Visit
www.raynecam.com
to get a full tutorial on how
to setup and use your Rayne cam.
1. To adjust Video, Photo or System settings, when in Video, Photo or
System Settings Mode press Wifi Button . This will take you to the
settings overview menu.
2. To Scroll through settings, press Menu Button .
3. To modify a setting, press OK / Shutter Button to scroll through
available settings.
4. To exit menu press Wifi Button .
Record video
Press the Power / Menu Button for 3 – 5 Seconds to power On / Off
SC Card Slot
Power / Menu Button
Indicator
Light
Shutter /
OK Button
LCD Screen
USB Port
HDMI Port
Mic
Mode /
Wi-Fi
Button
VIDEO
PHOTO
VIEW
SETTINGS
Photo Burst
RAW Photo
Mode
Sharpness
Slow Motion
Gyroscope
Stabilization
Default
1 Touch
Record
Dash Cam
Mode
Playback footage
Change settings
Capture photo


