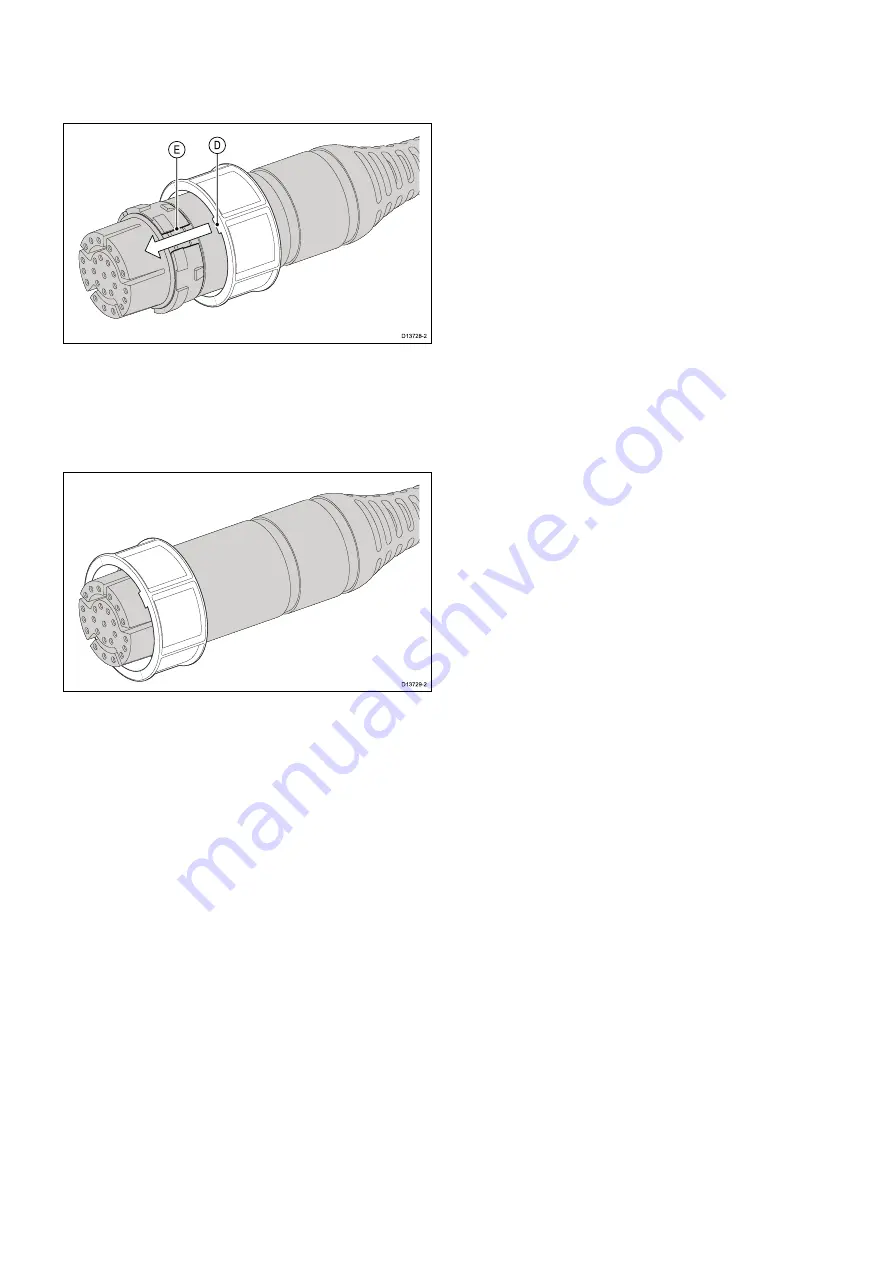
6. Slide the locking collar towards the plug-end of the connector,
rotating the collar as necessary to ensure that the lugs on the
locking collar (labelled ‘D’ in the illustration) pass through the
channels (labelled ‘E’) in the split-ring.
The locking collar slides easily towards the plug-end of the
connector, before butting up against the split-ring moulding.
7. Grasp the body of the connector with one hand, then with the
other hand, pull the locking collar firmly towards the plug-end
of the connector.
As you pull the locking collar, it clicks into place over the
split-ring. The locking collar stays in position on the connector,
but rotates freely.
2
RealVision 3D transducer cable: attaching the locking collar


