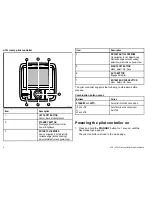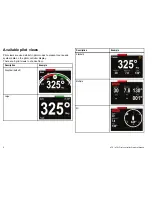
Setting the pilot view
To set the pilot view to your desired layout:
1. Go to the
Pilot view
menu:
Main menu > Pilot view
.
2. Highlight and select
View type
.
3. Highlight the required view:
• Graphical
• Large
• Standard
• Multiple
• 2D
4. Press
SELECT
to save the view as default.
Standby mode
In Standby mode you have manual control of the helm and the
display shows the vessel’s current compass heading.
You can disengage any autopilot mode and return to manually
steering at any time by pressing
STANDBY
.
Auto mode
Steering automatically to a heading
You can use your autopilot system to steer automatically towards
a heading.
1. Steady the vessel on the required heading.
2. Press
AUTO
.
The autopilot is now in AUTO mode and will steer to the chosen
heading, shown on the display.
3. You can return to manual steering at any time by pressing
STANDBY
.
Changing course in auto mode
To change course whilst in AUTO mode:
1. Use the
–1
and
–10
button, or turn the rotary controller
anticlockwise to change the vessel’s course to port.
Pressing
–1
button will increment the course to port by 1º and
–10
will increment by 10º.
Turning the rotary controller 1 click anticlockwise will increment
the course to port by 1º .
2. Use the
+1
and
+10
buttons, or turn the rotary controller
clockwise to change the vessel’s course to starboard.
Pressing
+1
button will increment the course to starboard by 1º
and
+10
will increment by 10º.
Turning the rotary controller 1 click clockwise will increment the
course to Starboard by 1º .
e.g. pressing the
-1
button four times, or turning the rotary 4 clicks
anticlockwise will result in a 4° course change to port.
Alarms
Alarms are used to alert you to a situation or hazard requiring your
attention.
Some examples of alarms are:
• Anchor alarm — Used when anchored, this alerts you to a
change in depth which could mean that the chain length requires
adjusting.
• Depth and speed alarms — These alarms alert you when your
depth or speed moves outside of specified limits, for example
a minimum depth.
7
Содержание P70
Страница 2: ...ENGLISH Document number 86142 1 Date 02 2011...
Страница 9: ...Owner notes...
Страница 10: ...Owner notes...
Страница 11: ......
Страница 12: ...www raymarine com...


