


Chapter 8
194
OmniSeed™ Viper Pro™ Installation & Operation Manual
Create Map From Field Boundary Method
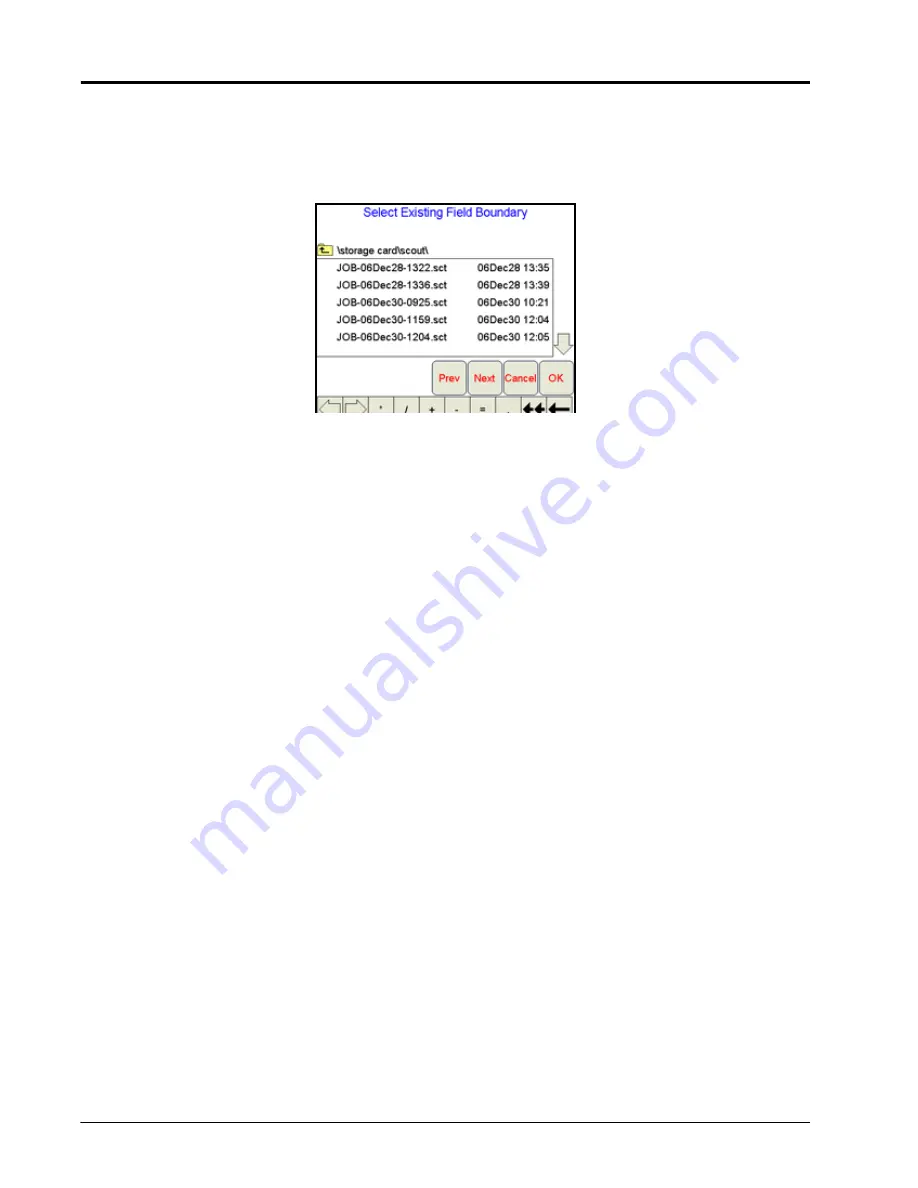
This method allows the operator to select an existing field boundary to use in creating a no-apply field
boundary. When the Next button is selected, a new screen is displayed showing the names of the fields stored
on the Viper internal memory.
The operator selects the desired field boundary to create a no-apply boundary for the field. A no-apply zone for
three implement widths around the extents of the largest zone will be created based on the field boundary file.
Note:
The file selected must have a completed boundary. If the file selected does not have a completed
boundary, a prompt will be displayed indicating that the boundary is not complete. Select another
option or another field that contains a completed boundary.
Changing Apply/No-Apply Default Colors
The Viper Pro assigns the default colors to apply and no-apply zones. The default colors used to identify apply
and no-apply zones on the Viper Pro display may be modified
1.
Select
Menu
.
2.
Select
Setup
,
Maps
, and
Scout Maps
.
Note:
The apply and no-apply labels will be grayed out and cannot be changed, but the color can be
changed by the operator.
3.
Touch
Color
next to the apply or no-apply feature name. The Feature Colors screen displays.
4.
Touch the desired color to assign to the apply or no-apply zone and touch
OK
. Viper assigns the color to the
zone and returns to the Enter Features Name and Color screen.
5.
For other zones, repeat step 3 through 4.
6.
Touch
OK
when to finish modifying the colors for the apply and no-apply zones. Viper saves the information
and returns to the Main Screen.
Note:
Select colors for the apply and no-apply zones that are different from the coverage map colors, as
the coverage map will be painted over the Section Control map in the Section Control tab.
Содержание OmniSeed Viper Pro
Страница 1: ...Viper Pro Software Version 3 10 OmniSeed Calibration Operation Manual ...
Страница 10: ...Table of Contents viii OmniSeed Viper Pro Calibration Operation Manual ...
Страница 98: ...Chapter 4 86 OmniSeed Viper Pro Installation Operation Manual ...
Страница 150: ...Chapter 6 138 OmniSeed Viper Pro Installation Operation Manual ...
Страница 222: ...Chapter 10 210 OmniSeed Viper Pro Installation Operation Manual ...
Страница 240: ...Chapter 11 228 OmniSeed Viper Pro Installation Operation Manual ...
Страница 250: ...Appendix A 238 OmniSeed Viper Pro Installation Operation Manual FIGURE 1 OmniSeed System Diagram 3 Bin D N 054 5010 003 ...
Страница 251: ...Manual No 016 3001 015 Rev C 239 FIGURE 2 OmniSeed System Diagram 3 Bin D N 054 3001 026 ...
Страница 255: ...Manual No 016 3001 015 Rev C 243 FIGURE 6 Seed Blockage Sensor Cabling More than 60 Sensors D N 054 5002 002 ...
Страница 256: ...Appendix A 244 OmniSeed Viper Pro Installation Operation Manual ...
Страница 284: ...Appendix D 272 OmniSeed Viper Pro Installation Operation Manual ...
Страница 292: ...Appendix G 280 OmniSeed Viper Pro Installation Operation Manual ...
Страница 300: ...Appendix H 288 OmniSeed Viper Pro Installation Operation Manual ...
Страница 304: ...Index 292 OmniSeed Viper Pro Calibration Operation Manual ...
Страница 307: ......


