background image

OPERATION 

ATTENTION!


Make sure that the power source to which the appliance is to be connected 


is accordant with the parameters specified on the rating plate.


Always  remember  to  keep  a  safety  distance  from  walls  or  other  objects.  Airflow  cannot   
be blocked! 
 

1.


Attach  this  heater  to  a  suitable  ceiling.  The  appliance  must  hang  at  least  1.8m 


from the floor and a minimum distance of 0.5m from the ceiling.


2.


Make sure that the hook is able to undertake a weight 3 or 4 times that of the Patio 
Heater itself.


3.


These appliances must be supplied with proper voltage and frequency , and connected 
to  an  individual,  properly  grounded  branch  circuit,protected  by  a  circuit  breaker 


which in accordance with wiring rules. 


4.


The power cable of this appliance must be fastened with the chain.


5.


Installation can only be carried out by qualified person in order to avoid a hazard.


6.


Use rocker power switch to control power off/standby


7.


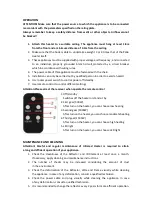
Use remote control to control different settings


Attention:Please aim at the receiver when operate the remote control   


1.


Off/standby


Switches off the heater or stands it by.


2. First gear (500W)


    After turn on the heater, you can choose low heating.


3. Second gear (1000W)


    After turn on the heater, you can choose moderate heating.


4. Third gear (1500W)


    After turn on the heater, you can choose high heating


5. LED light


    After turn on the heater, you can choose LED light.


MAINTENANCE AND CLEANING


Attention!  Careful  and  regular  maintenance  of  Infrared  Heater  is  required  to  attain 


a long and efficient operation of your appliance.


1.


Check  the  cleanliness  of  the  Reflector  and  IR-Filament  at  least  once  a  month. 


If necessary, apply cleaning and maintenance instructions.


2.


The  number  of  checks  may  be  increased  considering  the  amount  of  dust 


in the environment.


3.


Check  the  deformation  of  the  Reflector,  Wire  and  Frame  visually  while  cleaning 


the appliance. In case of any deformation, consult a qualified technician.


4.


Check  the  power  cable  and  plug  visually  while  cleaning  the  appliance.  In  case 


of any deformation, consult a qualified technician.


5.


It is recommended to change the reflector every 2 years for more efficient operation.


Содержание OT-1500LED

Страница 1: ...ukcja oryginalna Ogrzewacz tarasowy EN Original instructions Patio Heater MODEL OT 1500LED Producent Ravanson Ltd ul Mazowiecka 6 09 100 Płońsk Polska tel 0048 23 662 68 01 fax 0048 23 662 68 02 www ravanson pl ...

Страница 2: ...użytkowania Nieprzestrzeganie podanych niżej ostrzeżeń dotyczących bezpieczeństwa i wskazówek bezpieczeństwa może być przyczyną porażenia prądem elektrycznym pożaru i lub poważnych obrażeń Zachowaj wszystkie ostrzeżenia i wskazówki dotyczące bezpieczeństwa aby móc skorzystać z nich w przyszłości Urządzenie powinno być instalowane zgodnie z obowiązującym prawem i użytkowane TYLKO NA WOLNYM POWIETRZ...

Страница 3: ...ie pozostawiać urządzenia bez nadzoru podczas pracy Zawsze odłączyć urządzenie gdy nie planuje się jego użycia 5 Promiennik jest gorący podczas pracy Aby uniknąć oparzeń nie dotykać gorących powierzchni gołą skórą Uwaga Niektóre części niniejszego produktu mogą ulec znacznemu nagrzaniu i spowodować oparzenia Należy zwrócić szczególną uwagę na obecność dzieci i osób bardziej narażonych na obrażenia...

Страница 4: ...runku sufitu Element grzejny należy skierować w stronę miejsca które ma ogrzewać Ostrzeżenie Aby uniknąć przegrzania nie zakrywać grzałki 10 Urządzenie to może być używane przez dzieci w wieku od 8 lat oraz osoby niepełnosprawne bądź o ograniczeniach sensorycznych lub umysłowych jak również bez doświadczenia i wiedzy pod warunkiem że są pod nadzorem lub zostaną poinstruowane w zakresie bezpieczneg...

Страница 5: ...odzenia przewodu zasilającego musi on zostać wymieniony przez producenta jego przedstawiciela serwisowego lub osoby o odpowiednich kwalifikacjach aby uniknąć zagrożenia 15 Nie dotykać elementów gołymi rękami W przypadku nieumyślnego dotknięcia usunąć ślady palców miękką szmatką i spirytusem metylowym lub alkoholem gdyż w przeciwnym razie dojdzie do ich wypalenia na elemencie co spowoduje przedwcze...

Страница 6: ...układać przewodu zasilającego pod wykładziną Nie przykrywać przewodu zasilającego dywanami chodnikami lub innymi podobnymi elementami wyposażenia wnętrz Poprowadzić przewód zasilający z dala od ruchu pieszego w miejscu w którym nie zagraża potknięciem 21 Nie owijać kabla zasilającego wokół urządzenia 22 Nie wprowadzać ani nie dopuszczać do przedostania się ciał obcych do otworów wentylacyjnych lub...

Страница 7: ...k należy ustawić przełączniki w pozycji OFF WYŁ a następnie wyjąć wtyczkę z gniazdka Nie ciągnąć za przewód zasilający w celu jego odłączenia 28 Zawsze odłączyć urządzenie od zasilania i upewnić się że jest całkowicie zimne przed przenoszeniem czyszczeniem lub przechowywaniem 29 Promiennik przeznaczony jest wyłącznie do użytku domowego i nie powinien być wykorzystywany w zastosowaniach komercyjnyc...

Страница 8: ... ustawione lub zainstalowane w przewidzianym normalnym położeniu roboczym i są one pod nadzorem lub zostały poinstruowane w zakresie korzystania z urządzenia w bezpieczny sposób i rozumieją związane z tym zagrożenia Nie zezwala się na podłączanie regulację lub czyszczenie urządzenia lub wykonywanie czynności serwisowych przez dzieci w wieku od 3 do 8 lat 33 UWAGA Niektóre części niniejszego produk...

Страница 9: ...arczony hak 38 Przed zainstalowaniem promiennika sprawdzić ściany zewnętrzne pod kątem uszkodzeń 39 Sprawdzić ściany zewnętrzne pod kątem obecności przewodów telekomunikacyjnych i elektrycznych oraz rurociągów 40 Jeśli w bezpośrednim sąsiedztwie znajdują się przewody lub rury nie należy instalować promiennika ale znaleźć alternatywne miejsce instalacji produktu ZASTOSOWANIE Tylko do użytku zewnętr...

Страница 10: ...e uziemionego obwodu zabezpieczonego wyłącznikiem zgodnym z normami elektrycznymi 4 Kabel zasilający niniejszego urządzenia należy przymocować za pomocą łańcucha 5 Instalacja może być wykonana wyłącznie przez wykwalifikowaną osobę w celu uniknięcia zagrożeń 6 Sterowanie wyłączeniem przejściem w stan czuwania za pomocą przełącznika kołyskowego 7 Sterowanie różnymi ustawieniami za pomocą pilota Uwag...

Страница 11: ...miennika przez wiele lat 1 Przed czyszczeniem urządzenia odłączyć przewód zasilający dla własnego bezpieczeństwa 2 Usunąć przednią siatkę drucianą przez wloty na ramie za pomocą śrubokrętu płaskiego 3 Odbłyśnik i żarnik należy czyścić miękką ścierką gładką szczotką Ścierka może być wilgotna ale nigdy nie przesadnie mokra a środek czyszczący nie powinien zawierać żadnych środków chemicznych 4 Nie s...

Страница 12: ...ETRY TECHNICZNE Model OT 1500LED Takie oznakowanie informuje że sprzęt ten po okresie jego użytkowania nie może być umieszczany łącznie z innymi odpadami pochodzącymi z gospodarstwa domowego Użytkownik jest zobowiązany do oddania go prowadzącym zbieranie zużytego sprzętu elektrycznego i elektronicznego Prowadzący zbieranie w tym lokalne punkty zbiórki sklepy oraz gminne jednostki tworzą odpowiedni...

Страница 13: ...arnings at hand for future reference The device must be installed in accordance with the applicable law and USED ONLY OUTSIDE ATENTION FOR OUTDOOR USE ONLY SAFETY INSTRUCTIONS 1 Please follow all the safety precautions listed below for safety and to reduce the risk of injury or electrical shock 2 Read this Instruction Manual carefully to maximise this appliance s performance and keep for future re...

Страница 14: ...ld on the sides if not available make sure the unit is turned off Do not move the unit when in use Wait until the heater is completely cool before moving and check that it has been unplugged from the power supply 7 Position the unit at least 1m away from highly combustible materials such as trees leaves dry grass and bushes furnitures pillows and curtains 8 The heater must be installed at a minimu...

Страница 15: ... the appliance Cleaning and user maintenance shall not be made by children without supervision 12 Do not use the product if there are any visible signs of damage to the appliance 13 Do not attempt to repair or adjust any electrical or mechanical functions on this unit The unit does not contain any user serviceable parts Only a qualified electrician should perform servicing or repairs Attempting to...

Страница 16: ...places near water or other liquids such as bathrooms shower or swimming pool 18 This product must not be left outdoors exposed to the elements for long periods of time 19 Do not operate with wet hands or spill water or other liquids on to the appliance the mains cable or plug 20 Do not run the power cable under carpeting Do not cover the power cable with rugs runner or similar coverings Arrange th...

Страница 17: ...is plugged into a suitable socket one that is tested for outdoor use 27 To disconnect heater turn controls to OFF then remove plug from socket Do not unplug by pulling on the power cable 28 Always unplug the unit and ensure the unit is completely cold before moving cleaning or storing 29 This heater is intended for domestic use only and should not be used commercially for contract purposes Any alt...

Страница 18: ...l operating position and they have been given supervision or instruction concerning use of the appliance in a safe way and understand the hazards involved Children aged from 3 years and less than 8 years shall not plug in regulate and clean the appliance or perform user maintenance 33 CAUTION Some parts of this product can become very hot and cause burns Particular attention has to be given where ...

Страница 19: ...Check exterior walls for areas of damage before installing the heater 39 Check exterior walls for communication and electrical cables and pipelines 40 Should any service lines be present in the immediate vicinity do not install your heater find an alternative location to install this product PUPROSE For outdoor use only CONSTRUCTIONS AND CHARACTERISTICS Hanging patio heater Halogen element Steel h...

Страница 20: ...ngs Attention Please aim at the receiver when operate the remote control 1 Off standby Switches off the heater or stands it by 2 First gear 500W After turn on the heater you can choose low heating 3 Second gear 1000W After turn on the heater you can choose moderate heating 4 Third gear 1500W After turn on the heater you can choose high heating 5 LED light After turn on the heater you can choose LE...

Страница 21: ...tact the seller Follow the rules in this manual Do not modify the product When the device does not work unplug it Check if there is power in the socket the device is connected to If power was not disrupted do not attempt to repair the device on your own Contact manufacturer s authorized service centre TECHNICAL SERVICE All devices undergo a thorough post production control If you still find any fa...

Страница 22: ... and other local units make a system enabling to dispose of the device Proper procedures concerning electric electronic equipment disposal are intended to avoid any harmful impact to humans and environment resulting from dangerous components and improper storage or processing of the devices Substances having negative environmental impact have been reduced to make the product safer after its dispos...

Отзывы: