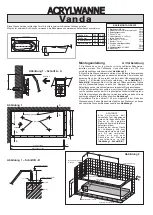
CONTENTS OF MOUNTING
KIT - SUPPORT
1. Metal support 600mm
2. Plastic leg M12
3. Clip
4. Dowel
8mm diameter
5. Bolt for dowel
4x40mm
6. Bolt
5.5x 16mm
7. Drill bit
3mm diameter
8. Washer
9. Threaded rod M12x125
10. Nut M12
!
!
!
!
2 pc
4 pc
4 pc
4 pc
4 pc
8 pc
1 pc
4 pc
4 pc
12 pc
Depending on the type of installation into the bathroom, the bathtub can be enclosed with a front panel and with either one or two side panels,
or it can be built-in and surrounded with ceramic tile.
INSTALLATION OF THE BATHTUB
A / Constructional readiness
1.
picture 2
2.
see detailed
pic. 1, detail B-B
The bathtub should only be installed into a completely finished and tiled bathroom with prepared plumbing. If the wall tile does not
come down to floor level, it must be finished at least 150mm below the upper edge of the tub. (
).
If the bathtub is to be built-in, the inside of the surrounding wall must follow the outline of the bathtub so that it touches the outer
edge of the tub ( with a maximum tolerance of 20mm), and it must be 2 - 3 mm lower than the cut edge of the tub (
). Remember! before fully enclosing the bathtub, leave an opening in one wall for access to plumbing and siphon.
Aceramic tile with magnets or a small door can cover the opening.
3.
pic. 2
4.
pic. 2
The water mains can be either 3/4” or 1/2” in diameter. For water taps mounted on the wall, the head for the water pipe should be
800mm above the floor and in an appropriate area for proper water flow into the tub. With standard tub mounted taps, install the outlet
pipes in an area appropriate for mounting the taps in the correct place on the tub (
).
The drain pipe is 50mm in diameter. It should be installed near the bathtub drain so as not to interfere with the supporting legs
(
).
B / Mounting procedure for a built-in bathtub
When installing a bathtub with a surrounding plastic panel, follow the mounting instructions enclosed with the panel.
C / MOUNTING THE PLASTIC PANEL WITH THE PANEL KIT
!
!
MAINTENANCE, CLEANING, GUARANTEE
If you want your bathtub to reliably serve you for a long time, please follow these recommendations:
- after each use, clean the bathtub with a liquid cleaner and a soft cloth.
- fill the tub first with cold, and then with increasingly warmer water.
- repair leaky water taps without delay
- the surface of the tub can be damaged with thinners, solvents, nail polish, and polish remover
- hot things such as cigarettes or a curling iron can also damage the surface of the tub
- water scale can be removed with a mixture of water and vinegar, superficial scratches can be removed with polishing compounds
Never use any abrasive pastes, dissolvents, acetone or detergents and desinfectants, that contain chlorine.
: RAVAK CLEANER is used to remove old and dried on debris from glass surfaces, shower frames, enamel
and acrylic bathtubs, washbasins and water taps; RAVAK DISINFECTANT a special cleaning agent with outstanding germicidal and anti-fungal effects.
In the case of misuse, or if the bathtub is mounted without supporting legs in a built-in enclosure, the guarantee is not valid.
The manufacturer offers a 10 year guarantee on all bathtubs, on the condition that the product is installed by a professional serviceman or company and that the
bathtub is only used for the personal hygiene of adults and children.
We recommend the use of the RAVAK SERIES of speciality chemicals
5.
6.
7.
8.
9.
pic. 4
10.
11.
12.
13.
14.
pic.2
15.
16.
pic. 1
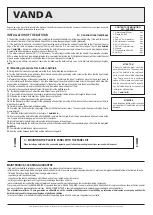
During the entire installation, leave the protective foil on the bathtub and work with caution.
Turn the bathtub upside down, and place the cardboard and styrofoam packaging on the corners of the tub so that the rim of the tub
and the raised headrest will not be damaged.
Measure the metal legs of the support according to picture 3. According to the type of installation, move the legs in such a way so
as not to interfere with the supporting wall. Also, take advantage of the asymmetrically placed holes in the support, which allows the
support to be turned around. On the reinforced part of the bottom of the tub, mark the spots where the holes will be drilled.
With the enclosed 3mm diameter drill bit, drill holes in the marked areas to a depth of 10mm.
Assemble the support with legs and fasten it to the bottom of the bathtub (
).
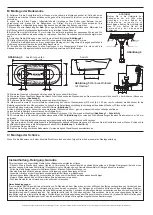
By rotating the plastic shoes, adjust the tub with feet to a height of 610mm.
Place the tub into position and if necessary, rotate the shoes to adjust the tub to the correct height in the enclosure.
When the tub is level in both directions, tighten the nuts on the feet.
On the floor, outline the position for the siphon opening.
On the tiled wall mark the true height of the upper edge of the bathtub. It must be 610mm above the floor with a tolerance of 5mm in
either direction (
).
Carefully remove the bathtub and place it aside.
Place the clips 55mm under the upper edge of the tub (555mm above floor level). The openings for the dowels should be 8mm in
diameter (
).
17.
pic. 1 detailedA-A
18.
pic. 5
19.
20.
pic 1
detailA-A
21.
22.
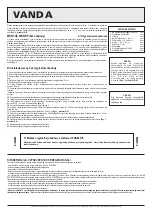
Attach the holders with the 4 x 40mm bolts (
).
We recommend the bathtub be fitted with the RAVAK complete drain kit (
) which may be purchased at the same time as the
tub. Prepare a 40mm drainage pipe for connection to the siphon.
Mount the drain to the bathtub according to the instructions given in the package.
Before finally installing the bathtub, place some putty into the holders and slide the perpendicular edge of the tub to the wall (
).
Complete the installation and siphon connection.
Seal the spaces between the bathtub and the tiled supporting walls.
ATTENTION!
All acrylic bathtubs must never be
permanently built-in. The supporting
part of the bathtub is the reinforced
bottom, on which are fitted adjustable
legs. There should be a minimum
space of 2-3mm between the bathtub
and the surrounding tiles. This space
can be filled with putty or silicon after
installation of the bathtub.
(Pic. 1 - detail B-B).
ATTENTION
Use a stop when drilling so that the acrylic
on the bottom of the bathtub will not be
damaged.
VANDA
The manufacturer reserves the right to change the price, technical parameters or other facts without a prior notice and shall bear no responsibility for the printing errors.
Содержание VANDA
Страница 15: ......


