


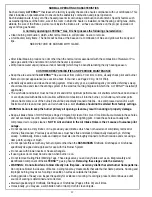

7
VENTED INSTALLATIONS
THE CHIMNEY DAMPER MUST BE WIDE OPEN AND FIXED IN A MANNER TO MAINTAIN A PERMANENT FREE OPENING
AT ALL TIMES AS OUTLINED ABOVE. THE AREA OF THE FLUE MUST BE NOT LESS THAN 1/10 THE AREA OF THE
FIREPLACE OPENING. THIS DECORATIVE GAS APPLIANCE MUST BE INSTALLED IN A FULLY VENTED METAL OR
MASONRY FIREPLACE WITH A WORKING FLUE THAT IS SAFE FOR BURNING A WOOD FIRE. THE FLUE MUST BE
FREE OF ANY OBSTRUCTIONS AND MUST EXHAUST ALL PRODUCTS OF COMBUSTION. DAMPER AND GLASS DOORS
MUST BE FULLY OPEN BEFORE LIGHTING OR BURNING FOR PROPER VENTILATION AND TO PREVENT HEAT
DAMAGE TO THE VALVE.
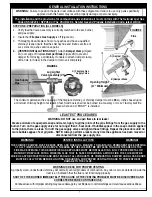
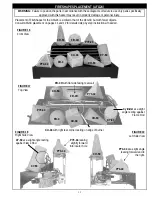
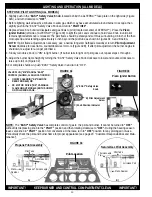
FIGURE 2
A) Damper Clamp
B) Damper Blade
Flue
Gas Supply
Pipe
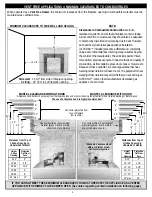
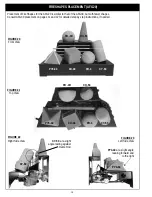
FIGURE 1
Log Lighter
Valve Assembly (V1)
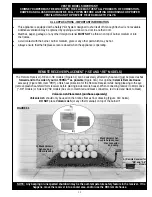
LEAK TEST PROCEDURES
WARNING: DO NOT use an open flame to test leaks!
Create a mixture of equal parts soap and water. Apply to all the joints of the pipe fittings from the gas supply to the
burner. Turn on the gas supply valve for no longer than 3-5 seconds. If bubbles appear in the soap solution applied
to the joints, there is a leak. Turn off the gas supply valve and tighten those fittings. Repeat the procedure until no
more bubbles appear. Test all joints. NOTE: Always perform a leak test any time the appliance has been moved or
disconnected from the gas supply line.
GENERAL INSTALLATION INSTRUCTIONS
The installation and the provisions for combustion and ventilation air must conform with The National Fuel Gas
Code ANSI Z223.1 / NFPA54, or The CSA B149.1, Natural Gas and Propane Installation Code, latest edition.
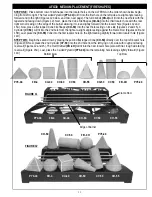
STEP ONE: PREPARATION (ALL MODELS)
1. Verify that the Valve Assembly is correctly matched to the set, burner,
and gas supply.
2. Insure that Fireplace Gas Supply is off (Figure 1A) .
3. Thoroughly clean fireplace floor of any ashes and have a qualified
chimney cleaner insure that the chimney flue and firebox are free of
soot, creosote, ashes and loose paint.
4.
(VENTED INSTALLATIONS ONLY) Attach Damper Clamp (Figure
2A) over edge of fireplace Damper Blade (Figure 2B) to prevent
damper from closing accidentally. If unable to attach damper clamp,
drill a hole (or holes) in the damper or remove it completely.
WARNING! CHECK FOR PROPER VENTING
A properly sized, unobstructed chimney will normally vent all products of combustion. Any odor or smoke detected inside the
room is an indication that the flue is not functioning properly.
SHUT OFF THE BURNER IMMEDIATELY! THE CAUSE OF THE VENTING PROBLEM MUST BE DISCOVERED AND
CORRECTED BEFORE CONTINUED USE.
Continued use with improper venting may cause damage to your fireplace, room furnishings and could cause serious illness.
WARNING!
WARNING!
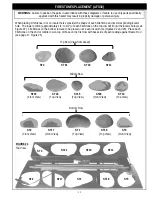
Opening Height
(17” Minimum)
A) Fireplace Gas
Supply Valve
The minimum permanent free opening of the fireplace chimney or chimney damper must be 29 sq. inches based upon
a minimum chimney height of at least 10 feet. Solid Fuels shall not be burned in a masonry or UL 127 factory built fire
place where an ALTERNA™ is installed.
WARNING: Failure to position the parts in accordance with these diagrams or failure to use only parts specifically
approved with this heater may result in property damage or personal injury.