

Chapter 6: Using the Web Interface
67
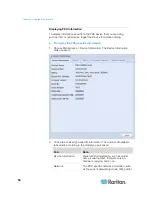
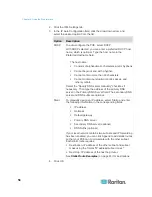
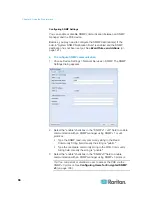
4. Enter the MIB-II system group information, if applicable:
a. sysContact - the contact person in charge of the system being
contacted
b. sysName - the name assigned to the system
c. sysLocation - the location of the system
5. Select the MIB to be downloaded. The SNMP MIB for your PXE is
used by the SNMP manager.
Important: You must download the SNMP MIB for your PXE to use
with your SNMP manager. Click Download MIB in this dialog to
download the desired MIB file. For more details, see
Downloading
SNMP MIB
(on page 188).
6. Click
OK.
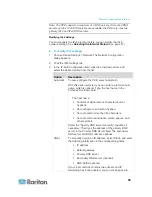
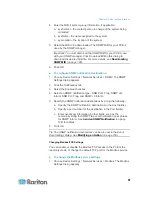
To configure SNMP notification destinations:
1. Choose Device Settings > Network Services > SNMP. The SNMP
Settings dialog appears.
2. Click the Notifications tab.
3. Select the Enabled checkbox.
4. Select an SNMP notification type - SNMP v2c Trap, SNMP v2c
Inform, SNMP v3 Trap, and SNMP v3 Inform.
5. Specify the SNMP notification destinations by doing the following:
a. Specify the SNMP notification destinations in the Host field(s).
b. Specify a port number for the destination in the Port field(s).
c. Enter necessary information in other fields, such as the
community string for SNMP Trap or authentication pass phrase
for SNMP Inform. See
Send an SNMP Notification
(on page
6. Click
OK.
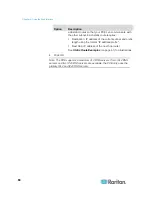
Tip: The SNMP notification destinations can be also set in the Event
Rule Settings dialog. See
Modifying an Action
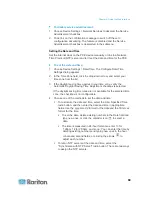
Changing Modbus/TCP Settings
You can enable or disable the Modbus/TCP access to the PXE or the
read-only mode, or change the default TCP port for the Modbus service.
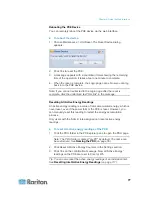
To change the Modbus service settings:
1. Choose Device Settings > Network Services > Modbus. The Modbus
Settings dialog appears.
Содержание PXE
Страница 1: ...Copyright 2014 Raritan Inc PXE 0C v3 0 E August 2014 255 80 0008 00 Raritan PXE User Guide Release 3 0...
Страница 12: ...Contents xii To Assert and Assertion Timeout 352 To De assert and Deassertion Hysteresis 354 Index 357...
Страница 16: ......
Страница 50: ...Chapter 5 Using the PDU 34 4 Pull up the operating handle until the colorful rectangle or triangle turns RED...
Страница 200: ...Chapter 6 Using the Web Interface 184 10 To print the currently selected topic click the Print this page icon...
Страница 339: ...Appendix A Specifications 323 RS 485 Pin signal definition al 4 5 6 D bi direction al Data 7 8...
Страница 353: ...Appendix D LDAP Configuration Illustration 337 5 Click OK The PX_Admin role is created 6 Click Close to quit the dialog...
Страница 380: ...Index 364 Z Zero U Products 1...
Страница 381: ......


