


Dominion KX II Quick Setup Guide
2
QSG-DKX2-v2.6.0-0N-E
255-62-4022-00-RoHS
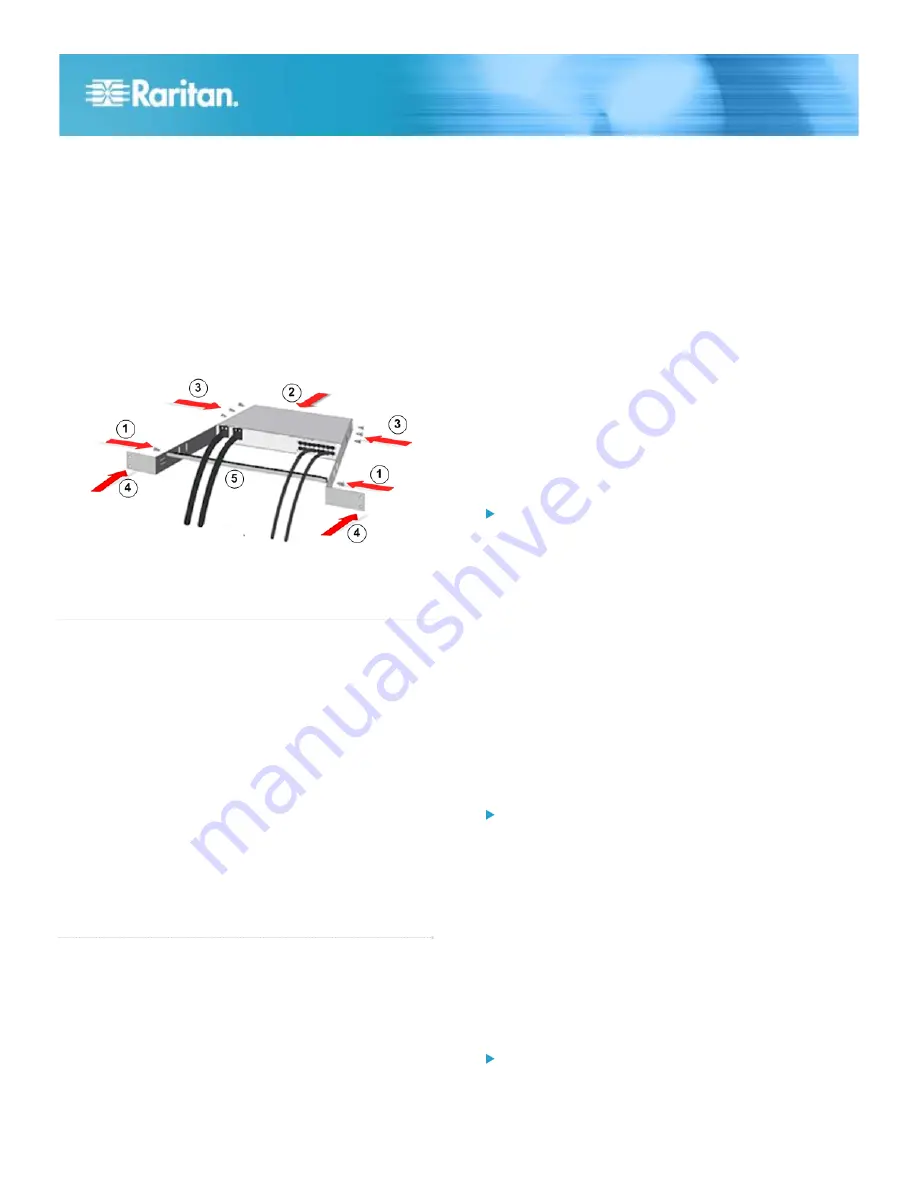
1. Secure the cable-support bar to the front end of the side
brackets, near the side brackets' “ears,” using two of the
included screws.
2. Slide the KX II between the side brackets, with its rear
panel facing the cable-support bar, until its front panel is
flush with the back edges of the side brackets.
3. Secure the KX II to the side brackets using the remaining
included screws (three on each side).
4. Mount the entire assembly in your rack and secure the
side brackets' ears to the rack's front rails with your own
screws, bolts, cage nuts, and so on.
5. When connecting cables to the rear panel of the user
station or switch, drape them over the cable-support bar.
QS Rule
Step 1: Configuring Network Firewall Settings
TCP Port 5000
Allow network and firewall communication on TCP Port 5000
to enable remote access to the KX II.
Alternatively, configure the KX II to use a different TCP port,
then allow communication on that port.
TCP Port 443
Allow access to TCP Port 443 (Standard HTTPS) so you can
access KX II via a web browser.
TCP Port 80
Allow access to TCP Port 80 (Standard HTTP) to enable
automatic redirection of HTTP requests to HTTPS.
QS Rule
Step 2: Configure the KVM Target Servers
Target Server Video Resolutions
For optimal bandwidth efficiency and video performance, KVM
target servers running graphical user interfaces such as
Windows
®
, Linux
®
, X-Windows, Solaris
™
, and KDE may
require configuration.
The desktop background does not need to be completely
solid, but desktop backgrounds featuring photos or complex
gradients might degrade performance.
Ensure that the server video resolution and refresh rate are
supported by KX II, and that the signal is non-interlaced.
See the
KX II Online Help
for a list of supported target server
video resolutions.
Mouse Settings
Following are the mouse settings for various operating
systems.
These settings are configured on your target operating system
unless otherwise indicated.
See the
KX II Online Help
for details on configuring these
mouse settings.
Windows 7 and Windows Vista Mouse Settings
Configure these mouse settings in Windows 7
®
and
Windows Vista
®
:
Configure the motion settings:
Set the mouse motion speed setting to exactly the middle
speed
Disable the "Enhanced pointer precision" option
Disable animation and fade effects:
Animate controls and elements inside windows
Animate windows when minimizing and maximizing
Fade or slide menus into view
Fade or slide ToolTips into view
Fade out menu items after clicking
Windows XP, Windows 2003, Windows 2008 Mouse
Settings
Configure these mouse settings in Windows XP
®
,
Windows 2003
®
and Windows 2008
®
:
Configure the Motion settings:
Set the mouse motion speed setting to exactly the middle
speed
Disable the "Enhance pointer precision" option
Disable the Snap To option
Disable transition effects:
Deselect the "Use the following transition effect for menus
and tooltips" option
Windows 2000 Mouse Settings
Configure these Windows 2000
®
mouse settings:


