background image

IMPORTANT HEALTH AND SAFETY INFORMATION
ABOUT YOUR NEW BOAT

FUEL SYSTEM

The fuel system consists of a fuel tank equipped with an electric

sending unit. The fuel level is displayed on the console mounted gauge
when the ignition switch is “on”. On models with two tanks, a console
mounted switch marked with a fuel pump symbol or just “fuel”, is used to
switch the gauge from one tank to the other. Push the fuel pump symbol
switch to display the level in tank 1 (starboard) or tank 2 (port). Or, on
some models,  push the switch to the left to display the port tank fuel level
and push to the right to display the starboard tank fuel level. The center
position is “off”. A fuel hose connects the fuel tank to the engine. On
models with more than one tank, a switch valve is installed to switch from
tank to tank. This valve, located at the driver seat, on the panel supporting
the driver and passenger seat or near the splashwell, depending on the
model, is clearly marked and easily operated. Some models have a
manual fuel shutoff valve located in the pick up tube at the fuel tank.

Fuel System

17

!

Engine exhaust, some of its

constituents, and a wide variety of

components contain or emit chemicals known to the 
State of California to cause cancer and birth defects and other
reproductive harm. In addition, oils, fuels and fluids contained in boats
as well as waste produced by component wear contain or emit
chemicals known to the State of California to cause cancer and birth
defects or other reproductive harm.
Battery posts, terminals and related accessories contain lead and lead
compounds. Wash your hands after handling. Used engine oil contains
chemicals that have caused cancer in laboratory animals. Always
protect your skin by washing thoroughly with soap and water.

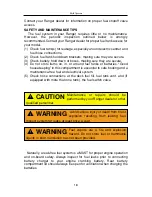
WARNING

!

Spilled fuel is a fire hazard. DO NOT

overfill or overflow the tank, or allow fuel

spills into the hull or bilge. To help prevent fuel blow back, always fill
tank slowly and monitor fuel flow as filling. If spillage should occur,
clean up immediately and dispose of soiled rags/towels in a proper
container.

WARNING

Содержание 2180 BAY RANGER

Страница 1: ...get a vessel safety check for your boat For more information on these important services contact the United States Coast Guard Auxiliary at 1 800 368 5647 www cgaux org or the United States Power Squ...

Страница 2: ...o protects your accessory equipment and fishing tackle from prying eyes and helps to guard against pilferage Familiarize yourself with the instruments and indicators used with all installed equipment...

Страница 3: ...ew while driving The power pedestal should be pushed down into the lowest position Should there be no base provided in the floor the seat should be removed and securely placed in the floor of the boat...

Страница 4: ...ll need to trim for safely handling a turn at various speeds and water conditions Just remember to MAKE SAFETY YOUR GUIDE when attempting any new or unfamiliar maneuver Proceed ONLY AT SPEEDS AT WHICH...

Страница 5: ...port brace between the trailer frame and the lower unit of your engine to prevent damage to your transom while the boat is in transit For the most possible boating and fishing enjoyment familiarize yo...

Страница 6: ...ity one third of the fuel to go one third to come back and one third to reserve GOOD BOAT KEEPING A clean boat is a safer boat Take care to see that rods lures nets gaffs and other potentially harmful...

Страница 7: ...sengers ventilate the boat by opening the side curtains or forward hatch to remove the fumes and immediately seek medical attention Carbon monoxide can be drawn into the cockpit area over the stern of...

Страница 8: ...nd Upholstery 35 Cleaning Marine Vinyl 36 37 Adding Accessories To Your Boat 38 Hook Up of Trolling Motor Leads 39 Wiring Diagrams 40 Electrical System 50 Fuse Panel Information 50 Fisherman Series 51...

Страница 9: ...partment for any additional information IMPORTANT Your Ranger Dealer s Responsibilities Generally it is the dealer s responsibility to the customer to make sure that the boat has been equipped as orde...

Страница 10: ...owner operator s responsibility to return the unit to the Ranger dealer for a periodic checkup The owner operator is responsible for the correct operation of the boat and for the safety of its occupa...

Страница 11: ...ine emergency stop switch can lead to property damage injury or death of the boat operator or passenger s or other whether within the boat or outside the boat WARNING WARNING The boat operator should...

Страница 12: ...HEADACHE NAUSEA AND DIZZINESS DO NOT MISTAKE FOR SEASICKNESS VENTILATE BOAT OPEN SIDE CURTAINS OR FORWARD HATCHES TO REMOVE FUMES WARNING Rotating propeller can cause serious injury or death Never ap...

Страница 13: ...the tow vehicle alone ANTICIPATE STOPS BRAKE EARLY Allow additional distance for stopping 2 Check lug nuts and tire pressure each trip Make sure that lug nuts are in place and tight Maintain tire pres...

Страница 14: ...ent information 2 Model Number This number should be referred to when ordering parts or making other inquiries 3 Hull Identification Number Serial Number Should also be included in any inquiries or wh...

Страница 15: ...m weight in pounds or persons capacity number found on the U S C G capacity information plate attached to your boat Know the ratings and load your boat accordingly It is a must for safe boating 15 Fai...

Страница 16: ...considered safe and suitable for on plane seating The operator of the boat should be familiar with these locations The boat should not be operated at or above planing speeds with persons on board not...

Страница 17: ...clearly marked and easily operated Some models have a manual fuel shutoff valve located in the pick up tube at the fuel tank Fuel System 17 Engine exhaust some of its constituents and a wide variety...

Страница 18: ...boating and a maintenance free fuel and electrical system 5 Check hose connections at the deck fuel fill fuel tank vent and if equipped with more than one tank the fuel switch valve Naturally a leak...

Страница 19: ...transport live fish in the well The auto position also holds the water in the well and in conjunction with the aerator will allow a mix of fresh water intake and recirculate existing water This would...

Страница 20: ...position and pull out on the aerator spray head Turn on the aerator and the water in the well will be emptied To fill the livewell and resume normal operation push the aerator spray head in and set t...

Страница 21: ...R S 7400262 3 4 Blk Spiral Reinf Water Hose N PVC ASSEMBLY M1 7100162 1 1 8 Closed Cell Neop Gasket M 7100125 Black 90 Deg 1 1 8 Elbow W Nut K 7100110 1 1 8 Black Thru Hull Grommet J 7100118 Transom M...

Страница 22: ...aitwell Continuous Exchange of Water Open valve A leaving valve B closed Turn pump on Tank will fill until water reaches the overflow Leave pump on for continuous exchange of water 2 Re circulate Bait...

Страница 23: ...Your Livewell Aeration System SALTWATER RECIRCULATING BAITWELL PLUMBING SYSTEM 23...

Страница 24: ...pped water Grass sticks or other debris have clogged the filters or cavity around the pump impeller restricting water flow to pump Clean screens or remove screens and flush system with garden hose usi...

Страница 25: ...wheel is required at all times You should familiarize yourself with the feel of the steering at various speeds and trim settings NEVER exceed speeds beyond your comfort level Steering 25 The steering...

Страница 26: ...d service as necessary If you have installed a jack plate make sure that there isn t any interference between the jack plate and your steering cylinder If there is interference it may occur during ful...

Страница 27: ...CEMENT KIT PART HS5157 FOR FRONT MOUNT CYLINDER PART HC5345 Item Part Quantity Description 1 797021 2 Seal Gland Only 2 745920 1 Seal Gland Assembly Guide Tool 3 745525 1 Pin Wrench Only 4 828980 1 Bl...

Страница 28: ...Ranger does not supply the cable to engine connectors except on pre rigged packages we will not make specific installation or torque recommendations However Figures 4 5 show maintenance and check poin...

Страница 29: ...Steering 29 See engine owner s manual for proper greasing and maintenance of engine link rod and steering kit CAUTION...

Страница 30: ...rom your Ranger dealer is also a wise investment to help prevent damage while the boat is at home or on the road Careful as you may be you will get that scratch from the dock or beach that will need s...

Страница 31: ...and back to the original shape using 600 grit WET sandpaper Then buff with a light duty buffing compound NOTE Area may have to be filled more than once due to shrinkage NOTE Due to different dye lots...

Страница 32: ...32 Gel coat will not cure by itself You must use a catalyst NOTICE Do not sand metalflake surfaces A different procedure is used to repair these finishes You should contact your Ranger dealer for more...

Страница 33: ...ll up position Always lower the seat to the full down position when the boat is underway We recommend that the seat and pedestal be removed from the front casting deck and remounted into the special b...

Страница 34: ...rn in a counter clockwise direction and try the pedestal again If your seat will not remain in the upright position move the adjustment screw approximately 1 4 one quarter turn in a clockwise directio...

Страница 35: ...Your Ranger upholstery is top grade marine vinyl Naturally the suppleness and color fidelity of the upholstery is best maintained by storing your boat out of direct sunlight Cleaning and conditioning...

Страница 36: ...un Orange 88 Degreaser Roll Off Bleach Baking Soda Turtle Wax Tar Remover APCO Harbor Mate Certain household cleaners powdered abrasives steel wool and industrial cleansers can cause damage and discol...

Страница 37: ...irst E Denatured Alcohol Rinse Dry F Follow instructions of stain agent manufacturer STEP 1 STEP 2 STEP 3 Ballpoint Ink E B A Chewing Gum D B A Coffee Tea Chocolate B Crayon D B Grease D B F Household...

Страница 38: ...before attempting to install a screw This lessens the chance of stripping the hold or chipping the gel coat around the hole If additional instruments are desired on the console holes may be drilled u...

Страница 39: ...d Should this occur the breaker s can be reset by pushing the switch If this occurs again disconnect battery leads and trace immediately or take it to your Ranger dealer for repair An ignition protect...

Страница 40: ...E MODELS HAVE ONLY 1 FUEL TANK IN WHICH CASE THE SENDER WIRE IS PINK AND NO FUEL SWITCH APPEARS ON CONSOLE TO TROLLING MOTOR BLACK RED BLACK RED 50 AMP BREAKER SWITCH TROLLING MOTOR BATTERIES 12 VOLT...

Страница 41: ...41...

Страница 42: ...42 VX TOURNAMENT EDITION WITH DIGITAL SWITCHING...

Страница 43: ...43...

Страница 44: ...44...

Страница 45: ...45...

Страница 46: ...46...

Страница 47: ...47...

Страница 48: ...48 Z COMANCHE...

Страница 49: ...49...

Страница 50: ...sily inspected or replaced The panel has a capacity of twelve to sixteen individual circuits The particular accessory ies they operate are shown on the decal on the right side of the fuse panel or bac...

Страница 51: ...es on and 2 minutes off The fourth key press will turn off the timer function Fuel Level The switch labeled with a diagram of a fuel pump on the console keypad controls which tanks fuel level is displ...

Страница 52: ...position The back lighting is on when the ignition is in the on position Keyless Ignition The user code for this system will come from the factory preset to 1 2 3 4 To change from the preset to your...

Страница 53: ...ss will turn off the timer function Fuel Level The switch labeled with a diagram of a fuel pump on the console keypad controls which tanks fuel level is displayed on the fuel gauge When the Fuel switc...

Страница 54: ...position The back lighting is on when the ignition is in the on position Keyless Ignition The user code for this system will come from the factory preset to 1 2 3 4 To change from the preset to your...

Страница 55: ...Likewise pressing the Aerator 2 switch turns on aerator 2 The pumps will remain on continuously until their corresponding switch is pressed again When the pumps are on the Aerator Timer switch can be...

Страница 56: ...Lighting The back lighting will turn on for 60 seconds when any key is pressed and the ignition is in the off position The back lighting is on when the ignition is in the on position Circuit Breaker...

Страница 57: ...ine press the stop button To lock the system after stopping the engine enter the user code 1 2 3 4 and then press Stop To choke a carbureted engine Pressing the Start and 1 keys simultaneously while s...

Страница 58: ...s on the auto bilge pump Pressing a third time turns off the manual bilge and the auto bilge pumps and reactivates the float switch Interior Lights Pressing the Interior Lights switch will turn on the...

Страница 59: ...for direct attachment to bare wires All wires must be terminated with a 10 ring terminal of the appropriate wire gauge size When assembling plug insure that two cover screws pass through grooves in pl...

Страница 60: ...Electrical System 60...

Страница 61: ...r electrical short Inspect wiring connections and terminals periodically for corrosion etc and replace as needed Replacement components should always be of equal or greater rating and quality We recom...

Страница 62: ...visual distress signals One B 1 U S C G or U L approved fire extinguisher unless the construction is such that explosive flammable vapors cannot be trapped there are no closed compartments no permanen...

Страница 63: ...accident report with their state boating law enforcement agency when their boat is involved in certain boating accidents as follows 1 There is loss of life or probable loss of life 2 Personal injury...

Страница 64: ...BOAT DATA OWNER Address DEALER Address Phone BOAT MAKE MODEL Serial No Key No ENGINE MAKE MODEL Serial No Drive Unit Serial No OTHER 64...

Страница 65: ...Periodically check the winch strap and winch parts for any wear and replace worn parts Remember a small expense for preventive maintenance is much less expensive now than a road side breakdown later 6...

Страница 66: ...nadvertently set by checking that the reset tab is not in the retracted position as shown in figure 15 To reset to the normal position insert a flat screwdriver into the slot on the release tab and pu...

Страница 67: ...disc brakes as outlined in your Disc Brake Manual To minimize corrosion it is necessary for the disc brake calipers and rotors to be rinsed off with fresh water after trailer has been immersed in sal...

Страница 68: ...ncy Brake Engaged Emergency Brake Disengaged To release the emergency brake bracket insert a flat screw driver into the slot on the release tab on bottom side of actuator and pull down until a click n...

Страница 69: ...act Tie Down Engineering at 404 344 0000 or visit their website at www tiedown com 69 If not familiar with disc brake pad replacement have work performed by a qualified individual or service shop CAUT...

Страница 70: ...d be equipped with a properly rated and substantial towing hitch well braced and firmly connected to your vehicle Make sure that your vehicle is properly wired for the trailer light connection The hei...

Страница 71: ...refer to your brake owners manual If you do not have a brake system manual please write or call Tie Down Engineering 5901 Wheaton Drive Atlanta GA 30336 404 344 0000 On swing hitch trailers make sure...

Страница 72: ...72...

Страница 73: ...73...

Страница 74: ...12 Castle Nut 13 Spindle 14 Inside Bearing 15 Inside Bearing Race 16 Outside Bearing Race 17 Outside Bearing 18 Hub 19 Spindle Washer 20 Spindle Nut Cotter Pin 21 Spindle Nut 22 Hub Oil Cap 23 Disc B...

Страница 75: ...fects in the exterior cosmetic gelcoat finish cracking crazing or fading Warranty Period runs one 1 year from the date of delivery to the original retail purchaser Repairs will only be authorized afte...

Страница 76: ...rrosion axle alignment adjustments and trailer components manufactured by companies other than Wood 12 Engines outdrive controls propellers batteries and other equipment or accessories that are not ma...

Страница 77: ...MAINTENANCE NOTES 77...

Страница 78: ...78 MAINTENANCE NOTES...

Отзывы: