


For technical support, contact us at 1-800-565-5321
P4-RS60-3 Installation Guide | REV. B2 | Page 14
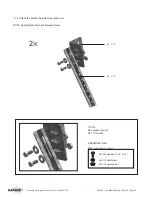
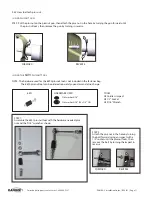
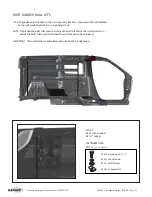
2.6.1 Aligned the wall brackets to the plus nuts, then install the wall brackets to the wall.
IMPORTANT: After installation is completed, ensure all bolts are tightened.
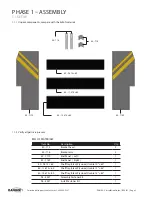
TOOLS
q
Cordless Impact
q
1/2" Socket
HARDWARE USED
4×
#90-212 Hex Bolt 5/16" × 1-1/4"
#98-122 Lock Washer
#98-116 Flat Washer
#94-132 5/16" Plusnut
N
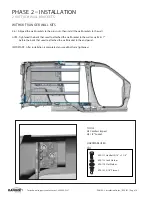
OTE: Tightened the bolts that used to attached the wall bracket to the wall or wall kits 1
st
before the bolts that used to attached the wall bracket to the end panel.
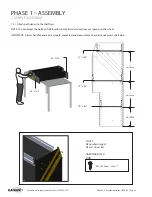
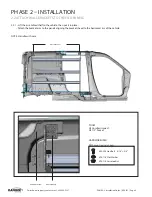
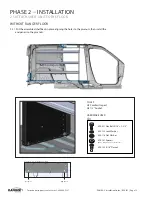
PHASE 2 – INSTALLATION
2.6 ATTACH WALL BRACKETS
without
ranGer
wall
kits


