11
Turn the Timer knob to the [
] position. The display will
show the current time of day plus the
‘cook time’
you just set.
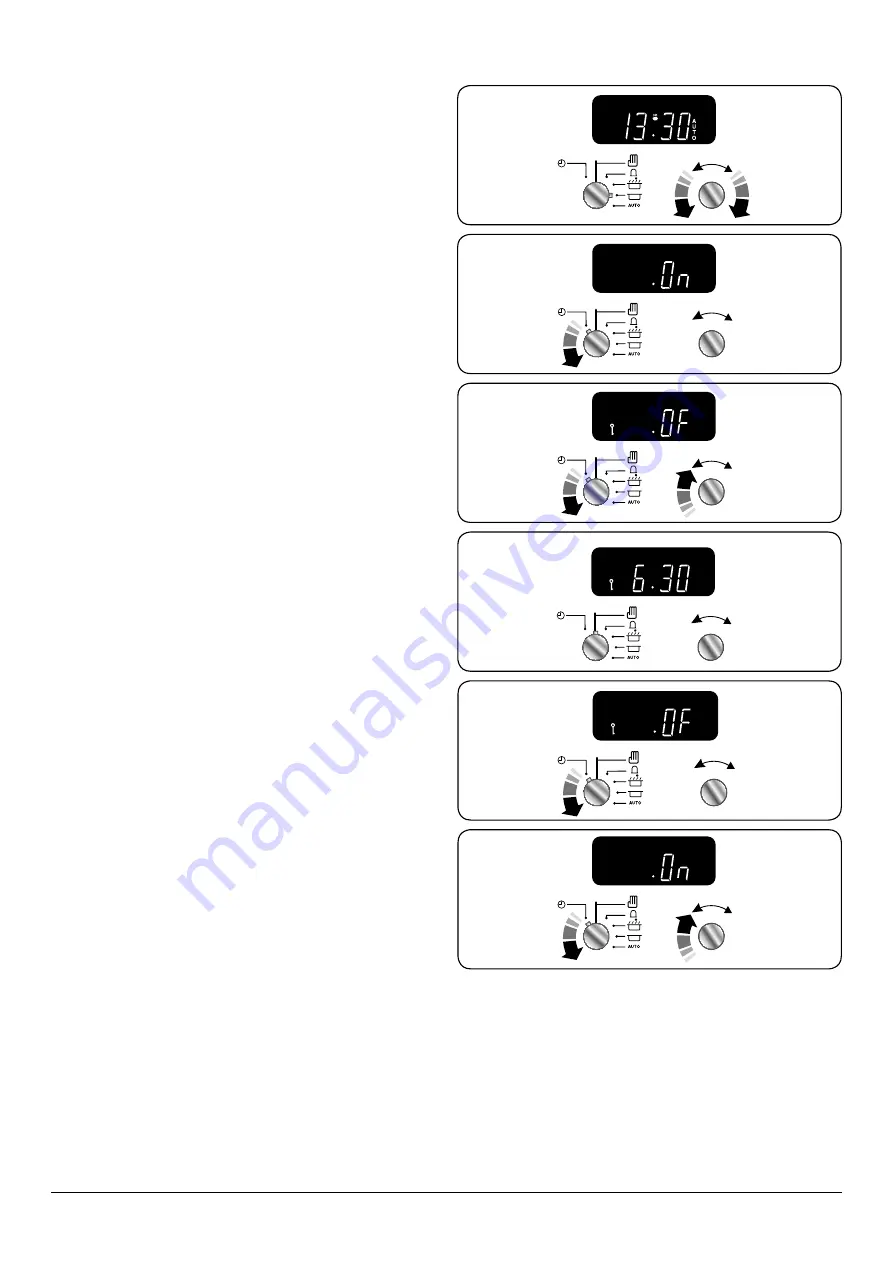
Use the Adjusting knob to set the
‘stop time’
required
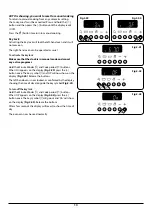
(Fig.2-23)
.
The
‘stop time’
is displayed, followed by ‘AUTO’. Set the oven
to the cooking temperature you need. Turn the Timer knob to
the ‘Auto’ setting.
When your cooking is finished, the beeper sounds. Turn the
Timer knob to the vertical [
] to return to manual cooking.
If you are out, do not worry about the beeper going off – it
stops on its own after a while. When you return, turn the
Timer knob to the vertical [
] to return to manual cooking.
AUTO is showing, but you want to revert to manual
cooking
You can cancel any automatic settings by briefly turning the
Timer knob to the clock symbol [
] and then releasing it.
Key Lock
When the key lock is activated the left-hand oven is locked
and will not come on.
The right-hand oven can be operated as usual.
To activate the key lock
Make sure that the clock is in manual mode and cancel
any active programs.
Turn and hold the Timer knob to the clock symbol [
] for
about 8 seconds. ‘On’ appears on the display
(Fig.2-24)
.
While still holding the Timer knob turned to the clock symbol
[
], turn the Adjusting knob clockwise until the key symbol
[
] and ‘OF’ shows on the display
(Fig.2-25)
. Release the
knobs.
The left-hand oven is now locked, as is confirmed by the
display showing the time of day alongside the key symbol [
].
When the key lock is activated, the left-hand oven is locked
and will not come on
(Fig.2-26)
.
To turn off the key lock
Turn and hold the Timer knob to the clock symbol [
] for
about 8 seconds. ‘OF’ will appear on the display
(Fig.2-27)
.
While still holding the Timer knob turned to the clock symbol
[
], turn the Adjusting knob clockwise until the key symbol
[
] goes out on the display and ‘On’ shows
(Fig.2-28)
. Let go
of the knobs.
After a few seconds, the display reverts to showing the time
of day.
The oven can now be used normally.
ArtNo.301-0008 2BC
Stopping the oven 2
Fig.2-23
Art No. 301-0011 2BC
Activating the key lock 1
ArtNo.301-0012 2BC
Activating the key lock 2
ArtNo.301-0013 2BC
Activating the key lock 3
ArtNo.301-0014 2BC
Deactivating the key lock 1
ArtNo.301-0015 2BC
Deactivating the key lock 2
Fig.2-24
Fig.2-25
Fig.2-26
Fig.2-27
Fig.2-28
Содержание 90 Induction
Страница 1: ...90 Induction Britain s No 1 Range Cooker USER GUIDE INSTALLATION INSTRUCTIONS...
Страница 4: ...ii...
Страница 38: ...34 Notes...


