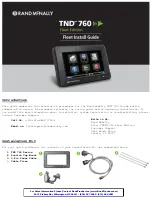


Installation Instruction
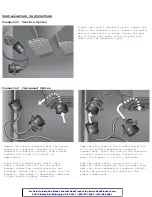
Connector: Visible Option
Connector: Concealed Option
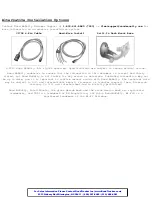
Locate the truck’s diagnostic port. Remove the
plug on the diagnostic port, connect the cable,
and lock the collar in place. Choose the best
way to route your cable after you plug your
cable into the diagnostic port.
Remove the plastic paneling near the trucks
diagnostic connector. Unscrew the truck’s
diagnostic connector (socket) from a metal
bracket that holds it in place (if
applicable).
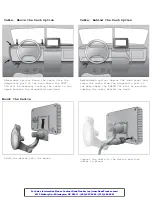
After that is unfastened, insert the Y
cable’s socket end into the now vacant
bracket (where the trucks connector was
located). Fasten the Y cable socket into the
bracket – this makes it externally identical
to the truck’s original connector.
Take the plug side of the Y cable and attach
it to the truck’s diagnostic connector
(socket end). Twist the lock on the connector
to ensure there is a secure connection. A
minor click means it is fully fastened.
Tuck the extra cable, using a twist tie to
keep the cable organized, into an empty area
near the trucks diagnostic connector socket.
Finish the process by re-installing the
plastic dash panel.
For Sales Information Please Contact RoadTrucker Inc (www.RoadTrucker.com)
8312 Sidbury Rd.; Wilmington, NC 28411 - (800) 507-0482 / (910) 686-4281


