background image

- 6 - 

OPERATING INSTRUCTIONS 

Uupacking and set-up summary 

1. Pull lid latches in an outward motion, remove power head and some accessories that may 
have been shipped in the tank. 
2. Attach the casters according to the instruction in this manual. 
3. Before replacing power head, refer to this manual to ensure you have the HEPA filters 
installed for your cleaning operation. 
4. Replace power head, and apply pressure with thumb to each latch until it snaps tightly in 
place. 
Make sure all lid latches are clamped securely. 
5. Insert the flexible hose end into inlet of tank. 
6. Attach the extension wands to the accessor end of the hose. Apply slight pressure until fitting 
is tight. 
7. Attach one of the cleaning accessories (depending on your cleaning requirements) on the 
extension wands. Twist slightly to tighten the connection. 
8. Plug the cord into the wall outlet. Your cleaniner is ready for use.


Assembing 
 
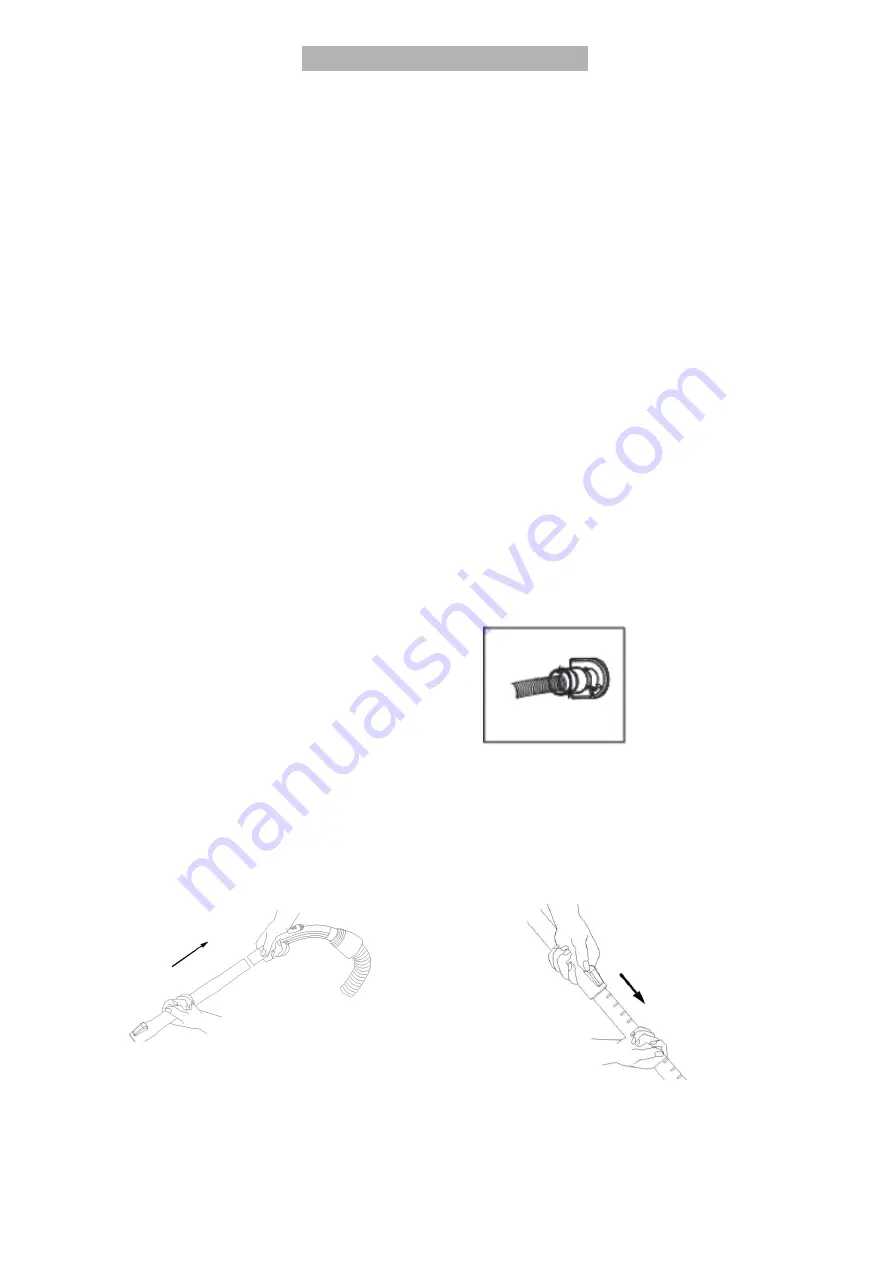
1.    Assembly and disassembly of the tube   

  Montage:   

Insert the tube in the air intake opening. Push the tube in until it locks in place                                                   


  Disassembly: 

Take the tube from the air intake after disconnecting from the mains socket. 
 

2.    Assembling the telescope tube and accessories 
 

2.1: Remove the telescope tube from the hand grip.   


2.2: Set the telescope tube to the correct length.   

Push the telescope tube slide forwards and pull out the lower part of the tube to the 
extension length required. Then simply let go of the slide and let it snap into place 

Содержание RM/553

Страница 1: ... 1 Wet Dry Vacuum Cleaner Model No RM 553 USER GUIDE IMPORTANT READ THIS OPERATOR S MANUAL BEFORE USING ...

Страница 2: ...ck up anything that is burning or smoking such as cigarettes matches or hot ashes 12 Do not use without dust bag and or filters in place 13 Turn off all controls before unplugging 14 Use extra care when cleaning on stairs 15 Do not use to pick up flammable or combustible liquids such as gasoline or use in areas where they may be present 16 Do not use your cleaner as a sprayer of flammable liquids ...

Страница 3: ...replaced by the manufacturer or its service agent or a similarly qualified person in order to avoid a hazard 2 Remove the plug from the socket before performing maintenance Before using the machine make sure that the frequency and voltage shown on the rating plate correspond with the mains voltage Specifications and details are subject to change without prior notice The accessories shown in the pi...

Страница 4: ...ator B Telescope tube C Floor brush D Caster E Container F Lid latch G Mains lead H Motor housing I Power switch J Carrying handle K Vacuum hose L Conversion button M Water brush N 2 in 1 combination nozzle O Upholstery nozzle P Water filter ...

Страница 5: ...causing the blockage 1 Never use the vacuum cleaner in the immediate vicinity of hot bodies and do not suck up hot objects such as cigarette ends or ashes 2 Only place the plug in the socket when your hands are dry 3 Please remove large of sharp objects from the floor before using the vacuum cleaner to avoid any possible damage to it 4 Do not pull by the mains cable when pulling out the plug ...

Страница 6: ...he hose Apply slight pressure until fitting is tight 7 Attach one of the cleaning accessories depending on your cleaning requirements on the extension wands Twist slightly to tighten the connection 8 Plug the cord into the wall outlet Your cleaniner is ready for use Assembing 1 Assembly and disassembly of the tube Montage Insert the tube in the air intake opening Push the tube in until it locks in...

Страница 7: ...e 2 4 Suitable for everyday cleaning of the carpet and of wooden floors 3 Assembling the cartridge filter When picking up water please change the HEPA filter to water filter 4 Assembling the caster Insert casters into dolly and snap them into place ...

Страница 8: ...er CLEANING To keep your wet dry vac looking its best clean the outside with a cloth dampened with warm water and mild soap To clean the tank 1 Dump out debris 2 Wash tank thoroughly with warm water and mild soap 3 Wipe out with dry cloth FILTER CLEANING 1 To remove the cartridge filter for cleaning hold the power head and turn the filter retainer counter clockwise to loose and remove 2 To clean f...

Страница 9: ...not vacuum Dust bag filters are full and or clogged Hose tubes or nozzles are clogged up Change dust bag filters Eliminate clogging Appliance runs unusually loud Sucked in particles have become jammed Remove particles Foam or liquid escapes from the ventilation outlets when vacuum cleaning Switch the appliance off immediately and withdraw the mains plug Empty the container and if necessary add som...

Отзывы: