background image


If you cannot connect to the Bridge  

If the software cannot connect to the Bridge first restart the software and ensure that it is 
fully updated. If the Bridge still does not appear it is most likely a networking issue. If this 
problem cannot be solved then the Bridge can be connected to point to point using a 
standard ethernet cable. 
 

NB 

By default the Bridge is connected via DHCP, this and other network settings can be edited via the 
Bridge webpages. It is possible to clear all network settings from a Bridge.  Please call Rako technical 
support for information on how to do this. 


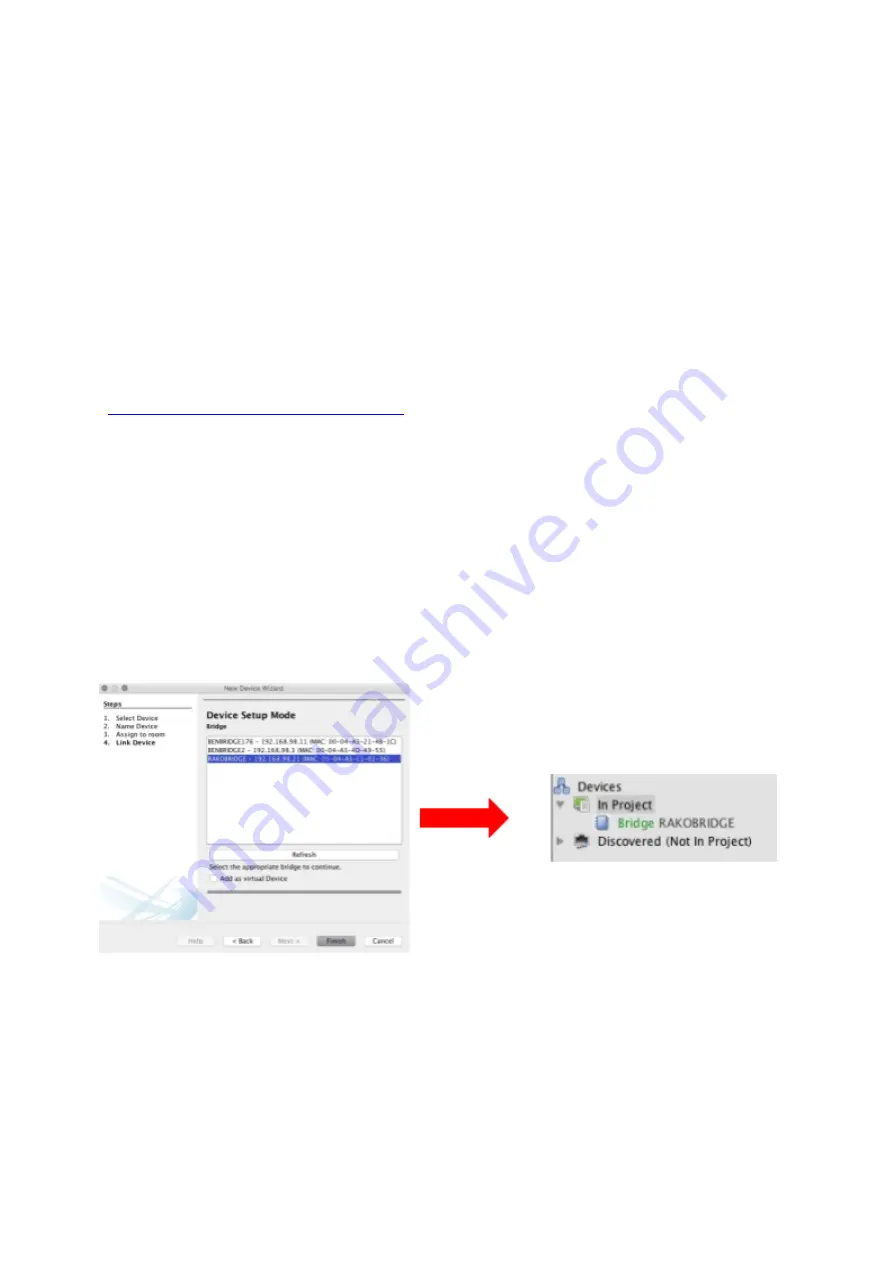
4 Adding the Bridge as a device  

Once the Bridge has been successfully connected it will need to be added into the software 
as a device.  

-

Select “File”- “New Device” to open the new device wizard. Choose “Bridge” as the 
device to be added.   
 

-

Select “Next” on the “Assign to Room”. No room or channel needs to be associated 
to the Bridge. 
 

-

Select the Bridge from the list, it will appear if you are successfully connected in the 
communications window. Click “Refresh” if it does not appear.  


-

The Bridge should now appear in the device list with Green text and a blue icon. The 
device is now assigned.  


-

Press the “Update Now” button in the centre of the screen to complete setup. If this 
does not appear, click on the Bridge in the device list.  

WA-Bridge

       Manual Version 2.1.3 

Содержание WA-Bridge

Страница 1: ...ading the project file 6 Downloading the project file 7 UDP Feedback 8 Performing a Firmware upgrade 1 Functions of the WA Bridge The WA Bridge will add the following features to a Rako wired system N...

Страница 2: ...to the WTC Bridge and an available RJ11 port in a RAK LINK RAK STAR WPCON C etc Step 3 Plug the Ethernet patch cable from the WA Bridge to a spare port in a router or network switch Step 4 Mount the B...

Страница 3: ...ght of the software with a red stop sign If it does not appear press the Refresh To set the Bridge House number The Bridge always has a default House Number of 1 Before beginning any programming using...

Страница 4: ...e Bridge The Bridge is now ready to be connected Do this by double clicking on the Bridge as below WARNING If a pop up box appears with a warning about the House number click Cancel This means there i...

Страница 5: ...on on how to do this 4 Adding the Bridge as a device Once the Bridge has been successfully connected it will need to be added into the software as a device Select File New Device to open the new devic...

Страница 6: ...mple a room set to switch type will show two buttons on and off whereas a blind type room will show three buttons open stop and close Mode The mode of the room is only set when lighting is selected as...

Страница 7: ...s called Room Import select it to open the page below Step 1 Press the Download Data at the top of this page This will open the data for preview on this page Step 2 Press Refresh List if the rooms do...

Страница 8: ...ations window is the Live feedback section Each command received or transmitted by the Bridge will appear here and it is useful for checking commands have been programmed as desired 7 2 UDP feedback l...

Страница 9: ...Bridge it is advised that it is updated with the latest firmware if possible This requires an active internet connection Click Refresh to see if updates are available Select Update All if updates are...

Отзывы: