M
anual for Rais Visio 1, Visio 2 and Visio 3
77
Rev 7
February 2016
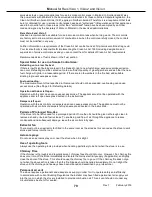
Approved Document J, to a distance of 30 cm in front of the stove and 15 cm to each side
measuring from the door of the combustion chamber
Combustion air supply
In order for the stove to perform efficiently and safely there should be an adequate air supply into the room
in which the stove is installed to provide combustion air. This is particularly necessary if the room is double
-glazed or a flue draught stabiliser is operating in the same room as the appliance. It may be necessary to
increase the air vent size in property with low air permeability ( < 5.0 m
3
/(h.m
2
).
The provision of air supply to the stove must be in accordance with current Building Regulations Approved
Document J. An opening window is not appropriate for this purpose.
IMPORTANT NOTE: If applicable and the appliance is being fitted within an existing fireplace recess,
specialist advice should be sought before fitting any permanent ventilation within this area.
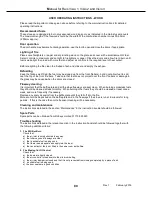
Connection to chimney
Stoves may have a choice of either a rear or top flue gas connector that allows connection to either a
masonry chimney or a prefabricated factory made insulated metal chimney in accordance with their
instructions. In some cases it may be necessary to fit an adaptor to increase the diameter of the flue to the
minimum required 150 mm section of the chimney or liner.
Electrical Services
The installation of any electrical services during the installation of this appliance must be carried out by a
registered competent electrician and in accordance with the requirements of the latest issue of BS 7671
Carbon Monoxide Alarm
A carbon monoxide alarm complying with BS EN 50292 must be fitted in the same room as the appliance. It
should be positioned on the ceiling at least 300mm from any wall or, if it is located on a wall, as high up as
possible (above any doors and windows) but not within 150mm of the ceiling. The alarm should also be
between 1m and 3m horizontally from the appliance.
Commissioning and handover
Ensure loose parts are fitted in accordance with the instructions given in the instruction booklet.
On completion of the installation allow a suitable period of time for any fire cement and mortar to dry out,
when a small fire may be lit and checked to ensure the smoke and fumes are taken from the stove up the
chimney and emitted safely to atmosphere. Do not run at full output for at least 24 hours.
On completion of the installation and commissioning ensure that the operating instructions for the stove are
left with the customer. Ensure to advise the customer on the correct use of the appliance with the fuels
likely to be used on the stove and warn them to use only the recommended fuels for the stove.
Advise the user what to do should smoke or fumes be emitted from the stove. The customer should be
warned to use a fireguard to BS 8423:2002 in the presence of children, aged and/or infirm persons.
Содержание VISIO 1
Страница 2: ...Manual for Rais Visio 1 Visio 2 and Visio 3 2 Rev 7 February 2016...
Страница 3: ...Manual for Rais Visio 1 Visio 2 and Visio 3 3 Rev 7 February 2016...
Страница 4: ...Manual for Rais Visio 1 Visio 2 and Visio 3 4 Rev 7 February 2016...
Страница 5: ...Manual for Rais Visio 1 Visio 2 and Visio 3 5 Rev 7 February 2016...
Страница 6: ...Manual for Rais Visio 1 Visio 2 and Visio 3 6 Rev 7 February 2016...
Страница 7: ...Manual for Rais Visio 1 Visio 2 and Visio 3 7 Rev 7 February 2016...
Страница 8: ...Manual for Rais Visio 1 Visio 2 and Visio 3 8 Rev 7 February 2016...
Страница 9: ...Manual for Rais Visio 1 Visio 2 and Visio 3 9 Rev 7 February 2016...
Страница 10: ...Manual for Rais Visio 1 Visio 2 and Visio 3 10 Rev 7 February 2016...
Страница 11: ...Manual for Rais Visio 1 Visio 2 and Visio 3 11 Rev 7 February 2016...
Страница 12: ...Manual for Rais Visio 1 Visio 2 and Visio 3 12 Rev 7 February 2016...
Страница 13: ...Manual for Rais Visio 1 Visio 2 and Visio 3 13 Rev 7 February 2016...
Страница 14: ...Manual for Rais Visio 1 Visio 2 and Visio 3 14 Rev 7 February 2016...
Страница 15: ...Manual for Rais Visio 1 Visio 2 and Visio 3 15 Rev 7 February 2016...
Страница 16: ...Manual for Rais Visio 1 Visio 2 and Visio 3 16 Rev 7 February 2016...
Страница 17: ...Manual for Rais Visio 1 Visio 2 and Visio 3 17 Rev 7 February 2016...
Страница 18: ...Manual for Rais Visio 1 Visio 2 and Visio 3 18 Rev 7 February 2016...
Страница 19: ...Manual for Rais Visio 1 Visio 2 and Visio 3 19 Rev 7 February 2016...
Страница 20: ...Manual for Rais Visio 1 Visio 2 and Visio 3 20 Rev 7 February 2016...
Страница 21: ...Manual for Rais Visio 1 Visio 2 and Visio 3 21 Rev 7 February 2016...
Страница 22: ...Manual for Rais Visio 1 Visio 2 and Visio 3 22 Rev 7 February 2016...
Страница 23: ...Manual for Rais Visio 1 Visio 2 and Visio 3 23 Rev 7 February 2016...
Страница 24: ...Manual for Rais Visio 1 Visio 2 and Visio 3 24 Rev 7 February 2016...
Страница 25: ...Manual for Rais Visio 1 Visio 2 and Visio 3 25 Rev 7 February 2016...
Страница 26: ...Manual for Rais Visio 1 Visio 2 and Visio 3 26 Rev 7 February 2016...
Страница 27: ...Manual for Rais Visio 1 Visio 2 and Visio 3 27 Rev 7 February 2016...
Страница 28: ...Manual for Rais Visio 1 Visio 2 and Visio 3 28 Rev 7 February 2016...
Страница 29: ...Manual for Rais Visio 1 Visio 2 and Visio 3 29 Rev 7 February 2016...
Страница 30: ...Manual for Rais Visio 1 Visio 2 and Visio 3 30 Rev 7 February 2016...
Страница 31: ...Manual for Rais Visio 1 Visio 2 and Visio 3 31 Rev 7 February 2016...
Страница 32: ...Manual for Rais Visio 1 Visio 2 and Visio 3 32 Rev 7 February 2016...
Страница 33: ...Manual for Rais Visio 1 Visio 2 and Visio 3 33 Rev 7 February 2016...
Страница 34: ...Manual for Rais Visio 1 Visio 2 and Visio 3 34 Rev 7 February 2016...
Страница 35: ...Manual for Rais Visio 1 Visio 2 and Visio 3 35 Rev 7 February 2016...
Страница 36: ...Manual for Rais Visio 1 Visio 2 and Visio 3 36 Rev 7 February 2016...
Страница 37: ...Manual for Rais Visio 1 Visio 2 and Visio 3 37 Rev 7 February 2016...
Страница 38: ...Manual for Rais Visio 1 Visio 2 and Visio 3 38 Rev 7 February 2016...
Страница 39: ...Manual for Rais Visio 1 Visio 2 and Visio 3 39 Rev 7 February 2016...
Страница 40: ...Manual for Rais Visio 1 Visio 2 and Visio 3 40 Rev 7 February 2016...
Страница 41: ...Manual for Rais Visio 1 Visio 2 and Visio 3 41 Rev 7 February 2016...
Страница 42: ...Manual for Rais Visio 1 Visio 2 and Visio 3 42 Rev 7 February 2016...
Страница 43: ...Manual for Rais Visio 1 Visio 2 and Visio 3 43 Rev 7 February 2016...
Страница 44: ...Manual for Rais Visio 1 Visio 2 and Visio 3 44 Rev 7 February 2016...
Страница 45: ...Manual for Rais Visio 1 Visio 2 and Visio 3 45 Rev 7 February 2016...
Страница 46: ...Manual for Rais Visio 1 Visio 2 and Visio 3 46 Rev 7 February 2016...
Страница 47: ...Manual for Rais Visio 1 Visio 2 and Visio 3 47 Rev 7 February 2016...
Страница 48: ...Manual for Rais Visio 1 Visio 2 and Visio 3 48 Rev 7 February 2016...
Страница 49: ...Manual for Rais Visio 1 Visio 2 and Visio 3 49 Rev 7 February 2016...
Страница 50: ...Manual for Rais Visio 1 Visio 2 and Visio 3 50 Rev 7 February 2016...
Страница 51: ...Manual for Rais Visio 1 Visio 2 and Visio 3 51 Rev 7 February 2016...
Страница 52: ...Manual for Rais Visio 1 Visio 2 and Visio 3 52 Rev 7 February 2016...
Страница 53: ...Manual for Rais Visio 1 Visio 2 and Visio 3 53 Rev 7 February 2016...
Страница 54: ...Manual for Rais Visio 1 Visio 2 and Visio 3 54 Rev 7 February 2016...
Страница 55: ...Manual for Rais Visio 1 Visio 2 and Visio 3 55 Rev 7 February 2016...
Страница 56: ...Manual for Rais Visio 1 Visio 2 and Visio 3 56 Rev 7 February 2016...
Страница 57: ...Manual for Rais Visio 1 Visio 2 and Visio 3 57 Rev 7 February 2016...
Страница 58: ...Manual for Rais Visio 1 Visio 2 and Visio 3 58 Rev 7 February 2016...
Страница 59: ...Manual for Rais Visio 1 Visio 2 and Visio 3 59 Rev 7 February 2016...
Страница 60: ...Manual for Rais Visio 1 Visio 2 and Visio 3 60 Rev 7 February 2016...
Страница 61: ...Manual for Rais Visio 1 Visio 2 and Visio 3 61 Rev 7 February 2016...
Страница 62: ...Manual for Rais Visio 1 Visio 2 and Visio 3 62 Rev 7 February 2016...
Страница 63: ...Manual for Rais Visio 1 Visio 2 and Visio 3 63 Rev 7 February 2016...
Страница 64: ...Manual for Rais Visio 1 Visio 2 and Visio 3 64 Rev 7 February 2016...
Страница 65: ...Manual for Rais Visio 1 Visio 2 and Visio 3 65 Rev 7 February 2016...
Страница 66: ...Manual for Rais Visio 1 Visio 2 and Visio 3 66 Rev 7 February 2016...
Страница 67: ...Manual for Rais Visio 1 Visio 2 and Visio 3 67 Rev 7 February 2016...
Страница 68: ...Manual for Rais Visio 1 Visio 2 and Visio 3 68 Rev 7 February 2016...
Страница 69: ...Manual for Rais Visio 1 Visio 2 and Visio 3 69 Rev 7 February 2016...
Страница 70: ...Manual for Rais Visio 1 Visio 2 and Visio 3 70 Rev 7 February 2016...
Страница 71: ...Manual for Rais Visio 1 Visio 2 and Visio 3 71 Rev 7 February 2016...
Страница 72: ...Manual for Rais Visio 1 Visio 2 and Visio 3 72 Rev 7 February 2016...
Страница 73: ...Manual for Rais Visio 1 Visio 2 and Visio 3 73 Rev 7 February 2016...
Страница 74: ...Manual for Rais Visio 1 Visio 2 and Visio 3 74 Rev 7 February 2016...


