background image

GB

19

D. IDENTIFICATION MODE

The transmission of the data is done thanks to a radio communication system.

Each unit (TBOS RADIO+ Interface, VRM-1+, FS-1) must be

identified. If, for example, 2 control modules equipped with radio interface

units or 2 VRM-1+ radio modules are near each other, each unit must

have its own identification code to avoid communication interference.

This function is used to identify the modules by assigning the site number

and control module number with a 4-digit number.

This allows the transmitter to register the city code in the software.

The transmitter is now ready to transmit to the control modules.

Each Radio+ unit (TBOS Radio+ Interface, VRM-1+) must receive a

4-digit identification code.

This 4-digit identification code contains :

2 digits which are the digits of the city. This 2-digit code is common

to all TBOS Modules managed by the same field transmitter.

2 digits which are the radio module code (TBOS Radio+ Interface

or VRM-1+). This code varies from one unit to another.

Here are the steps to follow to identify your TBOS Radio+ interface, VRM-

1+, or FS1.

1- Download from the PC to your TBOS Manager II Field transmitter

the programs of all your radio units: TBOS Radio + Interface, or VRM-

1+ or FS1 (see our software). Then the Field transmitter is ready to

identify the radio units.

The following steps must be performed for each unit one at a time.

2- Install the battery inside the Radio+ modules

IMPORTANT : Install the battery in only one radio units. Then download
the identification code into that radio module. Do not install the batteries
in all the radio units at the same time.

Method 1 : 

(Quicker)

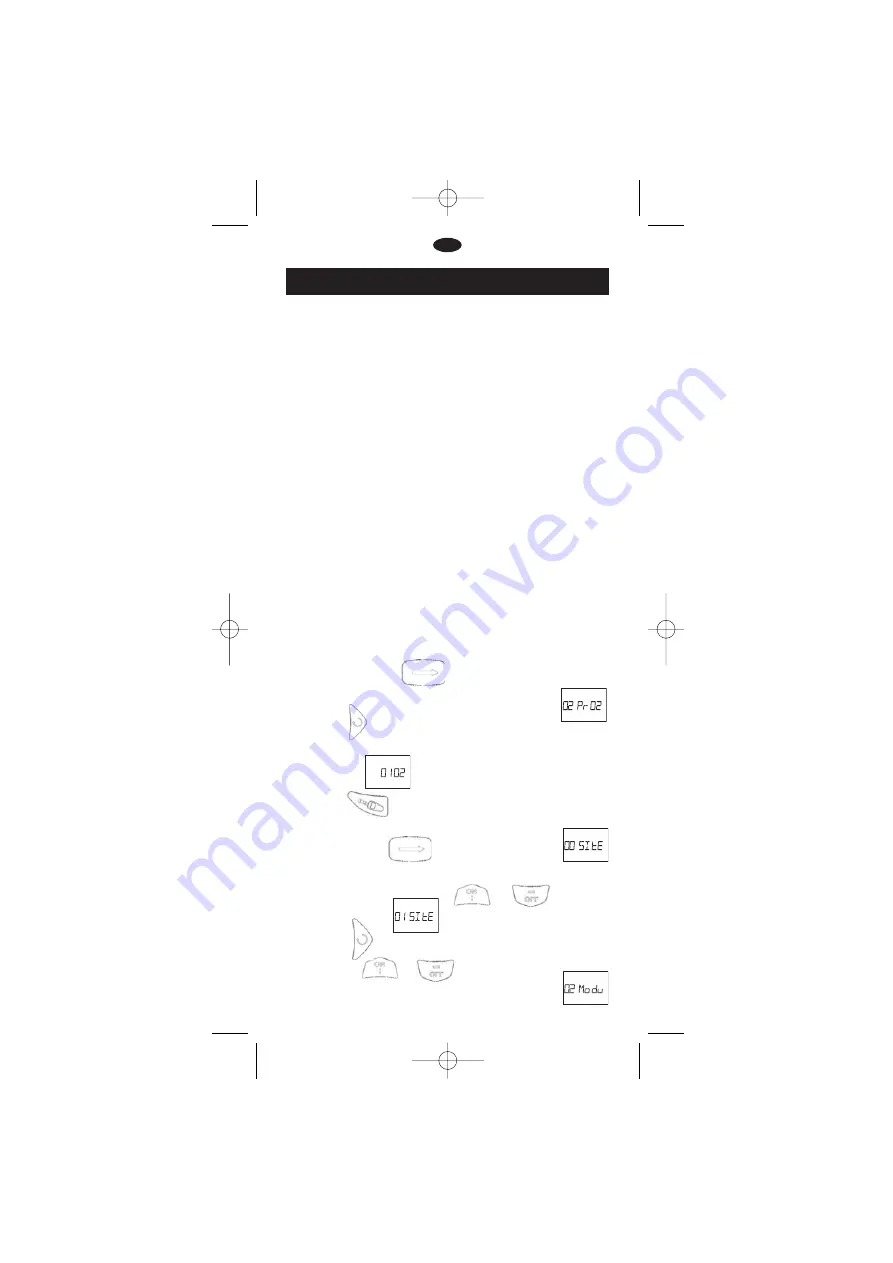
1. Repeatedly press the        

key on your Field transmitter to

display the “—Pr—“ screen. For example, “02Pr02”.

2. Press the           key to display the 4-digit identification number 

of your radio unit: TBOS Radio+ Interface or VRM-1+ or FS1. In our
example 0102.

3. Press the   

key to transmit the 4-digit identification code

to the radio unit.

Method 2 : 

1. Repeatedly press the                  key  to display  the “00Site” 
screen.
2. Select the number of the site that you have previously set up in
your PC Software by pressing the              or                key.
“01Site” in our example.

3. Press the             key and select the  number of the radio unit 

by pressing the             and             keys. “02 Modu” in our example.

TBOS Manager Anglais new der  5/11/04  12:08  Page 6

Содержание TBOS

Страница 1: ...Technotes TBOS MANAGER P 01 P 14 P 27 P 40 P 53 P 66 F GB D E NL P TBOS Manager couv DER 5 11 04 14 49 Page 2...

Страница 2: ...using the Universal Field Transmitter in TBOS Manager mode IMPORTANT You must select the operation mode on your field transmitter before using it To do this you have to perform the following steps EXA...

Страница 3: ...o PC USB port for the nex version Date Code Oct 2003 1 2 4 and 6 station Control Modules TBOS Radio Interface Unit with a date code indicating a manufacturing date after February 1998 or a VRM 1 Radio...

Страница 4: ...o modules The Radio Interface is simply snapped onto the Control Module The average radio transmission range between the Field Transmitter and the Radio Interface is 0 5 to 200m Distance varies depend...

Страница 5: ...th the TBOS Manager II software See TBOS Manager II Software Manual Step 2 Use the TBOS Manager Radio Transmission Interface Device to download the programs by radio from the computer into the TBOS Un...

Страница 6: ...rent sites Important the code 01 to 99 must be the same code that you entered in the TBOS Manager II software a Press simultaneously the and keys The following screen appears b Use or to enter the cod...

Страница 7: ...OS Radio interface VRM 1 or FS1 1 Download from the PC to your TBOS Manager II Field transmitter the programs of all your radio units TBOS Radio Interface or VRM 1 or FS1 see our software Then the Fie...

Страница 8: ...ield Transmitter The computer will confirm the successful transmission of the programs GB 4 Press the key to transmit the 4 digit identification code to the radio unit You can now program the Control...

Страница 9: ...il this type of screen is displayed You cannot transmit a program unless this type of screen is displayed In this example 2 programs have been transmitted 2 4 Press to the radio modules This display a...

Страница 10: ...site 3 has an alarm You have 2 possibilities a You can acknowledge the alarm by pressing This means that you cancel all the alarms detected by the FS1 and that the FS1 will continue operating normall...

Страница 11: ...on will start after 10 seconds If you wish to stop watering before the programmed time is up press the key Important The next 3 functions override all others This means that any program currently runn...

Страница 12: ...in sequential order 2 1 First enter the Radio Interface identification code 2 2 Repeatedly press the key until this screen appears 2 3 Select the program cycle you wish to start with the ABC key Your...

Страница 13: ...ons disappear it means that the scan process is over 1 3 To see the results of the scan press the key and all the module identification codes will be displayed IMPORTANT Note that the scan feature doe...

Страница 14: ...erface After programming Symptom The irrigation system does not work Checklist 1 Make sure the valve is not manually closed 2 Make sure that the irrigation is not in the Off mode 3 Make sure that the...

Страница 15: ...632 46 45 RAIN BIRD DEUTSCHLAND GmbH Siedlerstra e 46 D 71126 G ufelden Nebringen DEUTSCHLAND Phone 49 07032 99010 Fax 49 07032 990111 Rain Bird SVERIGE A B PL 345 Fleninge 260 35 dakra SWEDEN Phone...

Отзывы: