9
plate, and then insert the plug. If a cable extension is required, it is of utmost importance to comply
with the following specifications
EXTENSION LENGTH
CABLE SECTION
Up to 20 m
1.5 mm
2
From 20 to 50 m
2.5 mm
2
4. Operation
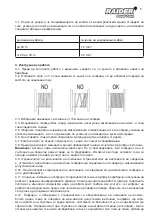
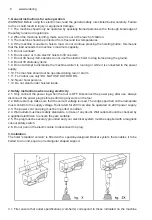
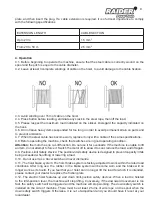
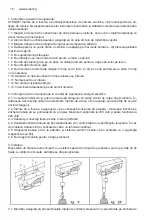
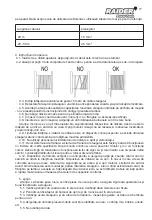
4.1. Before beginning to operate the machine, ensure that the steel cable is correctly wound on the
spool and the pitch is equal to the cable diameter.
4.2. Leave at least 3 complete windings of cable on the hoist, to avoid damage to the cable fixation.
4.3. Avoid winding over 15m of cable on the hoist
4.4. Press button before loading, eliminate any slack in the steel rope, then lift the load.
4.5. Please respect the maximum load indicated on the sticker. Disregard the capacity indicated on
the hook.
4.6. Do not leave heavy items suspended for too long in order to avoid permanent strain on parts and
to prevent accidents.
4.7. When the steel cable has become worn, replace it only with a cable of the same specifications.
4.8. Before operating the machine, check that switches are in good operating condition.
Attention:
the motor has no cut-off function. Do not use it for overloads. If the machine is unable to lift
an item, do not attempt to force it. Switch the motor off to allow it to cool, reduce the load, and lift again.
4.9.
Position-Limit Safety Device:
The position-limit safety device is designed to prevent capacity limits
being exceeded when lifting or lowering a load.
4.10. Do not use it as a travel switch and never dismantle.
4.11.
The hoist brake system:
The hoist brake system is factory-adjusted to work within the rated load
conditions. After long use, the rubber in the brake system will become worn and the brake will no
longer work as it should. If you feel that your hoist can no longer lift the load for which it is intended,
please contact your dealer to replace the friction plate.
4.12. The electric hoist features
up and down limit-position safety devices
. When a load is hoisted
to the limit-position level, the machine will stop lifting. Conversely, if the downward movement is too
fast, the safety switch will be triggered and the machine will stop working. The down safety switch is
installed on the side of machine. There must be at least 2 turns of wire rope on the spool when the
down safety switch triggers. Otherwise, it is out of adjustment and you should have it reset at your
local dealer.
Содержание RD-EH01
Страница 5: ...5 3 1 20 m 1 5 mm2 20 50 m 2 5 mm2 4 4 1 4 2 3 4 3 15 4 4 4 5 4 6 4 7 4 8 4 9 4 10 4 11 4 12...
Страница 6: ...6 www raider bg 5 6 5 1 5 2 5 3 5 4 5 5 10 6 2012 19 EG...
Страница 21: ...21 3 1 20 m 1 5 mm2 20 50 m 2 5 mm2 4 4 1 4 2 3 4 3 15 4 4 4 5 4 6 4 7 4 8 4 9 4 10 4 11 4 12...
Страница 22: ...22 www raider bg 5 6 5 1 5 2 5 3 5 4 5 5 10 6 2012 19 EG...
Страница 30: ...30 www raider bg 5 1 5 2 stop 5 3 5 4 5 5 10 6 2012 19 EG...
Страница 34: ...34 www raider bg...
Страница 35: ...35 PARTS LIST...
Страница 36: ...36 www raider bg 246 0700 44 155 e mail info euromasterbg com...
Страница 38: ...38 www raider bg 1 5 2 bar Raider 18 Raider Industrial Raider Pro 12 Raider Power Tools Raider Garden Tools...
Страница 39: ...39 112 115 112 1 2 1 2 3 113 1 2 3 2 114 4 5 114 1 113 1 2 2 3 115 4 115 1 2 1 3 1 1...
Страница 49: ......


