


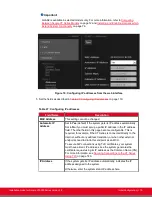


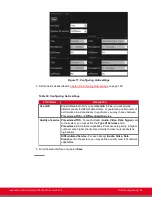


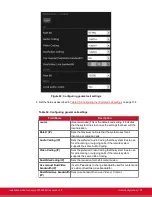
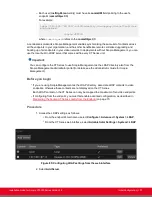


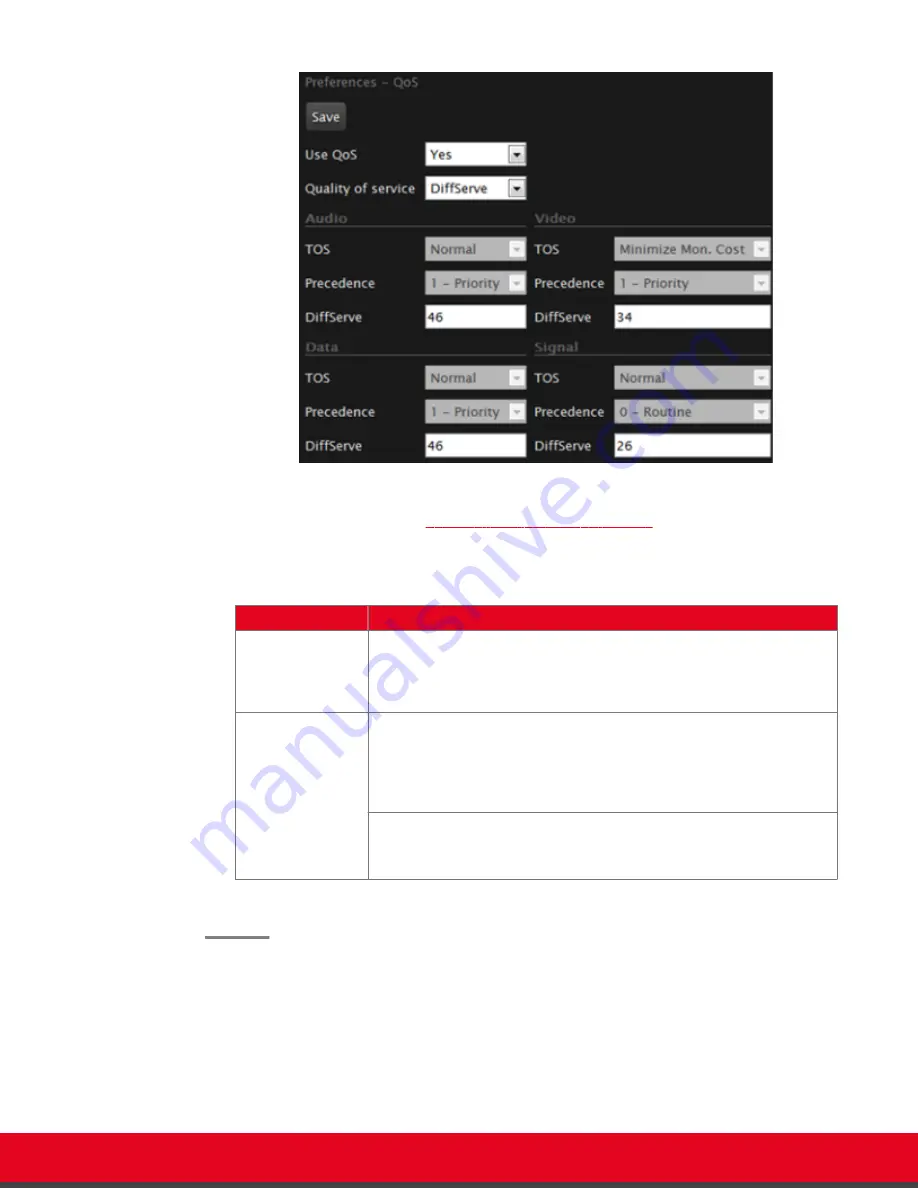
Figure 77: Configuring QoS settings
2. Set the fields as described in
Table 30: Configuring QoS settings
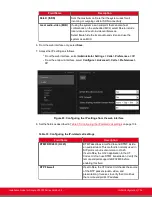
Table 30: Configuring QoS settings
Field Name
Description
Use QoS
Enable/Disable QoS. If you set
Use QoS
to
Yes
, you will provide
different priority to different data stream, or guarantee a certain level of
performance to a data stream. In particular, you may choose between
Precedence/TOS
and
Differentiated Service
.
Quality of service Precedence/TOS
- For each stream (
Audio
,
Video
,
Data
,
Signal
) sent
to the system, you may define the
Type Of Services
and a
Precedence
to fit network capabilities. Precedence is priority. A higher
number sets a higher priority. Used mainly to class router packets as
high priority.
Differentiated Service
- For each stream (
Audio
,
Video
,
Data
,
Signal
) sent to the system, you may define a priority level to fit network
capabilities.
3. From the web interface only, select
Save
.
Installation Guide for Scopia XT5000 Series Version 3.2
Initial Configuration | 125


